This year marks the 20th anniversary of Canon’s EOS 5 interchangeable-lens digital camera series—a milestone worth celebrating. Nearly all of my favorite photographs from the last twenty years were created with cameras from the EOS 5 series. The original 5D was with me during the filming of my award-winning television series Travels to the Edge, capturing stills that conveyed the beauty and our planet and it’s creatures. Each generation since has brought new opportunities to refine my craft, whether through enhanced resolution, improved low-light performance, or innovate autofocus technology.
Today, I’m working with the R5 Mark II, and it continues the tradition of excellence that first drew me to the series. These cameras have been invaluable tools in my work as both an artist and an advocate for the environment. Most remarkable has been their durability. Over the years I’ve had very few if any issues outside the usual wear-and-tear you might expect when traveling as much as I do, often to areas of extreme weather.
As Canon celebrates this milestone, I celebrate alongside them—grateful for the images captured, the stories told, and the enduring partnership between technology and vision.
Recently I posted about my amazing new Canon R5 Mark 2 and some of the features I’m loving about this camera. However for all the technology invested in capturing tack-sharp images and freezing action, its also important to remind yourself to slow down every now and again.
One of the techniques I employ often is dropping the ISO down to 100 and stop down the aperture and let the motion move across the image. This “intentional camera movement”, or “ICM” technique is a great way to convey the sense of motion in an otherwise still frame, inviting the viewer to imagine the subject in action as described by the blurred image. Ernst Haas was one of my early influences, a person who’s work I continue to admire. He was a pioneer of using this technique to show the motion in his subjects.
It takes some experimentation and often you won’t really know if you have any successful images until you’ve edited and evaluated them. Some may still show the eyes of the animal in reasonably sharp contrast to the blurred legs in motion – I like this look – but I also like those images that make me think of ancient drawings on a cave wall, where nothing is particularly defined and the entire animal is abstracted in it’s motion and the background a blurred canvas.
I won’t always see the potential in these images immediately. Some I shot on film many years ago I nearly tossed out but decided to file away at the last second. I pulled them out years later and found a new appreciation for their abstract qualities and I’m glad I did!
If you’re interested in more photos captured with this technique, check out Rhythms From the Wild.
I just returned from another spectacular journey in Southern Africa. While the dunes of Sossusvlei are always stunning, what really made the trip this time was photographing desert elephants. While they are not a distinct species from savanna elephants, they are uniquely adapted to the harsh desert environment. They are constantly spraying sand over themselves to keep cool which creates plumes of light-filtering dust, perfect for those atmospheric images.
The wildlife on this trip was also a great opportunity to put my favorite new feature on the Canon EOS R5 Mark II to good use. This was my first trip using the camera, and the ability to recover frames from a half-second before you’d traditionally expect to has already paid dividends. When the situation is changing rapidly, the best shots often fall into this window where you’re reacting. I highlighted a few more of the new features as well as an important note about the updated batteries in this recent post while I was on-location for this trip.
This was a fantastic adventure all around. Southern Africa continues to provide an amazing array of wildlife, culture and landscapes. The company was especially enjoyable, even if they took a little too much pleasure in my squeals of fear while traversing the dunes in buggies. Our help on the ground was also able to provide some great video content on-location; be sure to follow me on Facebook and Instagram to check those out!
Greetings from Namibia! This has been an incredible trip so far, made all the better thanks to a generous early birthday gift from a good friend in the form of a new Canon R5 II. Still a 45 megapixel camera, performance is the name of the game here. I’m loving the pre-shoot burst mode and this feature could be critical when trying to capture wildlife in the moment. Considering the lengths I go to on many trips hoping for that one perfect shot, this feature is invaluable. Coupled with shutter speeds as fast as 1/32,000th freezing action has never been better.
Though I don’t use the video features as much as some, the options and upgrades here are plentiful, including the option to shoot in 8k up to 60 FPS. Unlike the standard 5R there is also no limit on how long you can record. Gone is the 30 minute restriction. Instead, record as long as you have the memory to do so. Across the board, performance is up with this camera and it is noticeable.
Of course, that power and performance comes with a cost. Though the LP-E6P battery that comes with the camera is the same form-factor as previous batteries, and your old batteries will work with the R5 II, video enthusiasts will want to ensure they stock up on the specific battery that comes with the camera and NOT your old LP-E6NH models. While the form factor is the same, the E6P is an upgraded battery to support the increased performance demands. you’ll still be able to shoot and record video with either battery, however some of the higher-end video features will be disabled if you’re using the E6NH model.
All that being said I’m pleased with the camera, and happy with our trip so far. Our support on the ground has been incredible and I hope you’ve been enjoying the content they’ve been posting to my Instagram and Facebook accounts. I’ll be sure to post a full gallery from this trip when I return!
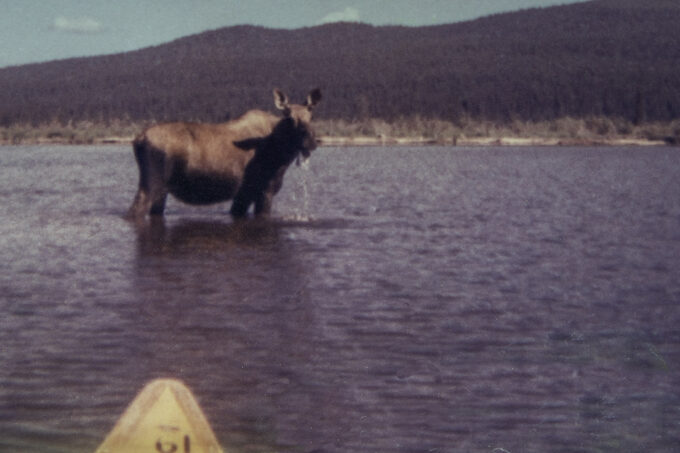
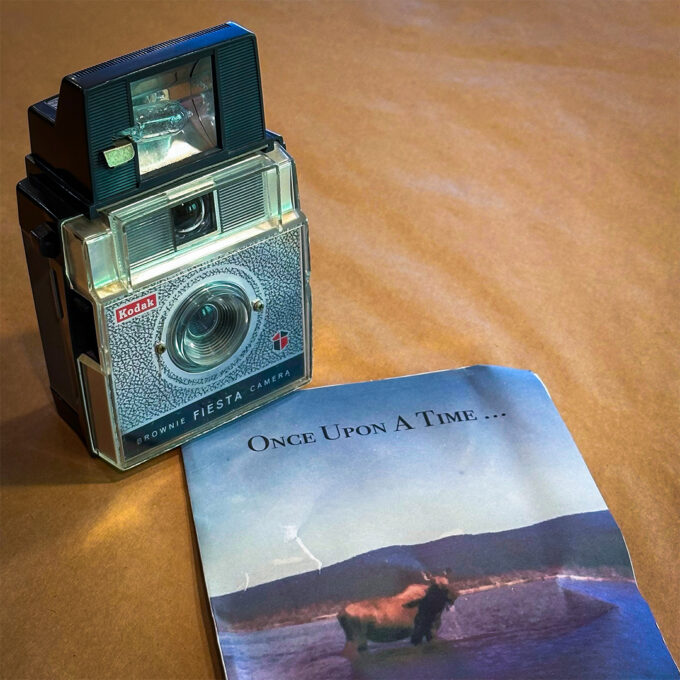
One of the early pages of my latest book Wild Lives features the very first wildlife photo I ever captured – a moose in British Columbia. Not the most stellar photo in the world, but significant in that it was the start of quite a journey that I am still on today.
I just received quite the surprise gift in the mail from my good friend, incredible author and fellow Photographer Rob Sheppard – a nice note with this “incredible” shot, along with the same style Kodak Brownie Fiesta Camera that I shot it with. Talk about a blast from the past! These cameras were manufactured in the 1960’s, and you could own one for the reasonable cost of $5.95! If you were exceptionally thrifty, 15 cans worth of soup labels sent to Campbells at the time would also suffice!
What was your first camera and the subject that set you on your photography path? Leave a comment below!
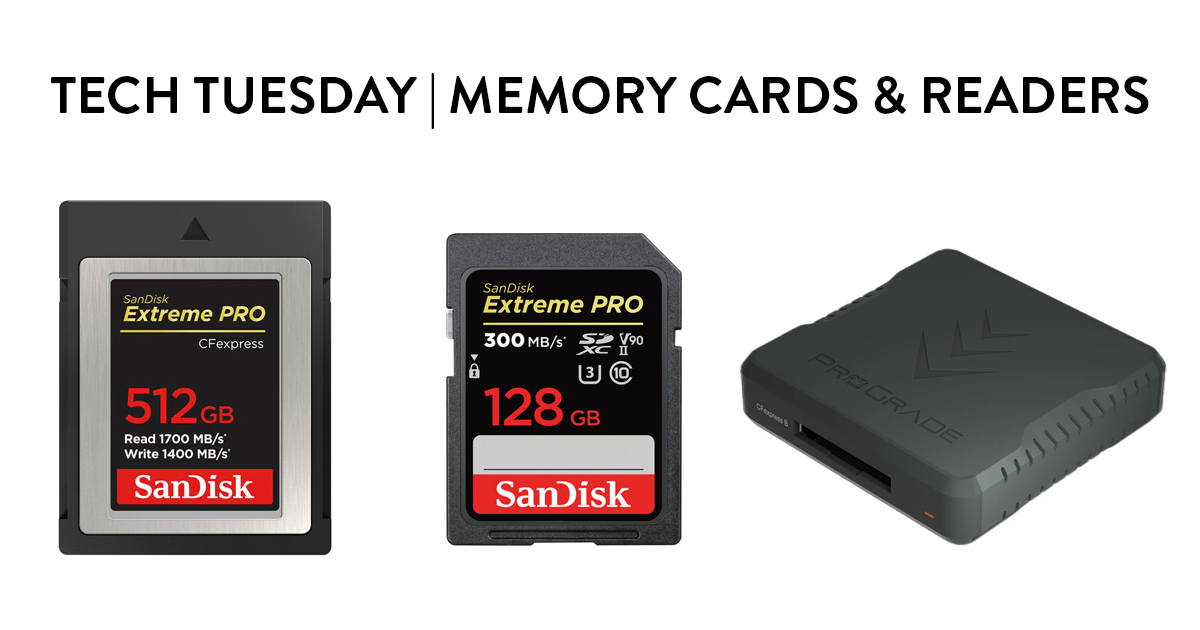
When it comes to memory cards (and card readers), there are considerations to make beyond just the capacity. A larger card might not even be the best option in some cases. When it comes to the technobabble involved in what factors in to selecting the right equipment, I leave that up to my staff member Kyle, who’s now going to pass that information along to you! Everyone has different experiences, so please leave a comment below if you have any first-hand knowledge on the subject to pass along.
Which Brand Do I Choose?
Note – this is NOT a sponsored post; the brands listed here are simply what Art uses and trusts.
We’ve had a good experience sticking with the Sandisk Extreme Pro line of memory cards. This is a trusted and supported name, and your cards come with a code for recovery software in case you run into any issues. These cards are durable enough that we haven’t needed to use this feature often, but it did come in handy when an older card I had failed. I was able to use the code from one of the newer cards to run the software and recover photos. Your experience may vary, as recovering files once they are deleted is never guaranteed to work. Expect it wont, cheer if it does!
ProGrade Digital also makes very good cards, and excellent card readers. More on that later.
What Are the Common Types of Memory Cards?
Though I am approaching presenting information as it pertains to a Canon R5, the information is general enough to apply to many different camera brands and models. Check with your camera manufacturer’s documentation to get the specifics of which slots you have. If you don’t have your original documentation, it’s likely your manufacturer’s website has a manual to download.
The R5 and many other pro cameras generally contain two or more memory slots. The most common slots included are for CF Cards and SD Cards. Consumer cameras tend have a single SD slot, though in recent years with the size of photos increasing this is starting to change. Keep in mind that there are many different versions of both CF and SD cards. You’ll want to make sure you’re using the right one by referencing the documentation.
CF Cards
CF (Compact Flash) cards are the fastest cards available. If your camera accepts CF cards and you frequently shoot 4K video or in continuous mode, this is the option you’ll want to choose. They are generally more expensive than SD cards of equivalent size due to their greatly increased speed.
Current CF memory cards are called “CF-Express” or “CFE”. They come in three different “types” (A, B or C) which describe the physical dimensions of the card. Having the right type of card for your camera as well as the right card reader is mandatory – they are not interchangeable. If you’re purchasing a new camera, you’ll want to make sure it uses type B or C. Type A is slower technology, but is often the same or more cost-wise based on a limited supply. (If your current camera only supports type A, don’t fret! it’s still a viable and fast card type)
By far the biggest selling point of a CF-Express card is the speed, as CF cards are potentially up to five-times faster than an equivalent SD card. Check the read and write speed of any card you consider purchasing. 1700 MB/s read cards are fairly common, with 3400 MB/s being the latest premium card speed. Just keep in mind your speed is limited by other hardware considerations, most notably your camera’s buffer speed, the source you’re copying to, the cabling, and the card reader. It doesn’t make sense to splurge on the latest, fastest card only to find the performance is about the same due to hardware limits and diminishing returns.
SD (Secure Digital) cards are not as fast as CF cards, but are more available and less expensive. The exception would be the “latest and greatest” SD cards on the market. These can often be comparable in price to a CF card with an equivalent capacity, however they are still not as fast. The reason for the price equivalency comes down to the fact that consumer cameras generally use SD cards, whereas CF cards are commonly found in higher-end pro cameras.
SD cards currently come in three different formats: UHS-I, UHS-II and the most recent UHS-III. Once again, you’ll need to refer to your camera’s documentation but for the most part UHS-II is the standard, with UHS-I being much too slow for most modern cameras. UHS-III is the latest and speediest version, but also expensive and the option to use a CF-E card if possible is more attractive.
You’ll also find SD cards described as “SD”, “SDHC”, or “SDXC”. No reason to get too much into the weeds here – you want SDXC, unless your camera is old enough to not be compatible. SDXC cards are the only ones that will hold more than 32 gb of data, which is in my opinion the smallest card I’d ever want to use with a modern camera.
Card readers are another lengthy post in their own right, but I’ll keep it simple. You’ll want a card reader that reads CF and/or SD memory cards, depending on the cards your camera uses and that you choose to purchase. Simple! Lets take a very small step into the weeds though.
Brand
A good card reader can make a big difference. Art was struggling with some of the readers we tried off of Amazon until his good friend and colleague Sean Fitzgerald recommended the readers from ProGrade Digital. We purchased this card reader specific for CF-E type B cards, and he’s extremely happy with the performance. They also make a model that reads both CF-E and SD card types.
As far as technical considerations go, the biggest factor affecting the speed that you have control over when purchasing a reader is the USB version. 3.0, 3.2, and 4.0 are all viable. Anything less than 3.0 will have vastly diminished read and write speed.
Stand-alone CF-E card readers are generally faster than card readers that also read SD cards, so if the speed of copying from your card to your device is critical, it’s something to consider. Often in the field, Art is shooting thousands of photos, and needs to be able to copy them quickly if he wants to download them and re-use the card for more shots. In these cases, being able to copy quickly is critical, and this is why he uses a separate CF and SD card readers.
Final Considerations for Purchasing Memory Cards & Readers
Hopefully this has been somewhat helpful in understanding card types. Obviously there are other options out there and your camera is largely going to determine what you need. Just keep in mind that splurging for extra speed and/or capacity is an amazing luxury to have, but not always the best use of your funds if you’re on any kind of budget.
For example – a Canon R5 includes both an SD and a CF card slot. Instead of considering a 512 GB CF card, you might want to get a 256 GB CF and a 256 GB SD card – that way you have options to shoot and write the same photos to both cards and have a very secure backup so you don’t lose photos. If a card fails in the field, you also have the option to use the other one. You still have the same storage capacity but more flexibility. Some photographers configure their cameras to write the larger, slower-to-copy RAW files to the CF card while sending the smaller, faster JPGs to the SD card.
In the end, CF-E cards are superior as they are faster, usually have a higher capacity, and are more durable than SD cards. SD cards are more common in consumer cameras. It really comes down to what your camera is compatible with, how you use your camera, and your budget.
One of the most common and frequently-utilized pieces of equipment in my kit is also one of the most commonly overlooked components – A circular polarizer, or “CPL” as you’ll see them sometimes called. Without getting into the weeds on the science, essentially a polarizer controls the amount of reflected light reaching your sensor, resulting in more saturated higher-contrast images. Although filters have largely been replaced by post-processing RAW images, a polarizer is still an essential component of any kit.
There are two kinds of polarizers – make sure you pick the right one. You’ll want a circular (not linear) polarizer with quality glass. No sense in ensuring you have quality gear only to skimp on the glass at the end of your lens! I use the fantastic filters from breakthrough photography. Polarizers also come in warm and neutral tones. A warm polarizer does the obvious – warms up the colors of your shot! It also has the added bonus of helping to cut through haze and atmosphere. A neutral filter will give you something more, well, neutral – making it a great place to start post-processing.
Using a polarizer is fairly simple. There is more to just slapping one on and shooting, however. Polarizing filters have a ring to adjust the amount of the effect. I watch my LCD screen while rotating the filter to see the results happen in real-time. This is useful when shooting water as well. I will dial between capturing a perfect mirrored reflection on the water’s surface, or bypassing the reflections entirely to see into it’s depths. The later helps me immensely when photographing subjects like the salmon-hunting bears in Katmai.
If you’re photographing landscapes a polarizing filter is a must-have. Leave a comment below if you have a polarizer you’d recommend. I also love hearing about the creative ways you’re using them!
On April 8th we’ll be able catch a total solar eclipse here in the United States, as well as Canada and Mexico. I’ll be in Seattle when it happens, so my viewing will only be partial – but I’ve had the pleasure of having some incredible opportunities for capturing these serendipitous moments in recent years.
In 2019, I made it a point to get down to Chile to catch the total eclipse. I have shot eclipse moments in the past but this time armed with Canon’s lightweight 600, a 2x and 50mp 5D… I was not only able to get the shot I came for – but cropping in you can even see solar flares along the edge of the sun (below)!
One of the most important tips for photographing the eclipse is to make sure you’re prepared to capture it in a variety of ways, both by zooming in for isolated details of the eclipse itself, but also connecting it to the environment. Framing it with trees or other terrestrial structures to establish a sense of place tells a greater story. My eclipse-shots are generally 1-second exposures at a low ISO around 400 using a long lens with extender, but there are a lot of factors you’ll need to consider. B&H has a great post on their Explora blog about photographing the eclipse.
A few years prior to Chile, I was also able to capture the annular event in one of Tanzania’s most remote National Parks, Katavi. This was a stop on a wildlife trip, and while I was able to capture some incredible photos of hippos and crocodiles, the eclipse stole the show!
I also captured an eclipse in Australia back in 2002. For that trip, I was shooting for Edge of the Earth, Corner of the Sky. I wrote an extensive blog post on that experience a few years back if you’re interested in more photos and stories!
Happy New Year – hopefully everyone had a rejuvenating holiday season! If you found a new camera, lens, phone, or other equipment under the tree and you’re looking to get out and shoot, you might be wondering where to start. Obviously there are technical hurdles to leap that are going to be specific to your setup, but the easiest way to learn is to just get out and do it, learning from mistakes, and focusing on one aspect at a time until it all comes together.
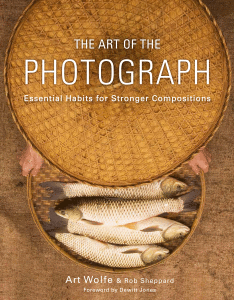
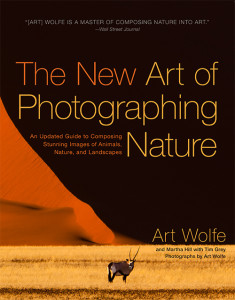
I also have a couple of well-reviewed how-to books on the subject, packed with great information on how to get going – sold individually, or as a bundle. And, when you’re comfortable enough with your camera – why not check out one of the many upcoming workshops and put your new equipment and knowledge to use in the field? Either way, I’m excited for you and your upcoming photography adventures in 2024!
Why not go as the worlds grea. . . er. . .most humble wildlife photographer?! From one of my most iconic exploits, use the knit hat and stuffed seal provided and be the life of your local party! Not SPOOKY enough for you?! Malarkey! The fear of corrupted cards and drives haunts us all to the very core! *shudder*.