When it comes to memory cards (and card readers), there are considerations to make beyond just the capacity. A larger card might not even be the best option in some cases. When it comes to the technobabble involved in what factors in to selecting the right equipment, I leave that up to my staff member Kyle, who’s now going to pass that information along to you! Everyone has different experiences, so please leave a comment below if you have any first-hand knowledge on the subject to pass along.
Which Brand Do I Choose?
Note – this is NOT a sponsored post; the brands listed here are simply what Art uses and trusts.
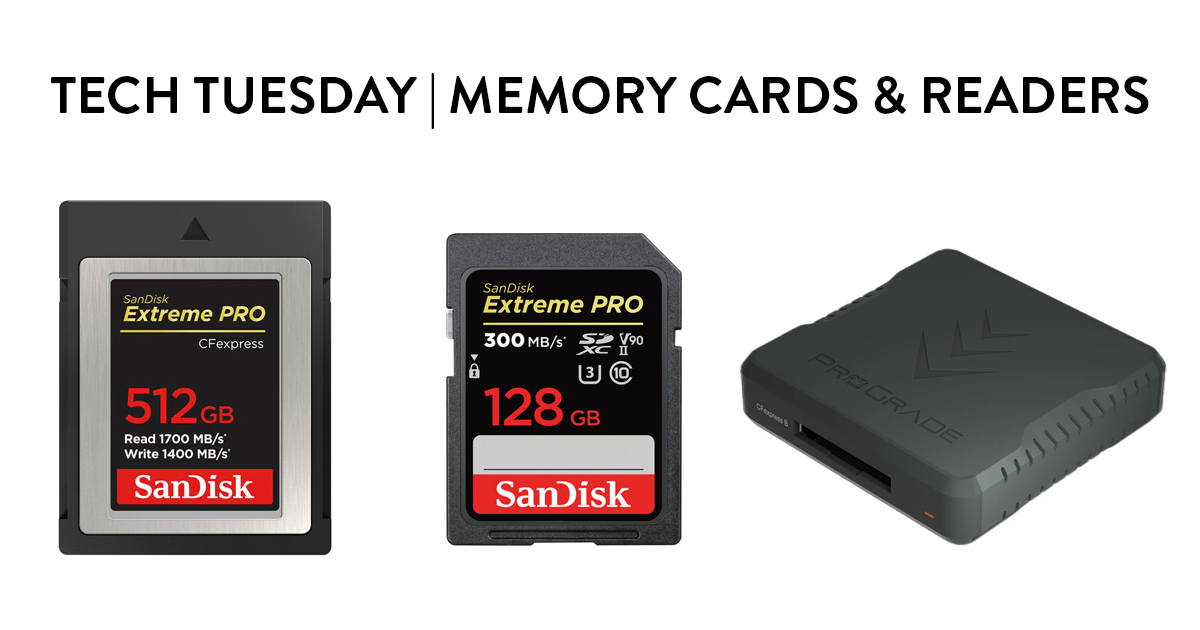
We’ve had a good experience sticking with the Sandisk Extreme Pro line of memory cards. This is a trusted and supported name, and your cards come with a code for recovery software in case you run into any issues. These cards are durable enough that we haven’t needed to use this feature often, but it did come in handy when an older card I had failed. I was able to use the code from one of the newer cards to run the software and recover photos. Your experience may vary, as recovering files once they are deleted is never guaranteed to work. Expect it wont, cheer if it does!
ProGrade Digital also makes very good cards, and excellent card readers. More on that later.
What Are the Common Types of Memory Cards?
Though I am approaching presenting information as it pertains to a Canon R5, the information is general enough to apply to many different camera brands and models. Check with your camera manufacturer’s documentation to get the specifics of which slots you have. If you don’t have your original documentation, it’s likely your manufacturer’s website has a manual to download.
The R5 and many other pro cameras generally contain two or more memory slots. The most common slots included are for CF Cards and SD Cards. Consumer cameras tend have a single SD slot, though in recent years with the size of photos increasing this is starting to change. Keep in mind that there are many different versions of both CF and SD cards. You’ll want to make sure you’re using the right one by referencing the documentation.
CF Cards
CF (Compact Flash) cards are the fastest cards available. If your camera accepts CF cards and you frequently shoot 4K video or in continuous mode, this is the option you’ll want to choose. They are generally more expensive than SD cards of equivalent size due to their greatly increased speed.
Current CF memory cards are called “CF-Express” or “CFE”. They come in three different “types” (A, B or C) which describe the physical dimensions of the card. Having the right type of card for your camera as well as the right card reader is mandatory – they are not interchangeable. If you’re purchasing a new camera, you’ll want to make sure it uses type B or C. Type A is slower technology, but is often the same or more cost-wise based on a limited supply. (If your current camera only supports type A, don’t fret! it’s still a viable and fast card type)
By far the biggest selling point of a CF-Express card is the speed, as CF cards are potentially up to five-times faster than an equivalent SD card. Check the read and write speed of any card you consider purchasing. 1700 MB/s read cards are fairly common, with 3400 MB/s being the latest premium card speed. Just keep in mind your speed is limited by other hardware considerations, most notably your camera’s buffer speed, the source you’re copying to, the cabling, and the card reader. It doesn’t make sense to splurge on the latest, fastest card only to find the performance is about the same due to hardware limits and diminishing returns.
SD (Secure Digital) cards are not as fast as CF cards, but are more available and less expensive. The exception would be the “latest and greatest” SD cards on the market. These can often be comparable in price to a CF card with an equivalent capacity, however they are still not as fast. The reason for the price equivalency comes down to the fact that consumer cameras generally use SD cards, whereas CF cards are commonly found in higher-end pro cameras.
SD cards currently come in three different formats: UHS-I, UHS-II and the most recent UHS-III. Once again, you’ll need to refer to your camera’s documentation but for the most part UHS-II is the standard, with UHS-I being much too slow for most modern cameras. UHS-III is the latest and speediest version, but also expensive and the option to use a CF-E card if possible is more attractive.
You’ll also find SD cards described as “SD”, “SDHC”, or “SDXC”. No reason to get too much into the weeds here – you want SDXC, unless your camera is old enough to not be compatible. SDXC cards are the only ones that will hold more than 32 gb of data, which is in my opinion the smallest card I’d ever want to use with a modern camera.
Card readers are another lengthy post in their own right, but I’ll keep it simple. You’ll want a card reader that reads CF and/or SD memory cards, depending on the cards your camera uses and that you choose to purchase. Simple! Lets take a very small step into the weeds though.
Brand
A good card reader can make a big difference. Art was struggling with some of the readers we tried off of Amazon until his good friend and colleague Sean Fitzgerald recommended the readers from ProGrade Digital. We purchased this card reader specific for CF-E type B cards, and he’s extremely happy with the performance. They also make a model that reads both CF-E and SD card types.
As far as technical considerations go, the biggest factor affecting the speed that you have control over when purchasing a reader is the USB version. 3.0, 3.2, and 4.0 are all viable. Anything less than 3.0 will have vastly diminished read and write speed.
Stand-alone CF-E card readers are generally faster than card readers that also read SD cards, so if the speed of copying from your card to your device is critical, it’s something to consider. Often in the field, Art is shooting thousands of photos, and needs to be able to copy them quickly if he wants to download them and re-use the card for more shots. In these cases, being able to copy quickly is critical, and this is why he uses a separate CF and SD card readers.
Final Considerations for Purchasing Memory Cards & Readers
Hopefully this has been somewhat helpful in understanding card types. Obviously there are other options out there and your camera is largely going to determine what you need. Just keep in mind that splurging for extra speed and/or capacity is an amazing luxury to have, but not always the best use of your funds if you’re on any kind of budget.
For example – a Canon R5 includes both an SD and a CF card slot. Instead of considering a 512 GB CF card, you might want to get a 256 GB CF and a 256 GB SD card – that way you have options to shoot and write the same photos to both cards and have a very secure backup so you don’t lose photos. If a card fails in the field, you also have the option to use the other one. You still have the same storage capacity but more flexibility. Some photographers configure their cameras to write the larger, slower-to-copy RAW files to the CF card while sending the smaller, faster JPGs to the SD card.
In the end, CF-E cards are superior as they are faster, usually have a higher capacity, and are more durable than SD cards. SD cards are more common in consumer cameras. It really comes down to what your camera is compatible with, how you use your camera, and your budget.
Since we are all likely spending a little MORE time on our computers and less time out and about shooting, I thought it might be good to compare notes on what everyone is using these days to edit, organize, and promote their photos.
Serious photographers seem to come in some combination of three varieties – those who love the medium and the experience it can bring through travel and interaction with the world around us, those who love using the camera as a tool to create artistic statements, and those who really -really- love tech. I am definitely more a combination of the first two types – but to really maximize your potential, you need to embrace all three to some extent.
I’m fortunate to have a staff to help me with the minutiae of all of these tools, and together we’ve come up with a list of some of the software applications and web services we use. If you have any suggestions for myself and fellow photographers, leave a comment!
Ten Tech Tools of the Trade (In No Particular Order):
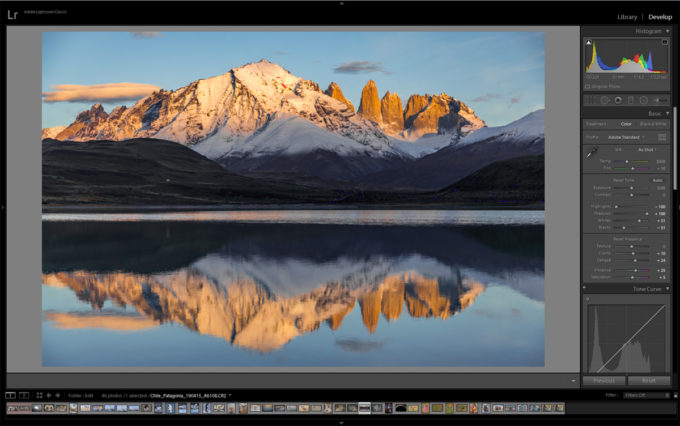
AW: Lets get the most obvious tool out of the way first as I’m sure most people are familiar with Adobe’s tools. I spend most of my time in Lightroom, where I use it as both an organizational tool, and to add some post processing to my photos. Most of the tools you’ll find here keep photography at the forefront, simulating many traditional practices in a much more simplified and speedy manner.
AW Staff Note: Art rarely uses Photoshop, however when I’m preparing his photos in final edit for a book project or print, it pays to have more control over the fine details. There are lots of tips out there for things like enhancing sharpness, reducing noise, and much more.
AW: This is a tool I’ve just recently started using. In the past, most de-noise tools operated roughly the same, or at least to my eye seemed to have similar results. This app from Topaz uses a new process to remove nose, and so far it works great.
AW Staff Note: It does take some time to process however, so make sure you have the time to spend getting everything just right, and pack your patience! Not that Art is ever impatient. . .
AW Staff Note: These are tools we use to edit audio and video. It’s not a huge part of what we do, but as they can come packaged with the other adobe tools we use it doesn’t hurt to have them. Premier is used primarily for cutting and editing video clips; AfterEffects is kinda like photoshop for video, and Audition is for editing sound clips to remove things like echo, mic popping, etc. . . they are complicated programs but just simple enough that most things you might need to do, you can find a tutorial online to get you through it.
AW Staff Note: Yep. Art doesn’t use this one himself either, but when we are working with video files, they are often for the web and therefore require slightly less fidelity than if we were say, creating an HD TV show with all the Audio/Video bells and whistles. But you also want to start with the best possible quality. That means huge video files. Handbreak is a great (and free) tool for taking huge video files and turning them into smaller video files that still look and sound great, with a lot of tuning available to get the result you want.
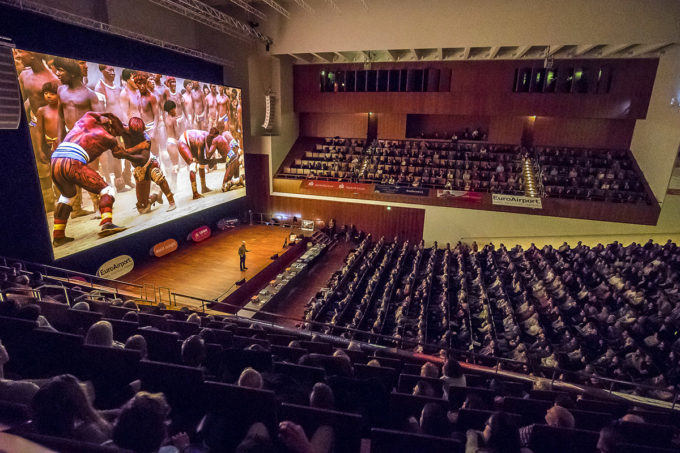
AW: Ah! Now we are speaking my language again. Currently I’m living in Keynote working on Pathways to Creativity, a new series of seminars that will be divided into chapters and made available for download, aiming for this fall! These programs are simple enough. I create all of my presentations in Keynote, whether it’s for an epic stage or a slide show at home. Lightroom does have a built-in slide-show feature as well, but Keynote gives me more control.
AW Staff Note: Powerpoint and Keynote are similar so if you’re on a windows-based computer, PP might be your option. They mostly play nice together, but aren’t without some small issues if you’re going back and forth.
AW: I don’t personally use Photoshelter often, but I have their plug-in installed in Lightroom. When I export my photos it can be pre-set to upload automatically to Photoshelter assuming I have an internet connection, so staff back home can see my latest photos.
AW Staff: Photoshelter is a great way to store, organize, and share your photos online. We use it to drive our stock site and host innumerable images. We’ve had very few if any service interruptions or down time in my experience with it. There are a lot of options for sharing your work, and also protecting it with watermarking and small file downloads.
AW: This one goes without saying – if you’re taking photos, share them! And follow me – maybe you’ll get a follow back – in fact, if you leave your handle in the comments below, I’ll be sure to do so.
AW Staff: One thing you’ll notice about Art’s Instagram page is that we try to avoid the square crop when possible and aim to preserve Art’s preferred aspect ratio for his images. We accomplish this in a simple manner – a square background slightly off white (RGB all set to 251), and then size the image to fit within the square.
AW Staff: YouTube gets more traction, but I find Vimeo to be more user friendly. The best solution is to use both if you’re using these tools for promotion. Don’t forget about the Handbrake tip – you don’t want to spend hours uploading a huge video that is going to soak up your storage space!
AW: Having a place to dump or receive files on the road or while travelling is incredibly useful. Both DropBox and Google Drive are good options and easy to use. Photoshelter is limited to just photographs, so having another way to store and transfer other file types online is necessary.
AW Staff: Another shout out to wetransfer.com as well, a free service (with some paid options) where you can send files to people to download via emailed link.
AW Staff: Last but not least with everyone working from home these days, we use GoToMyPC.com to connect to the office. We’ve never had any issues using it, and after the initial setup it’s very easy to use. There’s also a file-sharing option to make transferring files between computers easy and painless.
AW: Well, that rounds out today’s list, though there are plenty of other tech tools out there. Comment below if you have any additions or suggestions for things we should be taking a look at while we have the time to do so.
I have recently picked up a Canon 1DX, the latest flagship camera for Canon and, spoiler alert, I am thrilled! This camera represents a whole new world for photography. It’s not so much about how many megapixels the camera has, we’ve essentially passed the resolution of the best slide film in its day, now it’s all about the performance at higher ISOs and Canon has re-set the bar with this latest model.
If you know me, or have been to one of my seminars you know I am an artist first, a photographer second and a technical anything is not even on my list. The camera is a tool for me, just like my brushes and paint, thus I will leave the technical reviews to the likes of Jay Goodrich and others who play in that arena. This write-up is more my impressions of what it’s going to be like using this next generation camera going forward.
I have been shooting for over 30 years now, back in the good old days when you had to walk uphill in the snow both directions to get a shot of a moose, the ISO speed was 25. Yes, that’s not a typo for those of the internet generation, ISO 50 didn’t come around for many years after I began my career, and 100 was largely unheard of for professional photographers. You panned with your subjects, not always for the effect but because you had to, even wide open you couldn’t always get a shutter speed fast enough except in the brightest of conditions. Hand holding was just a fantasy that we all had to disregard.
So when did I make the switch to digital? As soon as it was available as mass market product. I was in a small inflatable zodiac in Antarctica photographing iceberg formations with an 11 megapixel Canon 1Ds. It was my first time using this camera and I was shooting at ISO 100 when the opportunity to photograph a leopard seal that had just hauled itself out on the ice. Remember, this was my first time shooting with digital and when I was able to bump up the ISO to 400 and capture a decent shot of the seal while bouncing on the waves and then try another at 800, I was sold. I never loaded another roll of film again and I came home with 300 rolls of unexposed slide film, that I sold the very next week.
Up through the 1DS Mark III and 5D Mark II, I was comfortable pushing the ISO to 400, but not much higher. The grain and noise that came in at higher ISOs began to impact the image enough and the gains of one more stop simply didn’t buy me enough to justify it, it was still a tripod, mirror lock-up situation afterall.
But not any more…
With the 1DX, I can easily see going up to ISO 6400 and perhaps further, I haven’t tested much beyond 6400 as the idea is so absolutely foreign to me. Unless I’m looking for slower shutter speeds to blur the motion of a river or pan with a moving animal, I don’t imagine I’ll even set it any lower than 1600 on most days. This is an absolute game changer for me. With this camera I will return to try and capture old subjects that I would have otherwise passed up earlier in my career. I can return to photograph swift moving animals in the forest canopy in the late afternoon where there simply was not enough light to allow for a fast enough shutter speed. I have never favored flash unless it was absolutely necessary, and even then the results rarely made the cut.
Now shooting at ever changing ISOs being the highlight for me, Canon has located the ISO button perfectly, even differentiated with a raised bump such that I can switch settings with my eye to the camera as easily as I would change the aperture.
Shooting at higher ISOs also opens up new worlds for controlling Depth of Field. A slight breeze while photographing flowers in the meadows of Mt. Rainer meant choosing between tack sharp foliage vs. a depth of field appropriate to the composition. A compromise, and rarely a good one. People even marketed “plant clamps” to hold the foliage steady for you. Now I can simply dial up the ISO to get the shutter speed I need without sacrificing F-Stops and Depth Of Field.
Though I have said it many times in the past – “If you want to improve your photography get a tripod, cable release and mirror lockup, and use it…” you will find me hand holding the camera more and more often in the future. I am not religiously tied to a tripod, they are excellent tools allowing you to shoot with slower shutters speeds, but if I can bump up my ISO to 4000 and still come home with sharp images, I will. It will allow me to be more nimble, more reactive to moving animals and people.
I’m often asked about the one that got away… It was in Varanasi, India. I was walking down the back streets of the bustling city trying to keep up with the guide and my friends, but I knew I was falling behind overwhelmed by all the sights and smells, a photographer’s paradise. As I glanced down an alley way I saw a dog curled up sleeping on top of a cow taking advantage of the warmth and comfort it offered. It was a spectacular shot especially considering my book “Dogs make us Human” had yet to go to press and I could potentially include this image…Alas, had I chosen to get my tripod out, set up and get the shot, I would have had one more great shot in the bag and the guide would have been long gone leaving me completely lost in the back allies and small streets of this enormous city. He was just out of earshot given the ambient noise, I couldn’t call out, I just had to enjoy the moment and press on hurrying to catch up with the guide. Had I been carrying the 1DX…I would have simply shot it at ISO 6400 and been able to easily hand hold the camera for the exposure racking off several frames (up to 12 in a second actually) and then hustled on to keep the back of my guide’s head in sight.
During August I led a tour to Lake Clark Alaska with Jay Goodrich and 9 participants. The shot that made the trip for me was when a young mother grizzly came within view trailing 3 very young cubs. We were told that she was new to the area and uncertain of the surroundings. In the deep grass a pair of otters scurried through, unable to see what had made the noise, she immediately let out a sharp grunt calling her three cubs to her side. One by one the three cubs reached mama and stood at attention ready to head her next command. With the camera set at ISO 1600 I was able to capture the scene with sharp focus from the mother bear to the last cub in line – absolutely perfect! It was a fleeting moment and one I would have missed with a lessor camera in the past.
Canon has dramatically changed the focusing system as well, and for the better. While I didn’t specifically test out the focusing abilities of the 1DX, I was in Brazil recently shooting with the new Canon 5D Mark III which has a similar focusing system. The 5D Mark III allows you to not only pick from 61 different focusing points (in a variety of automated ways) it allows you to choose different scenarios to track the subject from erratic to predictable. While in Brazil at the Buraco das Araras (the Hole of the McCaws) the colorful birds were moving in and out of the canopy as if they were sparrows. They’re not like our bald eagles here in the Pacific Northwest – gently and predictably soring over the ground…They would dart in and out of my frame as they quickly moved from tree to tree. The advances in focusing made it possible for me to get tack sharp images of these birds in flight as I watched the scene through the viewfinder reacting to flashes of color as they made swooping passes across the open spaces. The camera accurately tracked their movements maintaining the focus for me. Could I have shot this scene in the past? Yes, but with far fewer successful exposures. It would have been much more of a “shoot a lot and hope for a little” situation. With this new focusing system, I was able to get vastly more keepers for the archives.
For all of the complexity Canon has done a great job with their menus and labels – this was my first time out with the camera (the manual safe at home of course) and I was able to navigate the settings to reprogram the shutter release and other buttons and general setup to suit my preferences. It’s also a very solid camera, well built, it feels like the professional tool in my hands that it is.
The extent of the buttons that can be utilized while your eye is to the camera to adjust and change settings is wonderful. I can (now more easily) check the depth of field, switch between focusing modes, change the ISO settings, and adjust exposure; most everything I can foresee needing will be at my fingertips now, rather than having to pull away from the camera and navigate through menus and potentially missing a shot.
Yes, I’m sold on the new 1DX, and while I’m sure I’ll stop giggling eventually, every time I look in the LCD to see sharp images at incredible ISOs, I think of where technology is going next. There are going to be a lot of firsts with this camera over the next year or so – first time reacting to a charging lion at sunset, first time with birds in flight at F13 without a tripod, first time stopping the motion of a wheat field with sharp focus throughout…It’s going to be a good year.


, Lake Clark National Park, Alaska")

