In just over a week, I’ll be in Boise, Idaho bringing my popular Photography As Artseminar to the City of Trees!
This seminar is designed to completely change the way you view photography, and my intent is to inspire you to bring unique artistic visions to life using your camera as both brush and canvas. With an emphasis on the abstract, imaginary landscapes, and capturing metaphors the lessons learned here can be applied anywhere and with whatever equipment you have available – no globe-trotting or a plethora of fancy gear required.
I recently took a trip up to Northern Canada to photograph a variety of owls, and came away happy – if not chilled to the bone. It’s cold up above the 51st parallel, no matter the time of day. That didn’t seem to impact the hunting owls of the region, who’s keen senses can detect rodents beneath the snowfall dozens of meters away. They essentially do a graceful face plant into the snow, rummage around, and come away with a snack.
The light sky and the bright white snowy landscape make shooting a challenge. To control the light and capture a quality image, one first has to understand light in terms of it’s relationship to photography. This excerpt from “Chapter 6: Reading the Light” from The New Art of Photographing Nature explains it more succinctly than I might in a blog ramble:
Without light we would have no color. And without light, there would be no photography. In fact, the word photography derives from Greek roots meaning “writing with light.”
Primitive man did not have the benefit of science to explain natural phenomena such as the rainbow. Nor did we, until Sir Isaac Newton’s use of the prism separated white light into its component colors. Light is a form of electromagnetic energy, which, in the whole spectrum of frequencies, is only visible as colors in a very narrow band. Other frequencies, such as infrared, ultraviolet, gamma, and X-ray radiation, are invisible to our eyes.
Yet, despite our basic understanding of light, it is something we are apt to take for granted, like the rising and setting of the sun. But in photography, we can never take light for granted, and must learn to perceive it many nuances. The quality of the light creates a variety of colors and moods. Light also models form, and the direction of light is crucial to how we perceive shape and depth in the landscape.
When talking about light, it is important to distinguish between quality and quantity. Quality of light can, for the outdoor photographer, mean the time of day, the angle of the light striking your subject or whether it creates high-contrast or low-contrast conditions. It can also be measured as color temperature (in degrees Kelvin) with daylight on a sunny day being around 5500 degrees Kelvin. While color film required filtration to correct for changes in color temperature, digital cameras have a built-in white balance function that can adjust the camera to virtually any lighting condition, indoors or out.
Quantity of light refers simply to the amount of light reaching the camera’s sensor and recording an image. It is by controlling this light, through changes in aperture and shutter speed, that we arrive at a proper exposure.
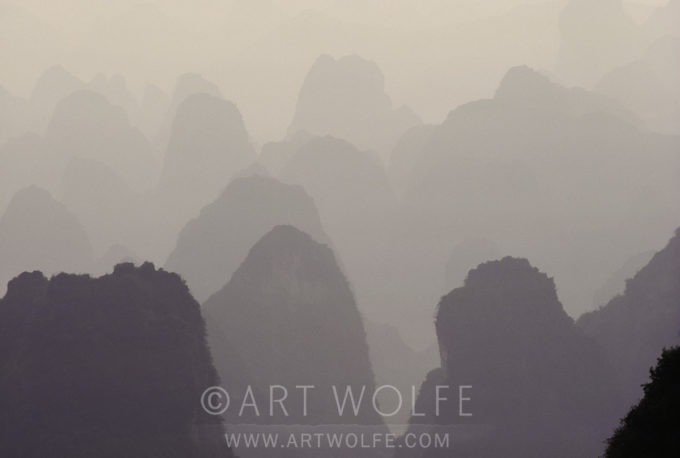
In the shot of the karst mountains in Guilin, China, I wanted to emphasize their repeating pattern and unusual shapes: individual humps instead of long ridges. I used my 80-200mm lens to zero in on an area that I felt made the strongest statement.
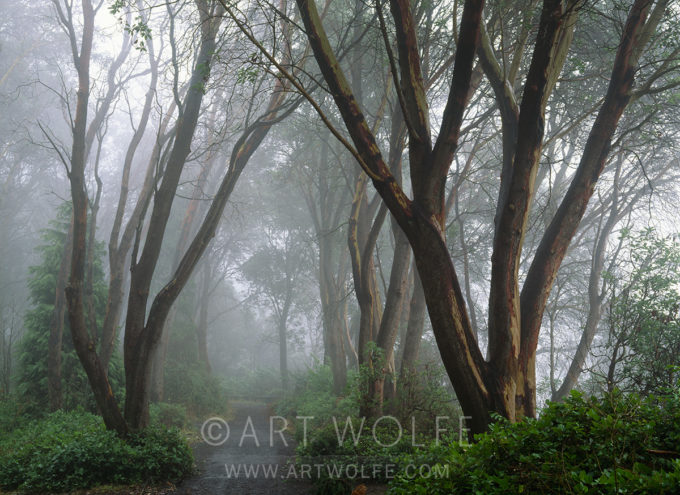
The second shot was taken a few minutes from my home in Seattle. I grew up in this neighborhood, and as a boy, I loved this path especially, with its graceful madrona trees. I went back to photograph it forty years later.
Madrona trees in mist, Washington. 45mm lens, f/22 @ 4 sec, Fujichrome Velvia 50
Spatially, light objects stand forward of dark in our normal experience of perception. When we have atmosphere such as fog, however, it is the reverse; dark objects are closer to us than light ones, as in the mountain scene. We understand this perceptually because atmospheric haze intervenes and makes the far mountains paler and less distinct. This is sometimes referred to as “atmospheric perspective.”
We also understand crisp outlines as close and fuzzy ones as distant, as with the trees in the fog, which is contrary to normal perception, where we can see distant objects in focus as well. The sense of space in both these images is definitely enhanced by the fog. Forms are more noticeable without competition from intricate detail. The tree trunks stand out more without the busy clutter of foliage. Because it shrouds things from view, fog, more than any other atmospheric condition, creates mood and a sense of mystery.
For more how-to lessons, purchase The New Art of Photographing Naturein my online store!
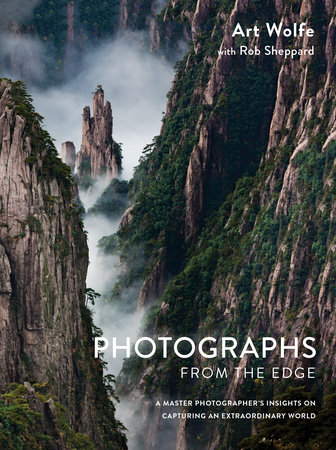
With SNOWMAGEDDON hitting the Pacific Northwest, a timely themed #TechniqueTuesday is in order! This is an entry from Photographs From the Edge, where I’ve combined the stories behind some of my most recognizable career photographs, as well as providing tips, techniques, and camera data for them. Enjoy, and I hope everyone back home is staying safe in the Winter weather!
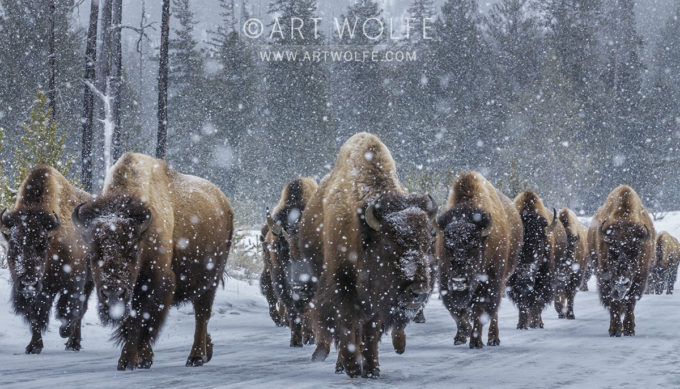
Canon EOS-1DX, Canon EF 70-200mm f/2.8 lens, f/18 for 1/250 sec., ISO 2000
This image of bison in Yellowstone National Park really began when I co-led a rafting trip down Alaska’s Taku River a number of years ago. On that trip I met Robert Bateman and his wife Birgit. This outstanding Canadian artist spent time photographing details of rocks along the river’s edge or details of the forest. I had to ask what he was doing. He simply responded that he was taking details that he could later render accurately as details in his paintings.
At that time I had been fixating on getting closer and closer to animals and ultimately getting that classic portrait of that animal almost as if it was a trophy. The analogy was that I was a hunter with the camera. Bateman made me take a serious look at how he would he was less concerned about portraits of animals and more concerned about capturing an animal within the context of its environment. I looked at my own work and started realizing he was right.
Bateman showed that by creating atmospheric conditions and a sense of place, the composition become more nuanced, more intricate, and more involving for the viewer. In the years after meeting Bateman, I think my work became infinitely more interesting by being more inclusive of the environment. From that point forward then I would always look at storms and thick atmosphere as opportunities rather than distractions.
This image of bison in Yellowstone works to carefully include the animal’s environment. With the advent of higher ISO cameras, I can shoot with both a smaller aperture and a faster shutter speed. Here, I was able to capture a herd of animals with great depth of field, and to use a fast enough shutter speed to stop the movement of snow. So in this image of the buffalo in Yellowstone, you can see tiny points of white snow suspended in motion as well as individual animals clearly in focus. To me, this photo recalls some of the great paintings of Robert Bateman.
Photo tip: For falling snow to show up in a photo, you need contrast to set the snow apart from the rest of the scene. In this image, both the dark trees in the background and the dark fur of the bison help bring this contrast to the image. The falling snow behind the bison also lend a strong sense of atmosphere to the shot.
The nature of the photo: Snow is extremely variable in size and shape, which has a strong impact on how it appears in a photo. Very cold conditions can create tiny snow crystals that will appear more as fog than snow in a photo. Large snowflakes can be a bold part of a winter photo.
For more photos and the stories behind them, along with tips and techniques, purchase Photographs From the Edge in my online store. As always, make a request note in your order and I’ll give it a signature!
And if you missed it – check out the gallery of images from my recent return trip to Yellowstone.
Since they are a niche piece of equipment, not everyone is familiar with what exactly a tilt-shift lens is and what they are used for. Admittedly, I’ve only used them sparingly in my career. Speaking in simple terms, a tilt-shift lens is a lens that allows the optics to tilt and rotate in relation to the image sensor on your camera.
When you take a photo with a standard lens, your lens and the sensor create planes of the same angle. At a wide aperture, everything in front of and behind your focus point will gradually become more out of focus. Using a tilt-shift lens, you can achieve more control over what is or is not in focus by having greater control of your focusing planes, therefore keeping more of the image both in and out of focus, depending on what you’re looking for. It should be noted that there is no auto-focus available on T/S lenses.
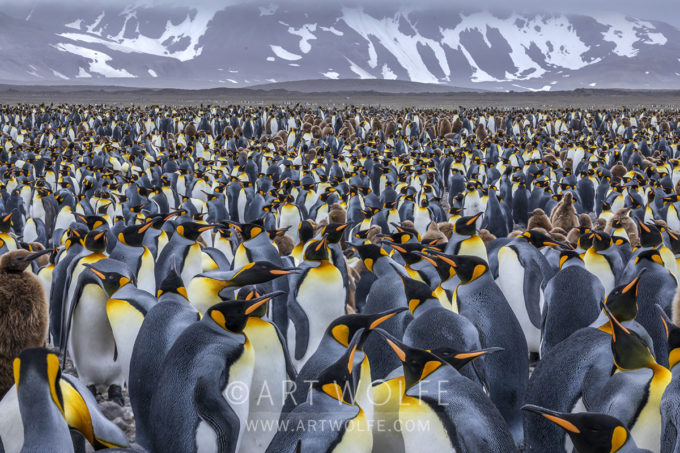
You can use this flexibility to achieve a number of desired outcomes. Although on short notice prior to my trip my Canon rep was unable to get me the lens, I was able to rent the Canon TS-E 135mm f/4L MACRO from borrowlenses.com and use to great effect while photographing a king penguin colony on South Georgia Island. By tilting the lens down, you’re essentially moving the plane of lens to be closer to the angle of the the ground and in effect, widening what falls into the range of focus. This allows you to utilize some of the benefits of a relatively lower aperture while still achieving a great deal of detail.
This is just one use and effect achievable with a tilt-shift lens. Even if you’re not familiar with their use, it’s likely you’ve seen photos or even video utilizing the concept. In portrait photography, where a longer lens is ideal to bring attention to the subject and blur the background, a tilt-shift lens can be used to use such a lens in a tight space. In architecture, having greater control over your image plane can be used to combat the distortion that often happens to parallel lines. If you’ve ever seen a photo of a cityscape that looks more like a scale model than an actual city – that’s a tilt-shift lens in action!
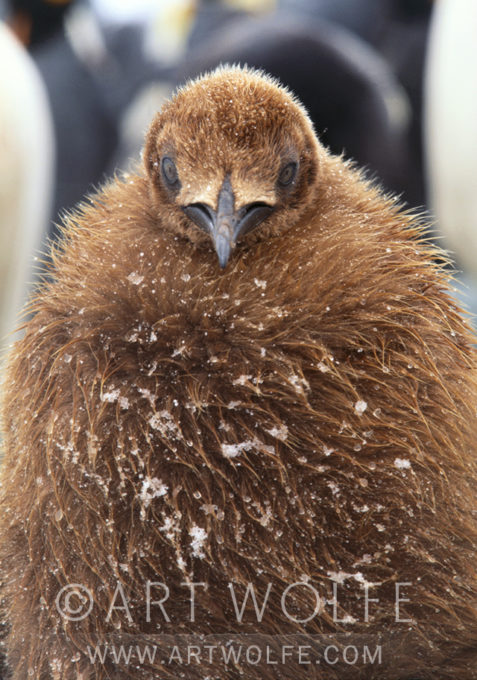
The nature of the photo:King penguins are second only to emperor penguins in size. Mostly they live on islands north of Antarctica such as South Georgia Island, rather than on the continent itself. They feed on fish and squid from the ocean nearby which is known for its diversity of life. Canon EOS-1N/RS, TS-E 90mm f/2.8 lens, f/16 for 1/125 sec., Fujichrome Astia
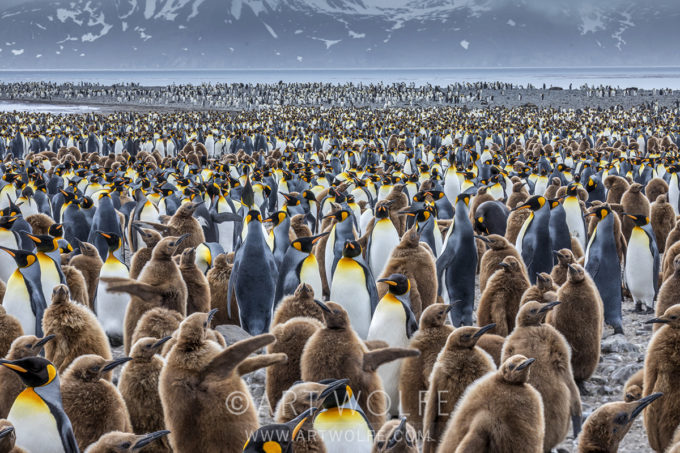
South Georgia Island is a great place for penguin photography, but it is an extremely remote island in the South Atlantic that is difficult to get to. While working on my book, The Living Wild, I worked out a way of getting onto South Georgia Island and camping for six days. My assistant, Gavriel Jecan, and I were dropped off by an American tour boat then picked up six days later by a German passenger ship coming from Cape Town, South Africa.
During our stay, we faced all sorts of weather, but primarily wind and snow. This can be miserable for the photographer but such weather is often stunningly beautiful for the pictures. I love atmospheric conditions and blowing snow is one of those conditions that convey a sense of the primordial and timelessness to the image. Still, it made for difficult shooting.
You can see all of the penguins are hunkered down to withstand this turbulent weather. We were trying to shoot videos as well as stills. The wind meant we had to stabilize the image with a heavy tripod. A small f-stop of f/16 kept all the penguins in focus. One thing a still photo doesn’t convey are the sounds and smells of the moment. Certainly the smells of hundreds of thousands of penguins is something I’ll never forget. The sounds of the birds, the trumpeting of the adults is a sound that is forever etched in my brain. Simply put, it’s one of my favorite places to visit on earth.
Photo tip:
A simple tip this technique Tuesday, but an important one to consider – If you suspect challenging weather, be sure you are prepared for it with the right clothing, boots, gloves and hats. If you are too uncomfortable, you are not going to stay outside for the unique possibilities that weather might bring. When conditions get tough, dramatic and unusual photographs are often possible then.
For more stories, technical details and tips relating to some of my most well-known photos, check out the book this excerpt was taken from in my online store – Photographs from the Edge.
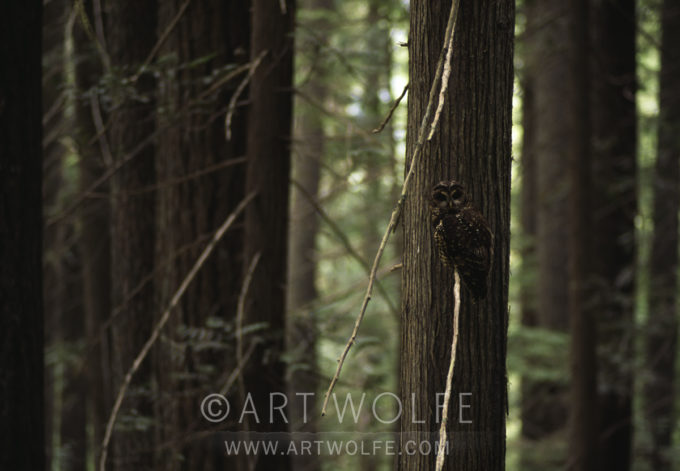
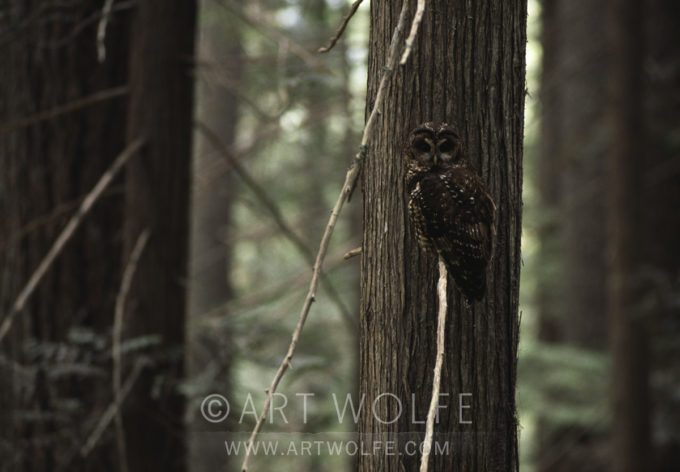
AW: In these three shots of a spotted owl, we see how the owl changes in importance according to its relative size in the frame. In my opinion, no image is stronger than the other; they simply say different things. The first composition is a shot of old-growth forest that happens to have an owl as an element (80mm lens). In the second, the owl is clearly more evident, and still enough forest shows to create a strong sense of place (200mm lens). But in the third, I’ve eliminated most of the forest and the owl is clearly the dominant element. It is a more rewarding view of the owl, and of the textures of the trees, which you can now fully appreciate. The sense of forest is definitely gone (400mm lens).
MH: In each of these images, the owl relates to his surroundings in a different way. In the first, he is hardly visible, blending in beautifully with his surroundings. It is interesting that here, the light-colored branch, rather than being a detracting element, actually leads our eye right to the owl. The forest, with its strong vertical lines, is clearly the dominant element in the frame. If I had a story to illustrate that emphasized the need to save lots of habitat to provide for one owl, I would use this version.
In the middle frame, there is much more of a balance between the bird and the forest. The owl stands on its own, without being overpowered by the trees. This would be a classic opening shot for a story on spotted owls and old-growth forests.
In the last image, you have a portrait of the bird. Now, too, the lighter limbs of the trees actually take over as the strong linear elements in the composition. The owl’s soft shape stands out against the harder lines of the tree trunks, without losing the feeling of camouflage we had in the first version. Unless I had text I wanted to drop out of the space on the left, I’d crop this to a vertical to emphasize the owl even more.
The elements that go into making a good image are basically the same for photography as for art, with one significant difference. An artist is faced with a blank piece of paper or canvas and has to construct a whole image by putting together the design elements–line, color, form, space, perspective–all of which he must create for himself. A photographer is given all these same elements in his viewfinder and basically subtracts the material he finds distracting and unessential to his statement.
Good photography is decision-making. It is not a passive process. The eye must learn to detect the essential and make it into a meaningful arrangement. Initially, nature appears random and chaotic. Our mind needs to make order out of chaos, to create relationships between things in order to understand them. When we look at something, we subconsciously focus our attention on some aspects and ignore others; we filter everything through our experience and our emotions.
The camera makes no such distinctions or evaluations. It records everything it sees. It is, therefore, the photographer’s responsibility to edit the camera’s view and select those elements to be captured. Understanding what goes into making a strong composition can improve a photographer’s personal statement. Freeman Patterson stated it beautifully when he wrote: “The camera always points both ways. In expressing the subject, you also express yourself.”
In a good composition, one has the distinct impression that nothing could be added to or subtracted from the picture. This sense of completeness–of balance–is the key. Balance does not, however, imply symmetry. Asymmetrical compositions can be balanced. We will explore these concepts as we move from chapter to chapter, discussing where to place the subject, how to make it stand out, how it relates to the other elements within the frame, and what creative options you have to work with to make a stronger photographic statement. There are some guidelines that can be followed, but none of them are so absolute they should be adhered to constantly.
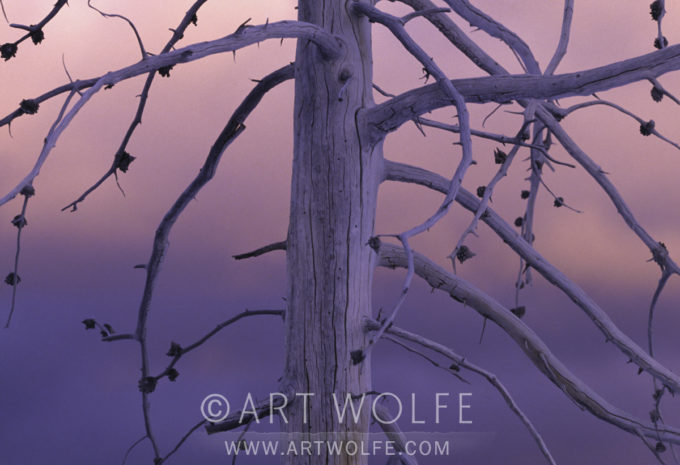
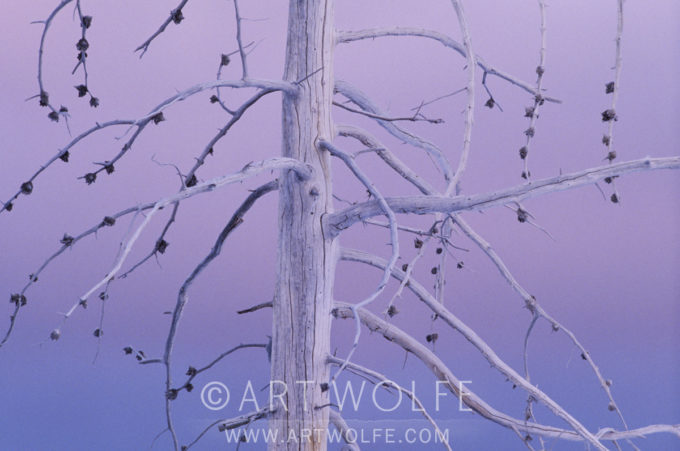
Art Wolfe: “In the first image, the tree is silhouetted against a much lighter pink sky. In the second, it is against a part of the cloud closer in value to that of the tree, but the composition is still not quite there. In the third, the cloud is now in complete balance with the value of the dead tree, and I have recomposed the tree to fill out all four corners of the composition. To my eye, it is a more harmonious image.”
Martha Hill: “We are talking about very subtle distinctions here. Many people will like the first image over the third because of the luminous quality of the pink background. And it is clearly a matter of personal taste.
What makes the third photograph so appealing to me is the ethereal quality of the light. The background colors gradate very subtly from pink to lavender to blue in an even tonality, giving a sense of serene harmony and balance. The linear design of the tree branches is weighted slightly off-center, thus creating a delicate imbalance.
The spatial depth in the picture is also ethereal. As in an Asian painting, the sense of three-dimensional space is ever so subtly there, as the lighter tone of the tree brings it forward from the background. The branches reach to the edges of the frame, also bringing the tree to the frontal plane of the picture space. To me, this third version is shibui, which in Japanese describes something of an understated, highly refined elegance.”
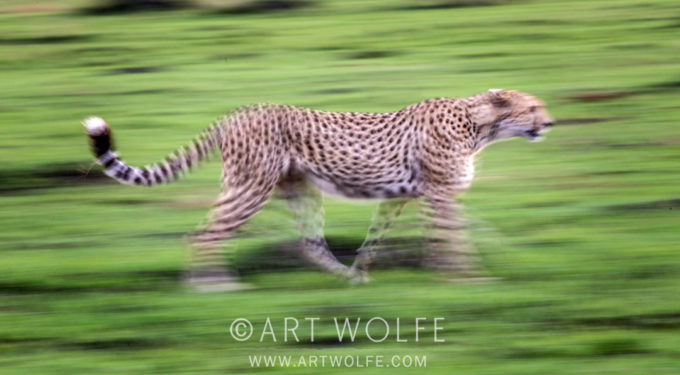
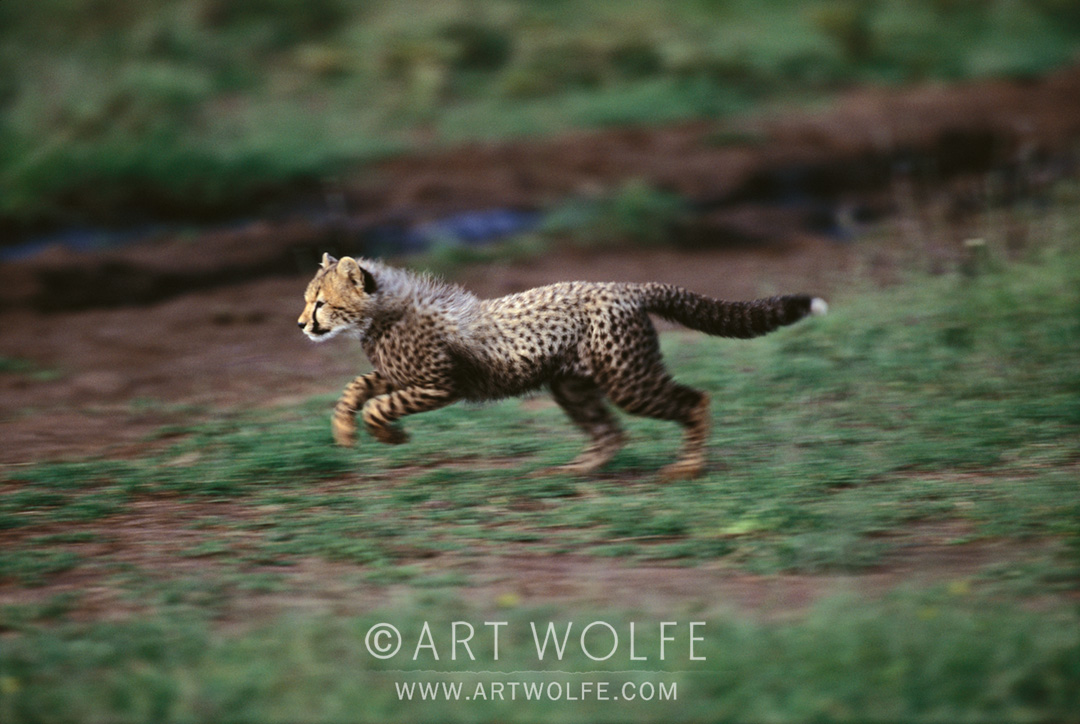
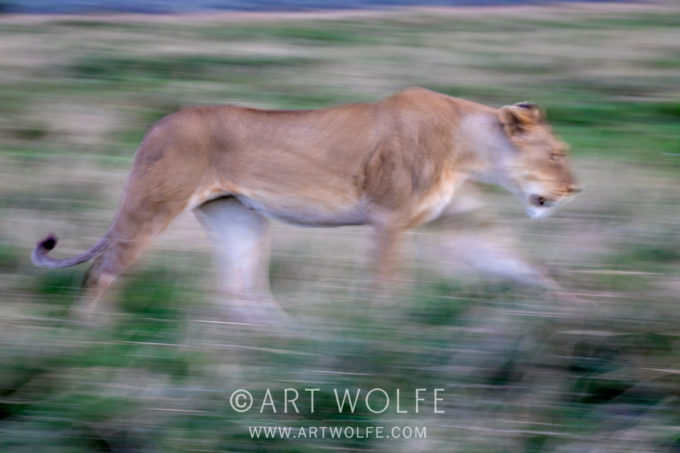
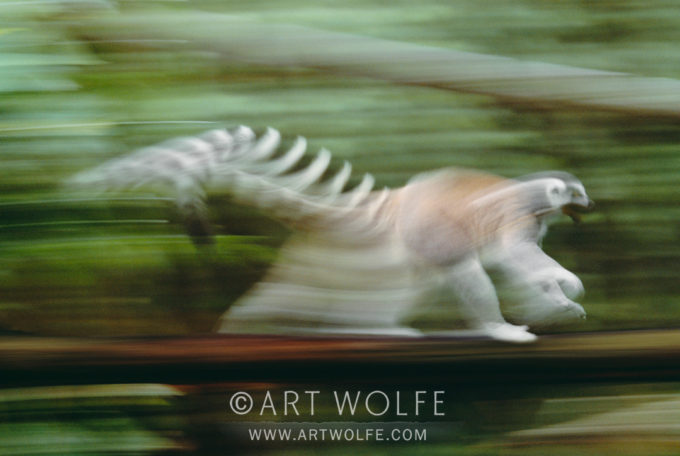
Today’s high ISO cameras are amazing at freezing motion, a technique I use and love on any wildlife shoot these days I have been capturing images that I couldn’t have imagined in the days of film – or even 8-10 years ago, for that matter. Flying bears, macaws tack sharp against a dark cave, every drop of water perfectly captured from the spray of an elephant – what’s possible now is incredible!
AI often try and remind myself to slow down every now and then; drop the ISO back down to 100 and stop down the aperture and let the motion move across the image. Ernst Haas was one of my early influences, a person who’s work I continue to admire. He was a pioneer of using this technique to show the motion in his subjects.
It takes some experimentation and often you won’t really know if you have any successful images until you’ve edited and evaluated them. Some may still show the eyes of the animal in reasonably sharp contrast to the blurred legs in motion – I like this look – but I also like those images that make me think of ancient drawings on a cave wall, where nothing is particularly defined and the entire animal is abstracted in it’s motion and the background a blurred canvas.
I won’t always see the potential in these images immediately. Some I shot on film many years ago I nearly tossed out but decided to file away at the last second. I pulled them out years later and found a new appreciation for their abstract qualities and I’m glad I did!
If you’re interested in more photos captured with this technique, check out Rhythms From the Wild.
This excerpt is from “Photographs from the Edge”, which not only details the stories behind some of my most well-known captures from across the globe and throughout my career, but is also filled with tips and tricks and equipment information.
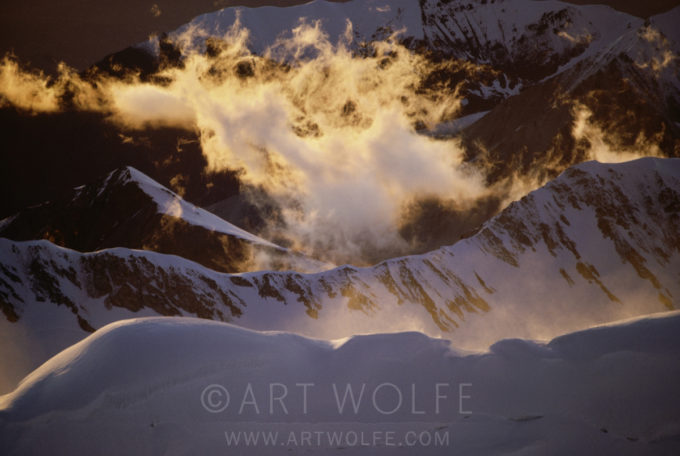
August 1988: “Rising Mist”, Alaska Range, Denali National Park, Alaska USA Nikon F3, Nikkor 200-400mm f/5.6 lens, f/8 for 1/250 sec., Kodachrome 64
The nature of the photo: Mountains are well known for their fast rising and falling air along their slopes. Glider pilots in mountainous areas will fly right at a mountain side when the thermals are right, then catch a fast moving ride going up with the air. They often describe this as running and jumping onto an elevator that is already moving upward.
Years ago I was working on a book entitled Alakshak, The Great Country, a Sierra Club book about Alaska. I spent a lot of time crisscrossing Alaska gathering photos for it. As part of this journey, I wanted to get some aerial shots of mountains in the Alaska Range. So I found myself in a small plane above the mountains working in the hours between 11 pm through 1 am.
In the summer, this is a key time because the light is most dramatic then. During summer solstice in Alaska, most of the day is bright sunshine and you only have a few hours of twilight with bold light and color. I was using the shortest hours of the day to capture the most radical light.
In this image, the light of the sun on the Arctic horizon illuminating a few misty cloud sweeping up a slope at around 18,000 feet. While I like this image and I have long loved photographing mountains, it is not the photo itself that brings back memories of this moment. This was shot over 25 years ago, and I remember it all these years later because of the absolute turbulence that our plane would encounter as the plane would fly long the lip of the ridge.
I fly a lot, and I have been on planes around the world in some very remote locations. However, I’m not a happy camper when the plane drops 20 feet in an instant as it was doing here. I can often circle in ever tighter circles around the subject with my mind so focused on the shooting that being scared is not part of the equation. However, when a plane is dropping and rising with the thermals like this, it is uncomfortable at best and frightening usually.
I remember spot metering the brightest part of the frame which was simply the wispy cloud. I compensated for the brightness by exposing to make that cloud bright with detail. By contrast then the surrounding mountains and distant valley remain fairly dark by comparison. This shot shows off the ephemeral nature of clouds and light. Within seconds of shooting this, the sun dropped below the horizon, and the entire moment was gone in an instant.
Photo tip: Spot metering can be a helpful technique when the light is dramatic and you have to be sure you get the brightness values right. In this shot, spot metering determined the exposure for the bright cloud, but that would have meant the clouds were dark and the rest of the scene even darker. That exposure has to be adjusted to make the clouds bright, not dark, by adding exposure to what the meter shows.
For this and many, many more stories behind some of the most notable photographs from a lifetime of world travel, pick up “Photographs From the Edge“ today and make a note at checkout that you’d like me to sign it!