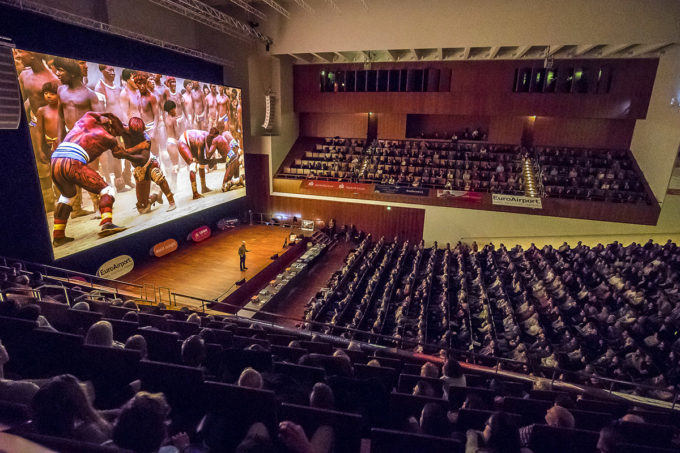
In case you missed it, Tequila Time #8 is in the books. It wasn’t without some technical snags, but I’m doing my best stuck at home! I was told there were a lot of messages relaying how much everyone’s been enjoying our weekly chat, and that means a lot!
If you missed the episode, here were some of my top travel moments and some photos to illustrate:
1) 1972: Ptarmigan Traverse
2) 1983: Everest Ultima Thule
3) 1992: Emperor Penguins
4) 1994: Baltoro Glacier
5) 1993: Yanomami,
6) 1995: Omo River Valley
7) 2001: Kumbh Mela
8) 2001: Mount Etna eruption
9) 2016: Nyiragongo Volcano
Next week I’ll be taking a deep dive into my top ten images. I’ll be giving away a print of one of them to a lucky watcher, so tune in for your chance to win!
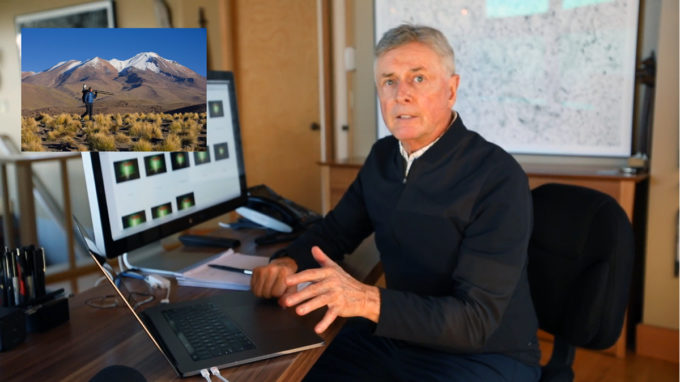
Another understated but very big deal is that the first episode from season one of my new online streaming series, Pathways to Creativity will be available for streaming this coming Tuesday, June 2nd! Check out the free 15 minute series preview below for a sneak peak at the first three episodes. Nearly five decades of experience experience and travel along with a traditional art background and approach means I have a lot to share! Pathways to Creativity can be purchased on a per-episode basis, or own the whole first season for a discount and two free bonus episodes. Visit the events page to pre-register to be notified when it’s available!
Happy Technique Tuesday – I shot this one down on South Georgie Island a while back, but good design is good design! Technology and style may change – what captures the eye does not! Staying on the topic of learning and teaching, stay tuned over the course of the next week or so to my social media and the blog, some exciting announcements about my new streaming lecture series, Pathways to Creativity are coming soon!
Canon EOS-1D X, EF200-400mm f/4L IS USM EXT, 1/6400 ƒ/5.6 ISO 5000
If you’ve been paying attention to the blog or caught last week’s livestream, you already know I’m keeping myself occupied lately working on a new series of educational videos releasing very soon. If you follow me you know that I’m an artist first and a technician second – I learn to use technology as I need it, but unlike many photographers my background lies in fine art.
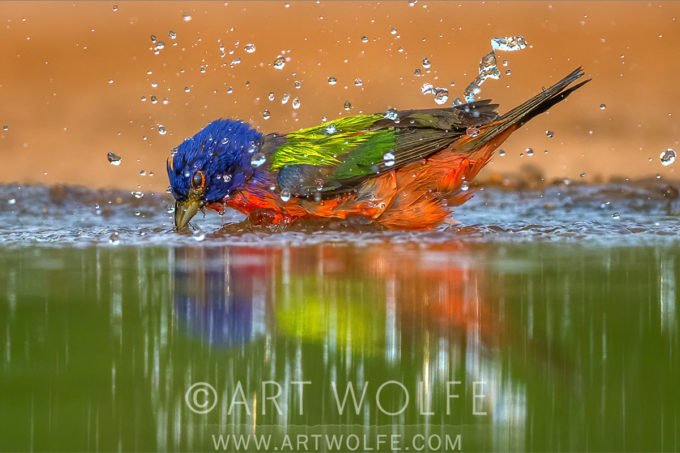
That being said, my upcoming lecture series will touch on many of the technical aspects of photography as well, for example using a high shutter speed to capture water droplets around the high-speed movements of this small painted bunting.
Freezing the action here requires a fast shutter speed – in this case I’ve chosen 1/6400th of a second. I’ve achieved my goal – the droplets and the bunting are sharp! However one problem you may run into depending on the available lighting is the high ISO required to get enough light from such a brief exposure. In this case my ISO was bumped all the way up to 5000 – well beyond what most photographers are comfortable with.
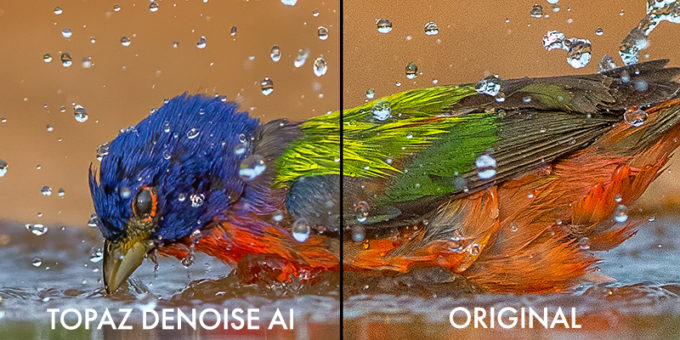
Personally I have always pushed my use of ISO; if the photo truly requires a high number to get the effect and freeze the action like I want it to, I am okay introducing a bit of noise. Much of that can be removed later in post. As an example, here is a close-up of this image with one side using Topaz Denoise AI, and the other the original image:
As you can see, Topaz does a great job of removing much of the noise in the image while retaining details. I highly recommend that regardless of the software you use to remove noise, that this is your first step in your edit. As you tweak levels, colors, and other attributes of your image, they may overly enhance the noise making it harder to retroactively remove. After you remove the noise, you can then go back and re-introduce some sharpening where needed, selectively avoiding areas with large swaths of color that will just end up looking noisy.
That will have to be a lesson for another day – enjoy your week, stay safe and healthy!
Happy technique Tuesday! Hopefully everyone is healthy and using their time to practice their photography at home. While I’m currently working on my Pathways to Creativity series of lectures, I figured it couldn’t hurt to give some tips for those of you looking to pass the time.
Photographers of all levels know just how useful a tripod can be. Myself and others have touted the necessity of choosing a good brand and not skimping on a cheap one. That being said, sometimes you need to ditch that thing. While the stability a tripod offers is essential for many shots, it’s not always the most maneuverable tool to use.
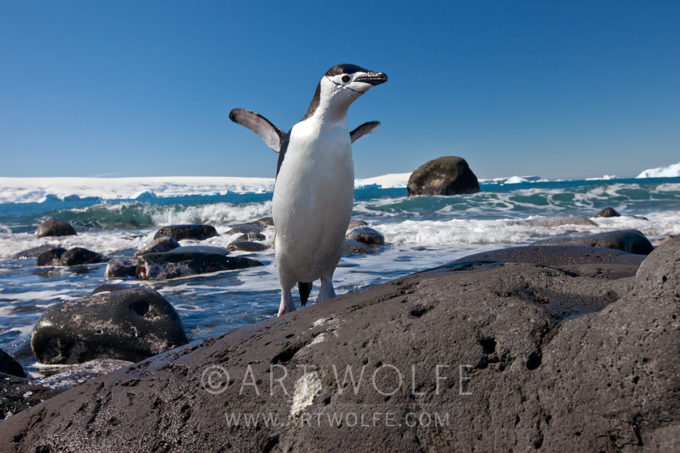
In this video, I illustrate that by losing the tripod and getting down low, I can capture these chinstrap penguins in such a way that enough background is included and in focus to give true context to their environment. This is an angle and perspective I wouldn’t have been able to achieve without the spontaneity and maneuverability gained by freeing myself from the tripod.
Use your body, the ground, and objects around you to stabilize your shot – don’t forget, any three points of contact, not just tripod legs, will make for a steady shot. Now, unless you’re super lucky, you don’t have penguins in your back yard – that’s okay! Get down low and photograph your familiar surroundings from a whole new perspective.
Since we are all likely spending a little MORE time on our computers and less time out and about shooting, I thought it might be good to compare notes on what everyone is using these days to edit, organize, and promote their photos.
Serious photographers seem to come in some combination of three varieties – those who love the medium and the experience it can bring through travel and interaction with the world around us, those who love using the camera as a tool to create artistic statements, and those who really -really- love tech. I am definitely more a combination of the first two types – but to really maximize your potential, you need to embrace all three to some extent.
I’m fortunate to have a staff to help me with the minutiae of all of these tools, and together we’ve come up with a list of some of the software applications and web services we use. If you have any suggestions for myself and fellow photographers, leave a comment!
Ten Tech Tools of the Trade (In No Particular Order):
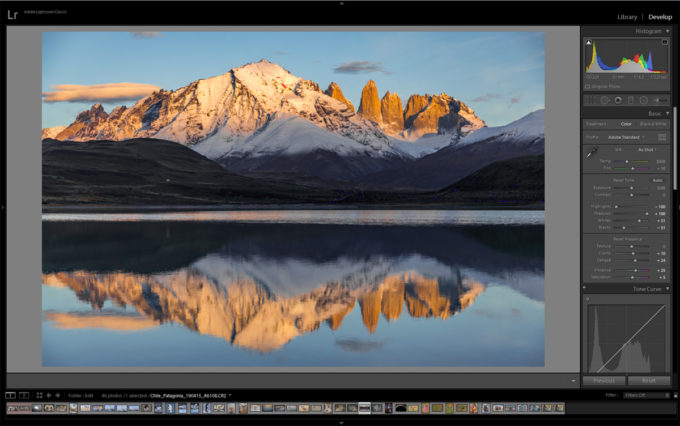
AW: Lets get the most obvious tool out of the way first as I’m sure most people are familiar with Adobe’s tools. I spend most of my time in Lightroom, where I use it as both an organizational tool, and to add some post processing to my photos. Most of the tools you’ll find here keep photography at the forefront, simulating many traditional practices in a much more simplified and speedy manner.
AW Staff Note: Art rarely uses Photoshop, however when I’m preparing his photos in final edit for a book project or print, it pays to have more control over the fine details. There are lots of tips out there for things like enhancing sharpness, reducing noise, and much more.
AW: This is a tool I’ve just recently started using. In the past, most de-noise tools operated roughly the same, or at least to my eye seemed to have similar results. This app from Topaz uses a new process to remove nose, and so far it works great.
AW Staff Note: It does take some time to process however, so make sure you have the time to spend getting everything just right, and pack your patience! Not that Art is ever impatient. . .
AW Staff Note: These are tools we use to edit audio and video. It’s not a huge part of what we do, but as they can come packaged with the other adobe tools we use it doesn’t hurt to have them. Premier is used primarily for cutting and editing video clips; AfterEffects is kinda like photoshop for video, and Audition is for editing sound clips to remove things like echo, mic popping, etc. . . they are complicated programs but just simple enough that most things you might need to do, you can find a tutorial online to get you through it.
AW Staff Note: Yep. Art doesn’t use this one himself either, but when we are working with video files, they are often for the web and therefore require slightly less fidelity than if we were say, creating an HD TV show with all the Audio/Video bells and whistles. But you also want to start with the best possible quality. That means huge video files. Handbreak is a great (and free) tool for taking huge video files and turning them into smaller video files that still look and sound great, with a lot of tuning available to get the result you want.
AW: Ah! Now we are speaking my language again. Currently I’m living in Keynote working on Pathways to Creativity, a new series of seminars that will be divided into chapters and made available for download, aiming for this fall! These programs are simple enough. I create all of my presentations in Keynote, whether it’s for an epic stage or a slide show at home. Lightroom does have a built-in slide-show feature as well, but Keynote gives me more control.
AW Staff Note: Powerpoint and Keynote are similar so if you’re on a windows-based computer, PP might be your option. They mostly play nice together, but aren’t without some small issues if you’re going back and forth.
AW: I don’t personally use Photoshelter often, but I have their plug-in installed in Lightroom. When I export my photos it can be pre-set to upload automatically to Photoshelter assuming I have an internet connection, so staff back home can see my latest photos.
AW Staff: Photoshelter is a great way to store, organize, and share your photos online. We use it to drive our stock site and host innumerable images. We’ve had very few if any service interruptions or down time in my experience with it. There are a lot of options for sharing your work, and also protecting it with watermarking and small file downloads.
AW: This one goes without saying – if you’re taking photos, share them! And follow me – maybe you’ll get a follow back – in fact, if you leave your handle in the comments below, I’ll be sure to do so.
AW Staff: One thing you’ll notice about Art’s Instagram page is that we try to avoid the square crop when possible and aim to preserve Art’s preferred aspect ratio for his images. We accomplish this in a simple manner – a square background slightly off white (RGB all set to 251), and then size the image to fit within the square.
AW Staff: YouTube gets more traction, but I find Vimeo to be more user friendly. The best solution is to use both if you’re using these tools for promotion. Don’t forget about the Handbrake tip – you don’t want to spend hours uploading a huge video that is going to soak up your storage space!
AW: Having a place to dump or receive files on the road or while travelling is incredibly useful. Both DropBox and Google Drive are good options and easy to use. Photoshelter is limited to just photographs, so having another way to store and transfer other file types online is necessary.
AW Staff: Another shout out to wetransfer.com as well, a free service (with some paid options) where you can send files to people to download via emailed link.
AW Staff: Last but not least with everyone working from home these days, we use GoToMyPC.com to connect to the office. We’ve never had any issues using it, and after the initial setup it’s very easy to use. There’s also a file-sharing option to make transferring files between computers easy and painless.
AW: Well, that rounds out today’s list, though there are plenty of other tech tools out there. Comment below if you have any additions or suggestions for things we should be taking a look at while we have the time to do so.
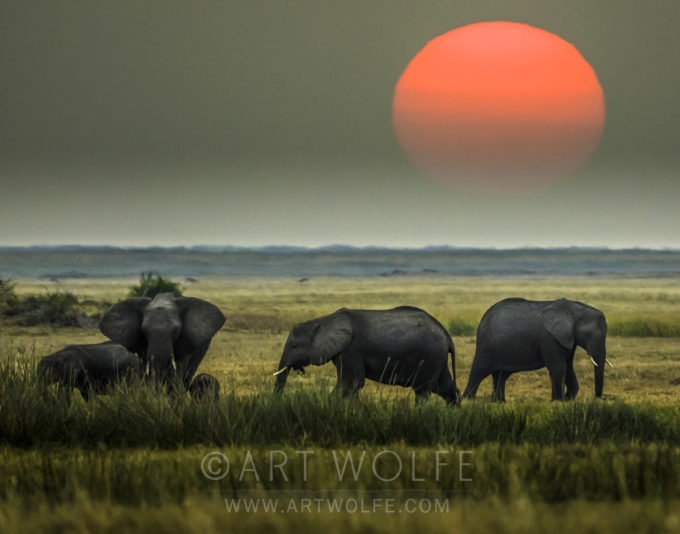
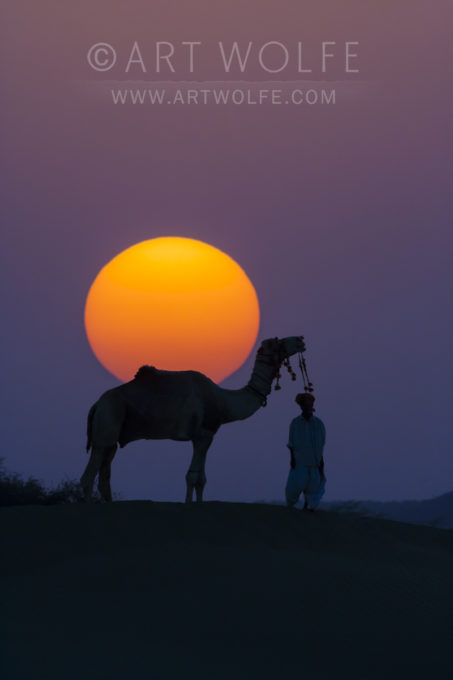
Happy World Wildlife Day! It’s also technique Tuesday, and today’s tip was inspired by a question from Lowell E., Who inquired via my contact page – how exactly DO photographers make things, like the sun for example, seem so much larger in a photograph than it does in real life?
Great Question Lowell!
The simple answer – use a telephoto lens! Now, it should be noted the sun itself is not getting larger, rather it’s an optical trick where your subject is appearing larger as your lens dials in on it. Photographing a subject a quarter of a mile away, for example, is relatively a short distance compared to the sun at 93 million miles away.
For more information, here’s an excerpt from The New Art of Photographing Nature:
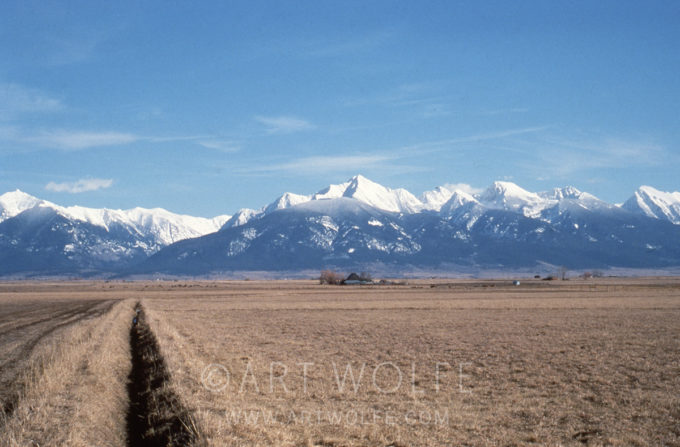
AW: As I was driving down the Flathead Valley in the Montana Rockies, I noticed this homestead set against the distant mountains. The first shot was taken with a 50mm and most closely resembles what I saw from the car as I drove by. I recognized the possibilities, but this clearly was not it. It incorporated too much sky, too much foreground, and the dark furrow of earth leads your eye away from what was most important to me in the composition.
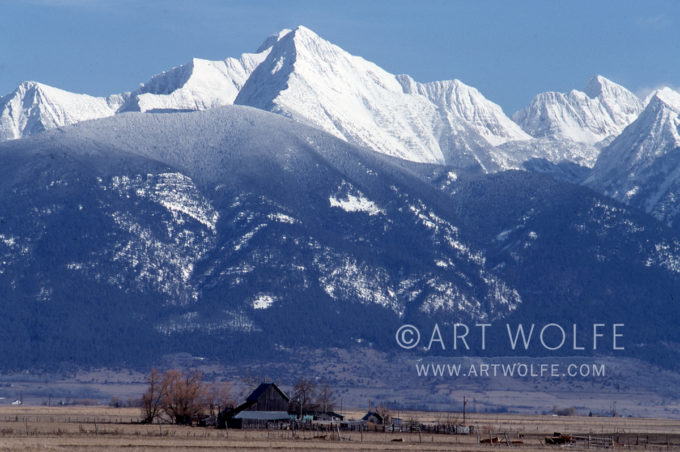
In the second shot, I zoomed in with a 300mm lens, creating a telescopic effect, and brought the mountains closer in relation to the farm. I knew this was what I wanted–the farm with the looming backdrop of mountains. I placed the farm in the bottom and cropped so only mountains were above it, creating a sense of dramatic vertical rise. For the last shot I used a 400mm with a 1.4 teleconverter resulting in 560mm focal length, bringing me even closer. By making the image a vertical I was able to emphasize the rise of the mountains, and using a polarizer allowed me to create a little more drama. For my money, this is the strongest image in the series.
MH: Here again is a good example of what the camera can do that the eye cannot. The only way we could approximate this image would be to hike a long way to get very close to the farm. But even then you would not have the same perspective, with the farm and the mountains so strongly juxtaposed. This sense of drama is created by the compression of distance only achieved by using a powerful telephoto lens.
Think you have a great question that might prompt it’s own Technique Tuesday post? Submit a question via the contact page!
Here are some other great resources relating to the subject:
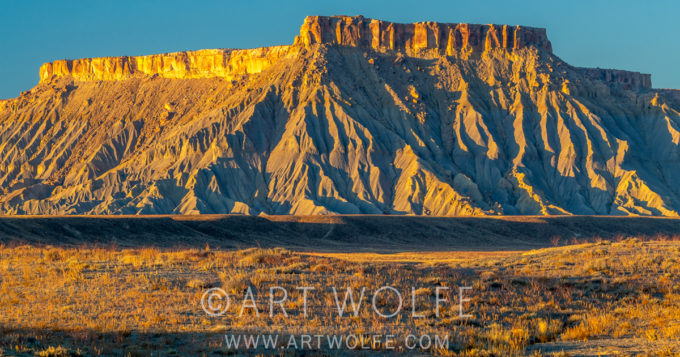
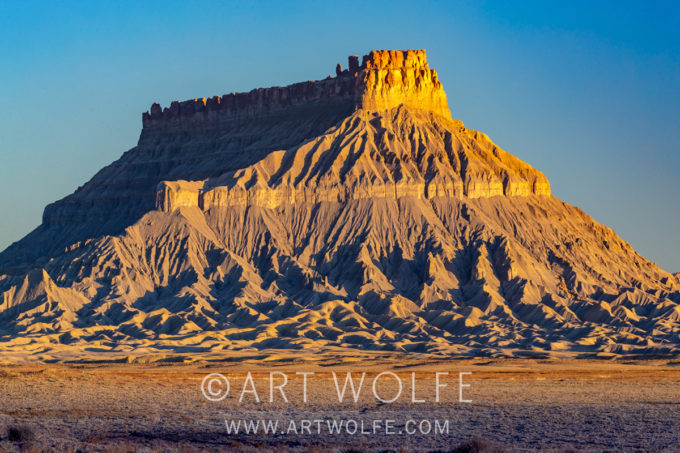
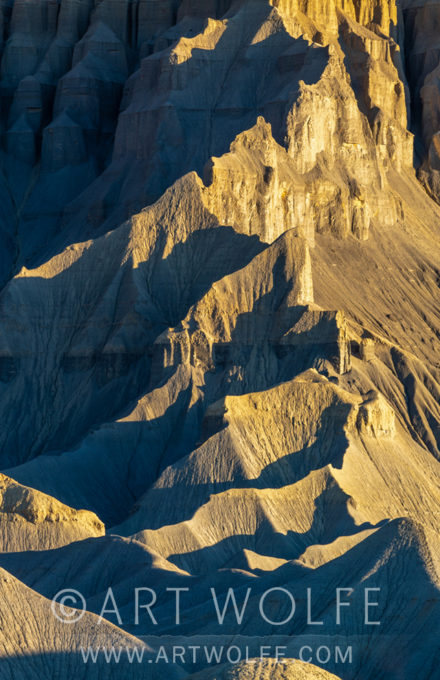
I spent some time in Utah this past November, and was struck by the colors of the directional light and shadow on the rugged buttes looming over the landscape.
Artists of the Renaissance period would work on a medium-toned colored paper and used light and dark paints, inks, and other materials to build depth within the image, adding form and dimension along the way. The term “chiaroscuro” has come to define images in which there is a strong contrast between light and dark areas that help inform the shape and form of a subject.
Renaissance artists often painted by candlelight, which provided it’s own harsh directional lighting. With photography we are painting in our own way with natural light we’ve been gifted, or our own artificial setups.Obviously it helps to have strong directional light when the sun is low on the horizon, but still high enough to illuminate your subject.
One of the draws to visiting a country like Romania is the old-world rural setting, and I came upon a couple fantastic and eventually willing subjects to illustrate just that.
When I first found the cat and the Muskovy duck in a barnyard in Romania, I decided to play up their relationship by basically herding them closer together. Initially they were about 5 feet apart which meant their association was less memorable. By slowly circling I was able to get them to be less than a foot apart which becomes visually more significant.
The cat understandably was unfazed by my presence. The duck was less confident with my intentions. Finally, with perseverance and patience, I got what I wanted – and brought two friends closer together!
I create books in large part because I know how impactful and inspirational they can be to the right audience. Sometimes all it takes is finding the right perspective to instigate an idea, a project, or even a lifestyle change. What might just be a picture and technique book to one person fills in the gaps for others and can send them down a creative rabbit-hole.
To that end, I make it a point to highlight books that either come across my desk or that I am referred to by friends, peers, and clients (often one in the same!) that leave an impression on me or that I think might be helpful for the photographer who follows my work.
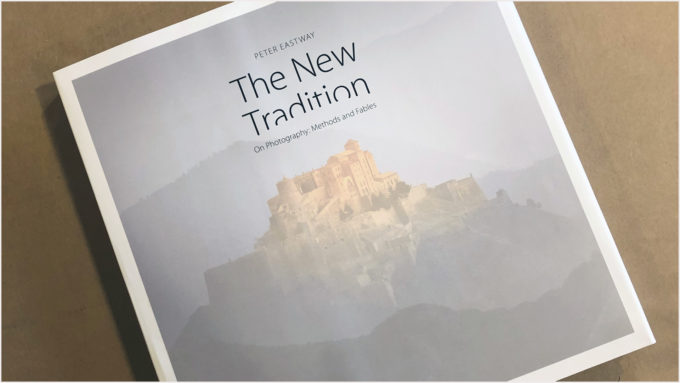
Today I am honored to discuss fellow Tales By Lightalumnist and kindred spirit Peter Eastway’s recently released book, The New Tradition. As a fan of both the traditional photographic works of staple legends like Ansel Adams and Edward Weston as well as the idea that photography can be its own self-contained conceptual art form, this book echos and expands upon this idea. Filled with hauntingly beautiful photographs, each one is accompanied with techniques and anecdotes that help describe Peter’s process and approach.
This is an important book that comes at a great time for photography enthusiasts. Digital photography has in recent years finally shaken many of the stigmas attached to it, and The New Tradition illustrates just that – a new way of approaching photography while capitalizing on the technology we have available rather than shrinking from it simply because it’s not how things were done “back in the day”. We have the ability and opportunity to push things beyond anything these historic innovators ever could, and I can’t help but think if they were still working they would be taking every technological advantage they could find IF it helped convey what they were hoping to communicate with their captures.
I can’t recommend this book highly enough! Order it today as an amazing gift for the photographer and artist in your life!
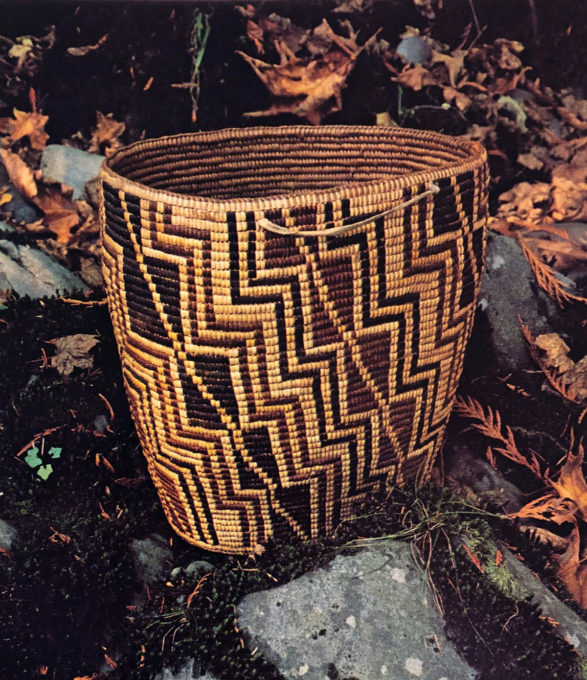
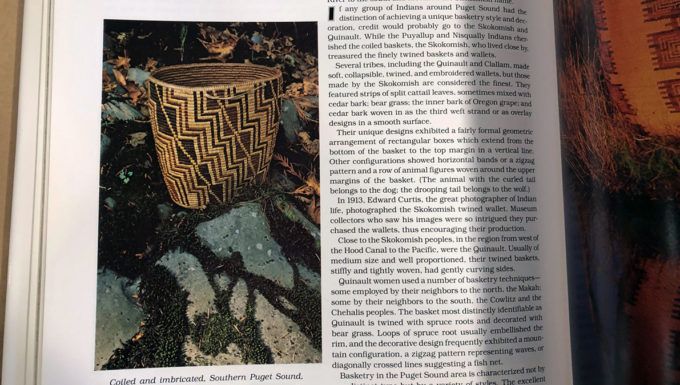
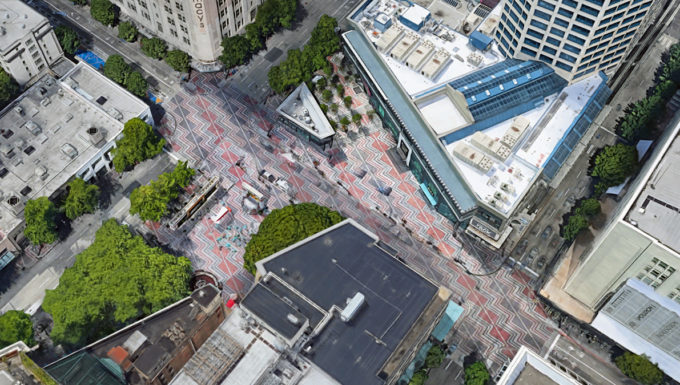
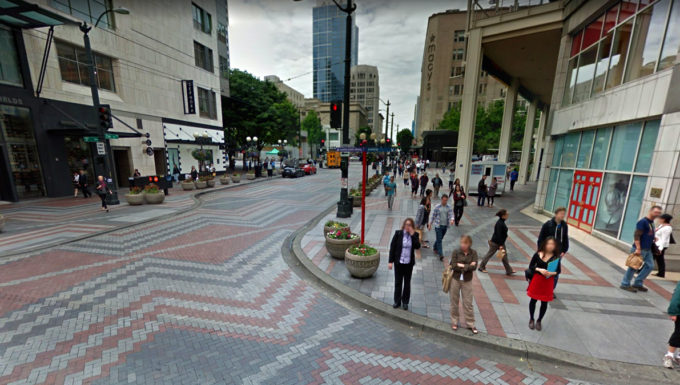
Happy Technique Tuesday! A little less of a technical lesson today as I’d like to talk about the many ways simple shapes and forms can become the basis for decades of design inspiration. This photo is from the book Indian Baskets of the Pacific Northwest and Alaska and captures a Cowlitz-style basket made from bear grass and dyed cedar bark. Coiled baskets were generally used in cooking are adorned in diagonal zig-zags and checkers.
The detail and quality of these baskets was cherished and ownership of them was prestigious enough that many baskets of this caliber were kept unused as pieces handed down generationally or traded. This particular pattern was used as inspiration when Westlake Center in downtown Seattle underwent a re-design in 1989. The pattern covers Westlake park and expands a block in any direction and was intended to bind the central down-town park into a ‘living room’ for the city.
From beautifully hand-crafted basket to (exquisitely captured, if I do say so myself!) photograph to major metropolitan design element, the original artist had no idea their work would become so very timeless. Next time you’re down town, give it a look – and the next time you’re looking to do your own decorating, it’s worth considering that inspiration may come from unlikely places!