For as much versatility as you get out of it, the Canon EF100-400 f/4.5-5.6 IS II USM lens is light weight, which means it’s great for traveling and backpacking. This is a particularly sharp lens with great glass and a smooth action collar. It also works well with extenders, which only adds to it’s versatility and value. The quick action zoom makes it a go-to lens for me for capturing wildlife.
What are some of your favorite lenses that never leave your pack? Leave me a comment below, I’d love to know what’s out there, and check out my gear page for more recommendations!
Capturing brown bears in Katmai, Alaska! Though specific to this location in the video, this is a lesson and focus I employ regardless of my subject – to capture that subject within the context of the environment rather than going for the same ol’ shots. Certainly as you travel and visit recognizable locations and subjects, you should capture the shots we are accustomed to seeing – but moving a step beyond and ensuring your photos are telling the story of that subject’s place in it’s environment makes for a much more informative and lasting image. Taking the time to explore a bit and focus on wide shots where the bears are present but not necessarily the focus, or finding details of the bear’s impact on the environment without showing them directly will not only immerse your audience in the location, it will inform and inspire other shots you choose to take.
Gavriel Jecan has traveled to this location with me many times, and he’ll be leading a trip here in July – sign up today! I’m leading a couple trips here as well, but they are sold out. If you’re interested, feel free to join the wait list in case we have any cancellations.
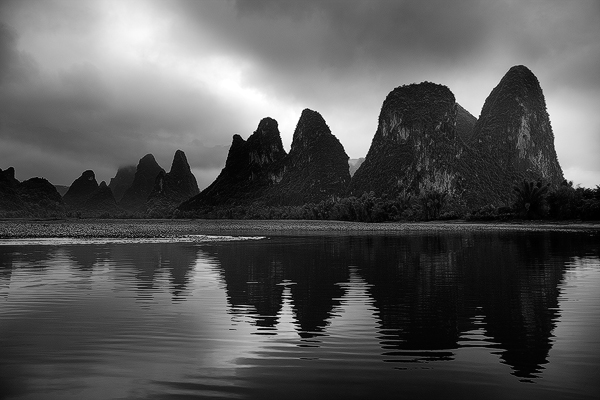
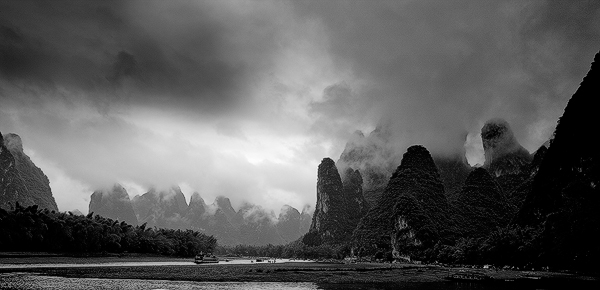
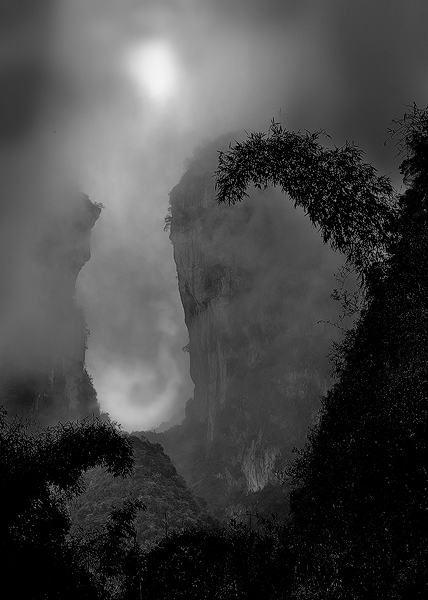
Never discount the ability to create effective photographs during a rainy overcast day!
On my last day in Yang Shao, China we were hit with some pretty bad weather. Instead of staying in the hotel, I traveled to a view point along the Li River to shoot some limited edition, fine art black and white images. I knew from experience that images taken on a day like this could yield dreamy photos with just a basic amount of dodging and burning once converted from a color capture.
My workflow for these images was fairly simple. I created a virtual copy in Lightroom, desaturated the image by dragging the Saturation Slider to 0 and then using the Brush Tool to selectively dodge and burn areas of the sky to make the clouds pop. Then, Jay Goodrich, my co-leader on this trip, opened the images in Photoshop and added an Auto Curves adjustment layer that, to my surprise, made the images just jump off of the page. When I have more time than I do on location, I will further refine the black & white image by using NIK Software’s Silver Efex Pro 2 software. This will allow me to really fine-tune the image.
I am always amazed at how many ways there are to process an image to get the results that I am looking for in my pursuit of creativity.
I am pleased to announce that beginning in January of 2018, I’ll be providing Portfolio Reviews to those interested in having me take a look at your photography work and provide constructive feedback! Among the many requests we’ve had, reviews come up most often – and given that the critique process has long been a part of our workshops that I look forward to, it only made sense to offer this service.
As you may know, I approach photography from the perspective of having had classic arts training, graduating with a bachelor’s degree in fine arts and art education from the University of Washington in 1975. Receiving and participating in the critique process with peers and instructors was an invaluable asset for my development as an artist, and the art of photography is no different.
We hope to accommodate anyone interested in having their work reviewed by offering a trio of packages and perks:
FOCUS:
5 images reviewed
MP3 Recording of my critique of your work
10% off any future Photography As Art seminar
CAPTURE:
12 images reviewed
MP3 Recording of my critique of your work
20% off any future Photography As Art seminar
Free Book – “The Art of the Photograph”
PRESENT:
15 images reviewed
LIVE Skype conversation regarding your photographs
30% off any future Photography As Art seminar
Free Book – “Photographs From the Edge”
Check out the Portfolio Review page for more information. I look forward to seeing everyone’s work in 2018!
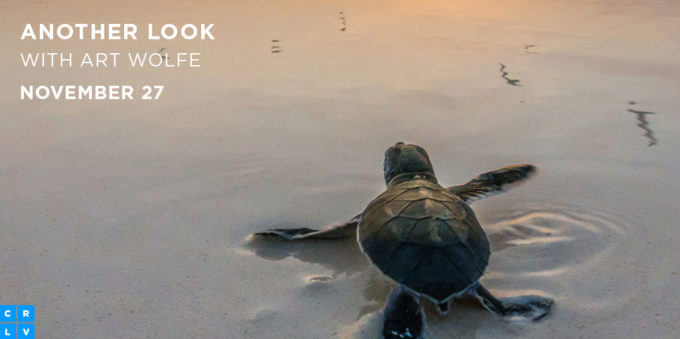
I am thrilled to announce that I’ll be teaming up with Creative Live once again to present another online seminar! This time around, I’ll be critiquing user-submitted nature photos and making post-processing adjustments to maximize the visual impact of each image. You’ll gain valuable insight into many of the techniques I put into practice utilizing the adjustments that shooting RAW provides.
The free live broadcast will be on Monday, November 27th from 9 AM to 12 PM, PST. If you can’t make that date and time, you can purchase the seminar for a limited time discounted price – so head on over to Creative Live and sign yourself up. You can also submit your own wildlife, landscape, abstract nature, or travel images that could possibly be selected to be part of the broadcast!
This presentation comes on the heels of announcing that beginning in 2018, I’ll be providing my own critiques through my website. We already have several people on the list to be notified when the purchase and submission process is live – get yourself signed up today! Details will be coming in the next couple of weeks.
Every successful image is comprised of several key elements that define its character: exposure, the balance and movement of the composition, the interplay of tone and color. Focal point and depth of field are critical components as well.
Picking a focal point and highlighting it with shallow depth of field makes the subject “pop“,but one risks over-revealing. Sometime the eye has nothing to do except dwell on the primary subject. Watch people in a gallery. They pass by an over-simple image in moments while an interesting composition engages them for a while.
I usually prefer to draw the eye across the frame, placing the focal point deeper in the composition. The focal point could be a strong design element, but nothing attracts the eye like brightness or a splash of vivid color.
When I construct a composition, something in the scene catches my attention. I immediately try to distill the image to its essentials, looking for anything that gets in the way of the design elements that attracted me in the first place. I feel my way toward the final composition. I don’t actually photograph each step of the journey, but I did here to illustrate the process.
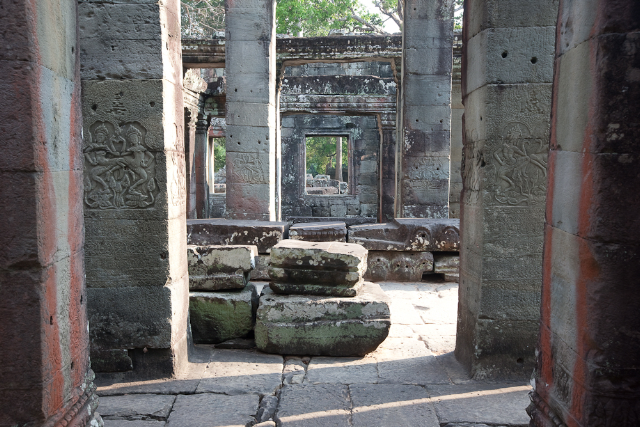
I shot this series in the ruins of a temple near Angkor Wat in Cambodia. In the first image (above) we see some strong vertical lines, but nothing grabs the eye. The bits of white sky are distracting; it is almost monochromatic, which is not a virtue with this composition.
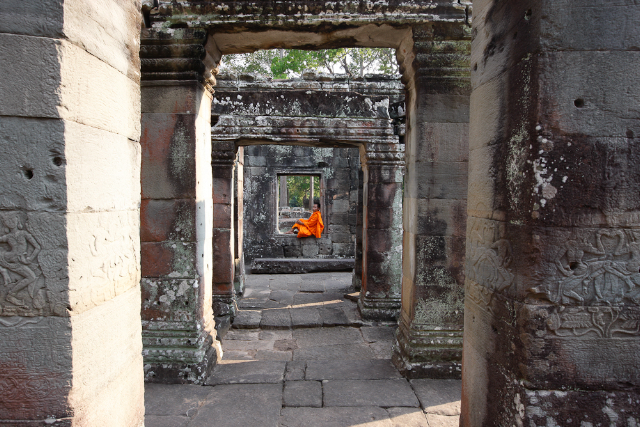
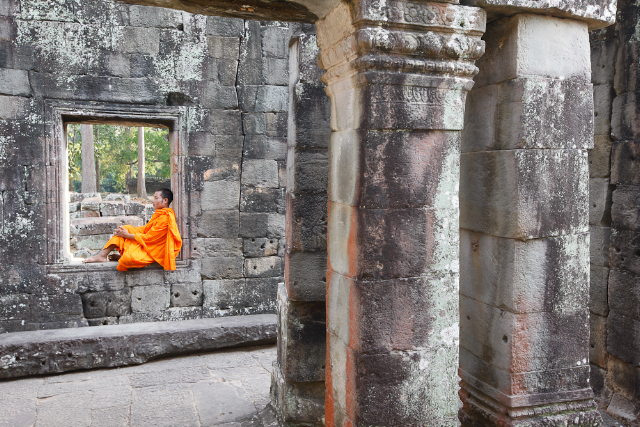
In the second image we see a Buddhist monk in orange robes in the distance. We now have our point of interest, but it’s overwhelmed by the temple, and the bright sky continues to move the eye away from the real subjects.
When in doubt, get closer. I moved in a little closer and zoomed to crop out sky above the doorway into the right. At the same time the sun on the floor is almost removed. Our monk is now a little larger, but there are still too many distractions from the main composition in the form of the remaining sky and foreground.
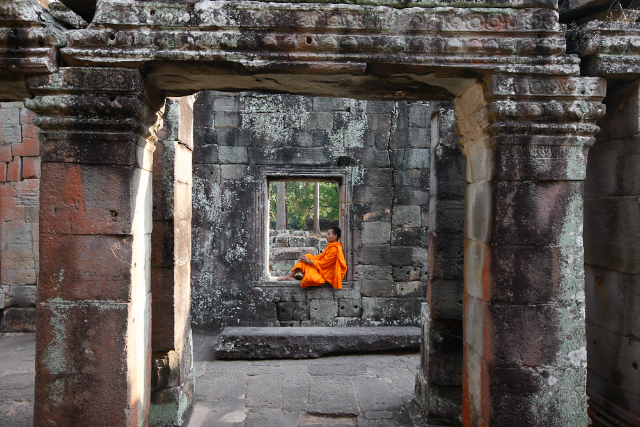
This time I got a lot tighter, driving extraneous elements out of the frame. (Cambodia4). The sky and bright triangle of light on the floor have been removed and there’s no question that the monk is the center of interest. However, the composition has become too symmetrical, too static for my taste. This is an acceptable image that I want to push a little farther.
This photograph is well-balanced, and all those bothersome highlights are gone. The eye jumps to the monk but then there is more to see in the forms of the pillars. The monk is looking out of the frame, which is a minor issue that I could tolerate.
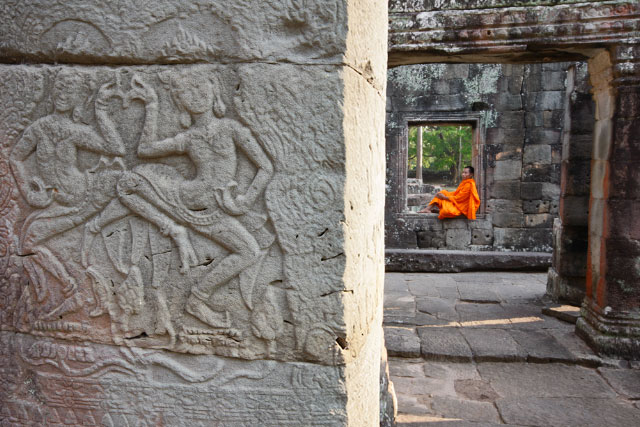
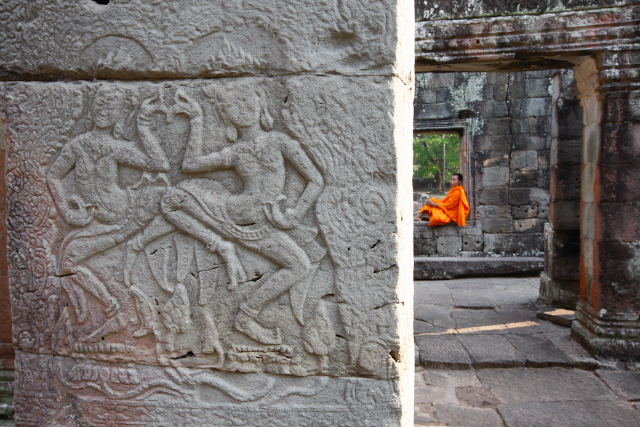
These final two images last two images work the best for me. They have strong graphic elements and can be read a number of ways. Although the monk still draws the eye, the bias relief of the dancing apsara (supernatural women, the wives of Indra’s court servants) is the first thing to draw the eye. Then, the bright orange forces your attention across the frame. Ordinarily, the bright vertical strip of sun lit sandstone would bother me, but in this case it seems like a border between the past and present and accentuates the verticals of the temple’s pillars. The monk seems a little crowded in the first photograph so I gave him a little more room in the final image.
The Eagle Hunters of western Mongolia are a proud and hearty people that have an immense sense of culture. They also practice a particular form of falconry in which they hunt with eagles. My goals for photographing them within the context of their environment were three-fold: convey the expansive landscape of the region, feature the power of the eagle, and highlight the traditional dress that is ever fading in the historical cultures of the world today.
1.) This first photo establishes where are, and our starting point. A pair of eagle hunters traverse the open landscape bordering western Mongolia and Kazakhstan with their avian assistant with horse in tow. While it does show the landscape, there is little drama and the other goals are not present.
2.) Here you can see I move in close to my subjects; I’m using a 16-35 wide angle lens which allows me to keep the three subjects in prominence while also capturing a dramatic background. The lighting looks a bit flat in this shot, but up close I am able to find better results. We keep the horse out of the shot – we don’t want competition for our focus – the men and their eagle.
3.) In my third image, which is at a right angle to the direction of the sun, I have attached a polarizer to my wide angle. You can see how much more dramatic the light appears. This image also highlights the problems of working with dramatic light – very harsh shadows were cast every time the eagle moved its wings.
4.) The wing of the eagle is now down, but the man that’s controlling the eagle is casting a shadow on his assistant. As my goal is to bring this culture into the light and share it, it’s not an ideal result to have half of my subjects in shadow.
5.) I decided to get lower and shoot upwards to bring in some of the openness of the sky in hopes of creating more of a story than in the previous shots. Always keep experimenting within your photographic goals!
6.) The result is that I don’t have nearly the problems of the previous images with the shadows. This is a very satisfying image to me and meets the goals I set for myself in terms of capturing the men, animal, and landscape. This is where some may stop, thinking they’ve captured the shot they are looking for. In an effort to see what else is achievable, I begin working the scene a bit more.
7.) I’m standing at eye level again with the hunters, but the problem with this shot is that the man closet to me is staring straight at me. I like to maintain anonymity when I am taking pictures, and would prefer that the subject is not staring straight into my camera.
8.) I ask him to look straight ahead, but now with movement of doing so, it’s the eagle mugging for the camera. This isn’t necessarily a bad composition, but I would prefer the eagle in a different position.
9.) I move a little bit further around and discover I love the way the light is falling across the main eagle hunter and his beautiful fox fur hat. However, as you can see, I have moved in too close to get all three subjects in the frame.
10.) I decide to back off a little bit, and now I am getting what I am looking for. I love the fact that the man in the middle is kind of looking my way without staring straight into the camera, the assistant is looking off to his left, and the eagle is conversely looking off in the opposite direction. There is a nice balance to this image, with no shadows on their faces. In addition, the eagle has nice light on his eye. This to me is a winner.
11.) I also like this last photo because it has a nice sense to it; the eagle is looking further opposite now, and is even more absorbed in what is going on in the landscape, rather than in what the photographer is busy trying to achieve. Both of these final two images are very strong photos for me, and I am very happy with the results.
A good balance of compositon, dramatic light, openness of the land, traditional wardrobes – it all comes together in a very nice way in these last two images!
Hot on the heels of my Greenland trip and the heavy focus on ice, it seemed like an appropriate time to revisit compositions utilizing icebergs, though in Antarctica for this particular shoot.
Icebergs and ice are an increasingly important topic in recent years, as climate change is becoming more of a resounding, everyday issue. On a recent trip to Antarctica I developed a personal project of capturing the ice in as artistic of a way as possible. During the day, cruise ship passengers disembarked in Zodiacs to go ashore and view penguins. I have photographed a lot of penguins, so my mission became the ice that was floating in the vicinity. On this particular trip I asked a Zodiac driver to take me over to a distant iceberg that I could see towering over all of the other icebergs. It looked almost like a cathedral, standing out there over a 150 feet above its surrounding neighbors.
This first image shows the dramatic angle of the pinnacle of ice as it’s surrounded by smaller icebergs. As usual I circled my subject and look at it from all angles before settling on an image.
As we travel around the iceberg it takes on a slightly different shape. This new vantage point allows me to incorporate more of the surrounding icebergs in the foreground.
Here I am able to incorporate a foreground “bergie bit” (little piece of iceberg) that is found floating around its larger cousins. I am using a 16-35mm wide angle zoom lens and a polarizer to compose this image. My main objective is to balance the foreground ice with the iceberg in the distance.
I put on my 70-200mm zoom and circled back around to the location where I captured my initial composition in image 1. I chose to shoot a vertical to emphasize the vertical sweep of this dramatic iceberg.
I noticed a distant iceberg with an arch and directed the Zodiac to it. As we headed over to it I put my wide angle zoom back on. I circled this iceberg looking for a point of view in which to include with my initial perspective.
This composition reveals the first iceberg in a very beautiful way. I also love the way the green arch surrounds the distant blue icebergs, and how the wide angle gives the image a nice perspective by incorporating some of the blue green ice just below the surface.
I decided to go back to my 70-200 to try to pull in that distant iceberg. This lens allowed me to compress the scene while still keeping the strong foreground element of the arched iceberg in my composition. However, because I am further away now, you can see the blue sky above the arched iceberg. I have lost the drama that I had with the last image.
I zoomed in to try and eliminate the sky from the previous shot,but in doing so I have lost the top of the distant iceberg.
This is my favorite image in the series. It conveys the drama of the arch, it frames the iceberg in the distance perfectly, and it has a nice sense of color with the blues and greens.
The result is 3 or 4 distinctly different compositions of the same iceberg, which demonstrates how perseverance and a change of perspective can yield a stronger set of images.
These unique perspectives are the kinds of things I’m always looking for in any location I visit. To learn more, check out my workshops page and explore them yourself! We have a couple exciting events coming up – join me next week in my home state of Washington and photograph the lush Olympic forest at the Lake Quinault Photography Retreat, and in November I will be leading a photography workshop to explore Hawaii from new and exciting perspectives. See you there!
Sometimes you may need to shoot a moving subject in lighting that isn’t ideal. Add in a longer lens and extension tubes to create the composition you want, and you may need to add a flash to capture effective detail. Shot on location in Manu National Park, Peru.
When shooting in harsh conditions, it’s important to keep your equipment protected. Avoid exposing your camera’s image sensor to dirt and the elements by avoiding changing lenses in the field when conditions may be problematic. Having multiple camera bodies with a range of lenses attached keeps the sensor from being exposed, with the added benefit of allowing for quickly capturing different looks for your images by simply grabbing your second camera.
As you know, I am all about capturing a unique and compelling image regardless of your equipment. However, if you’re going to invest in the time to travel and photograph amazing places it pays to be prepared. If you’re looking into a second camera body, consider checking out some of the used equipment on the B&H website or your local camera stores. Be sure to pick something up that’s compatible with your current lenses. Although the latest and greatest cameras offer some spectacular features, finding a backup camera body in a range that fits your budget will ensure you never miss a shot!
Don’t forget that you can also rent camera bodies and lenses as well! Your local camera shops may rent equipment, and there are websites like borrowlenses.com that will ship rentals to you. This can be a great way to try before you buy, or simply ensure you have the best gear available if you’ve already invested money into traveling and participating in photo workshops.