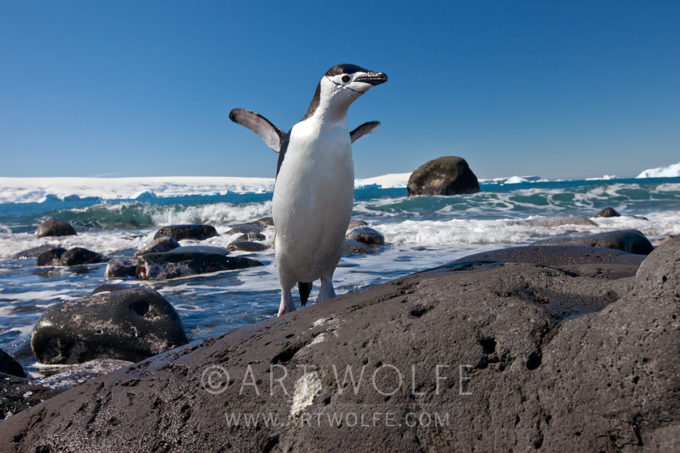
Happy Technique Tuesday – I shot this one down on South Georgie Island a while back, but good design is good design! Technology and style may change – what captures the eye does not! Staying on the topic of learning and teaching, stay tuned over the course of the next week or so to my social media and the blog, some exciting announcements about my new streaming lecture series, Pathways to Creativity are coming soon!
Here in Seattle, the days are getting brighter and longer so I figured I would share a quick tip on maximizing that bright, direct light that can be difficult to deal with – but can in fact be turned to your advantage. Enjoy, get out of the house if you can, but by all means stay safe!
Happy technique Tuesday! Hopefully everyone is healthy and using their time to practice their photography at home. While I’m currently working on my Pathways to Creativity series of lectures, I figured it couldn’t hurt to give some tips for those of you looking to pass the time.
Photographers of all levels know just how useful a tripod can be. Myself and others have touted the necessity of choosing a good brand and not skimping on a cheap one. That being said, sometimes you need to ditch that thing. While the stability a tripod offers is essential for many shots, it’s not always the most maneuverable tool to use.
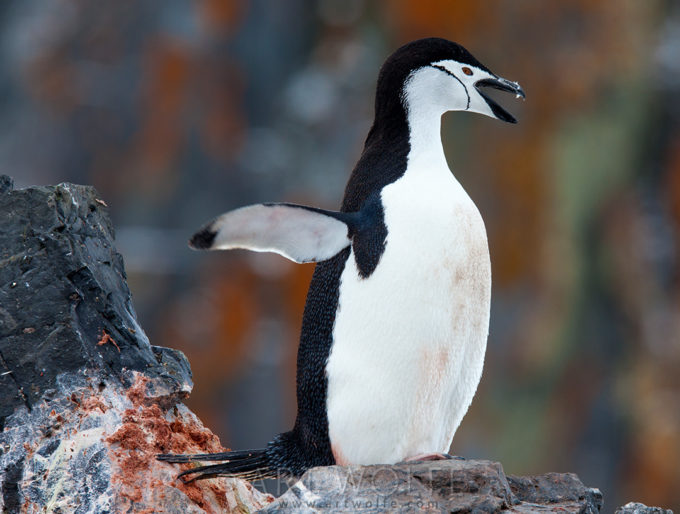
In this video, I illustrate that by losing the tripod and getting down low, I can capture these chinstrap penguins in such a way that enough background is included and in focus to give true context to their environment. This is an angle and perspective I wouldn’t have been able to achieve without the spontaneity and maneuverability gained by freeing myself from the tripod.
Use your body, the ground, and objects around you to stabilize your shot – don’t forget, any three points of contact, not just tripod legs, will make for a steady shot. Now, unless you’re super lucky, you don’t have penguins in your back yard – that’s okay! Get down low and photograph your familiar surroundings from a whole new perspective.
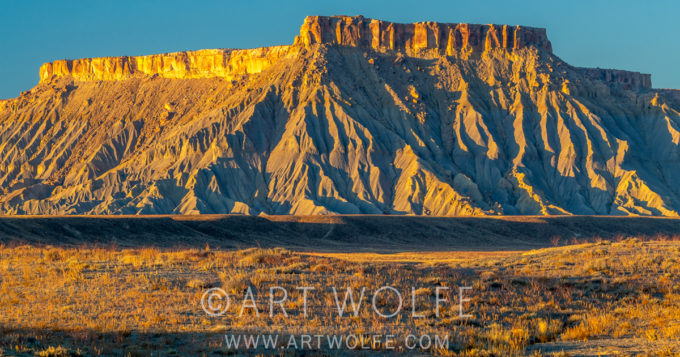
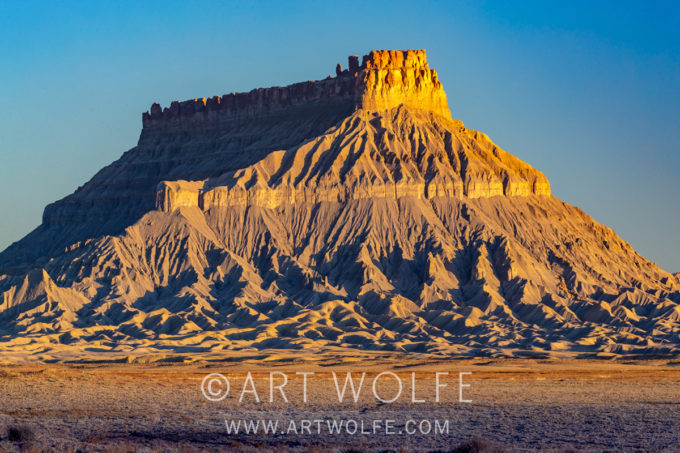
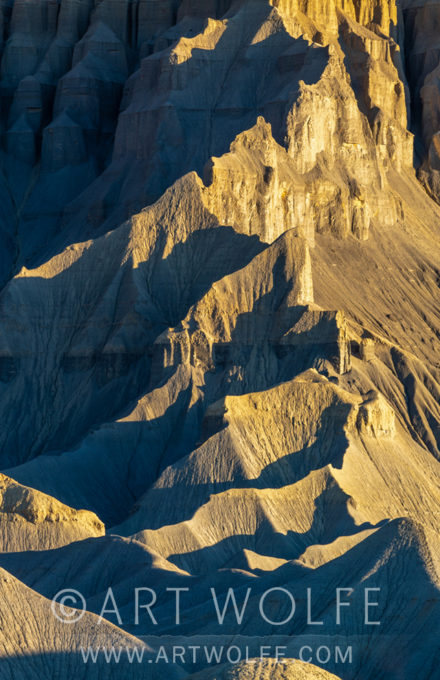
I spent some time in Utah this past November, and was struck by the colors of the directional light and shadow on the rugged buttes looming over the landscape.
Artists of the Renaissance period would work on a medium-toned colored paper and used light and dark paints, inks, and other materials to build depth within the image, adding form and dimension along the way. The term “chiaroscuro” has come to define images in which there is a strong contrast between light and dark areas that help inform the shape and form of a subject.
Renaissance artists often painted by candlelight, which provided it’s own harsh directional lighting. With photography we are painting in our own way with natural light we’ve been gifted, or our own artificial setups.Obviously it helps to have strong directional light when the sun is low on the horizon, but still high enough to illuminate your subject.
Capturing brown bears in Katmai, Alaska! Though specific to this location in the video, this is a lesson and focus I employ regardless of my subject – to capture that subject within the context of the environment rather than going for the same ol’ shots. Certainly as you travel and visit recognizable locations and subjects, you should capture the shots we are accustomed to seeing – but moving a step beyond and ensuring your photos are telling the story of that subject’s place in it’s environment makes for a much more informative and lasting image. Taking the time to explore a bit and focus on wide shots where the bears are present but not necessarily the focus, or finding details of the bear’s impact on the environment without showing them directly will not only immerse your audience in the location, it will inform and inspire other shots you choose to take.
Gavriel Jecan has traveled to this location with me many times, and he’ll be leading a trip here in July – sign up today! I’m leading a couple trips here as well, but they are sold out. If you’re interested, feel free to join the wait list in case we have any cancellations.
Sometimes you may need to shoot a moving subject in lighting that isn’t ideal. Add in a longer lens and extension tubes to create the composition you want, and you may need to add a flash to capture effective detail. Shot on location in Manu National Park, Peru.
When shooting in harsh conditions, it’s important to keep your equipment protected. Avoid exposing your camera’s image sensor to dirt and the elements by avoiding changing lenses in the field when conditions may be problematic. Having multiple camera bodies with a range of lenses attached keeps the sensor from being exposed, with the added benefit of allowing for quickly capturing different looks for your images by simply grabbing your second camera.
As you know, I am all about capturing a unique and compelling image regardless of your equipment. However, if you’re going to invest in the time to travel and photograph amazing places it pays to be prepared. If you’re looking into a second camera body, consider checking out some of the used equipment on the B&H website or your local camera stores. Be sure to pick something up that’s compatible with your current lenses. Although the latest and greatest cameras offer some spectacular features, finding a backup camera body in a range that fits your budget will ensure you never miss a shot!
Don’t forget that you can also rent camera bodies and lenses as well! Your local camera shops may rent equipment, and there are websites like borrowlenses.com that will ship rentals to you. This can be a great way to try before you buy, or simply ensure you have the best gear available if you’ve already invested money into traveling and participating in photo workshops.
When lining up a background for a subject, make sure to give it a clean background to create a more graphic image. In this example I am trying to shoot a Chinstrap penguin in Antarctica where the snowy backdrop isn’t working to make the white belly of my subject pop.
In this video shot on location in New Zealand, Art discusses the equipment used to compliment ideal overcast lighting to take photos in a forest of trees, moss, and lichens. The overcast lighting provides the perfect opportunity to capture the many layered textures of the forest without the distracting shadows and highlights of sunny direct lighting that can often hide or blow out the fine details.
Along with the overcast lighting, a longer lens to focus on areas of interest, and a shutter release with tripod to minimize movement, Art is able to capture the immense detail of the thick verdant forest.
Many people believe that great photographic images are composed in a flash of inspiration; an epiphany that presents itself fully-formed, ready to be mined by the artist there to capture it. This can and does happen, yet most of the time we fumbled towards a great shot, refining the composition with each exposure.
Such is the case with one of my favorite images, featured in this video. For Technique Tuesday, hear me pull back the layers of the many elements I navigated through to get the final shot.