I spent some time down in South America recently, a trip that was initially conceived to photograph the solar eclipse in Chile but also turned into a fantastic opportunity to photograph birds and other wildlife in Ecuador with a focus on capturing tiny, agile hummingbirds.
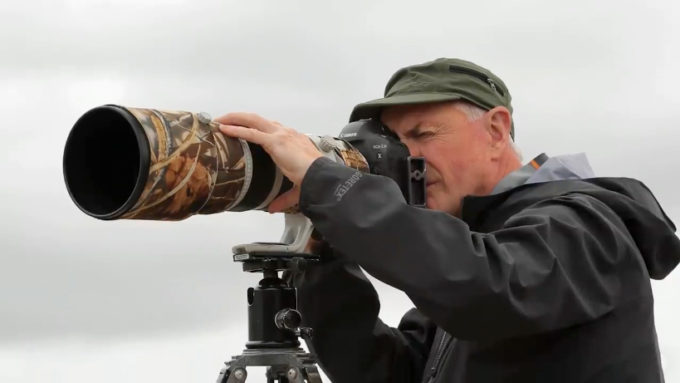
There are numerous sources online you can go to to find technical information on shooting slight and/or speedy subjects such as these, so I won’t bore you with technical specs except to say that my photos were captured with a Canon 5D Mark IV, a 100-400 lens, and a shutter speed of 1/160th of a second. Instead, I’d like to focus on my approach to capturing these and other animals that can be hard to get a handle on.
There were two things I didn’t want to end up doing in this situation – chasing elusive birds around with my lens all day long, or firing off a bunch of shots in hopes of coming away with something good after spending hours and hours editing and cropping photos.
Instead, I took the approach of spending plenty of time observing these creatures long before I attempted to take any shots. I recognized patterns in their behavior and how they interacted with their surroundings and each other. This allowed me to anticipate their movements and come away with more focused and intentional shots rather than just releasing the shutter and hoping for the best. Instead of chasing, I let them enter the frame and do the work for me. In the end, I came away with shots I’m happy with, and didn’t have to sort through too many duds to get there.
Currently, I’m in Chile viewing the total solar eclipse visible from South America, and it makes me hark back to when I traveled to South Australia back in December 2002 to photograph a total eclipse there. At the time, I was photographing landscapes for my book Edge of the Earth, Corner of the Sky and I thought this would be an amazing opportunity. I’d seen many technically excellent photographs of total eclipses over the years, but quite honestly they all looked pretty much alike. My objective became capturing the eclipse in relation to the Earth.
The solar eclipse that occurred on December 4, 2002, was noteworthy when viewed in South Australia for a couple of reasons. First, the eclipse was unusually brief at 25 seconds. Also, it occurred less than 40 minutes before sunset, so the likelihood of an obscured view was greatly increased because clouds generally stack up along the horizon at that time of day. To maximize my chance of success, I decided to find the precise position from which to film the eclipse by experimenting exactly 24 hours before the eclipse. I also decided to try two cameras for two very different perspectives, so I used both a wide-angle and a 70–200mm lens, enabling me to take full advantage of the eclipse’s late hour by incorporating the landscape.
Most eclipses occur earlier in the day when the sun is much higher in the sky. For this book, I wanted to establish the connection of the eclipse with the Earth. I wanted the viewer to witness the eclipse as if they were standing there next to me under the gum trees. Since I could not determine exposure until totality began, I decided to use matrix metering on an automatic aperture priority setting. When totality began, I would simply engage the shutter using locking cable releases, hoping that the entire roll of film would run continuously through the camera. This would have happened had I not made one final decision: to auto-bracket my exposures. I discovered, too late, that the camera would not continuously advance while on the auto-bracket setting. After just three exposures, both cameras stopped advancing. By the time I figured out what was happening, totality ended. Fortunately, I did get proper exposures for both compositions. After the critical moment of the full eclipse, I continued to photograph as the eclipse continued, switching to other lenses and film.
To create these images I used two Canon cameras, an EOS-1N and an EOS-1N/RS, EF70-200mm and EF 16-35mm lenses, Fujichrome Provia 400 film, and a Gitzo tripods. For the images of the setting eclipse on the horizon, I used an EF500mm IS lens and Fujichrome Velvia film.
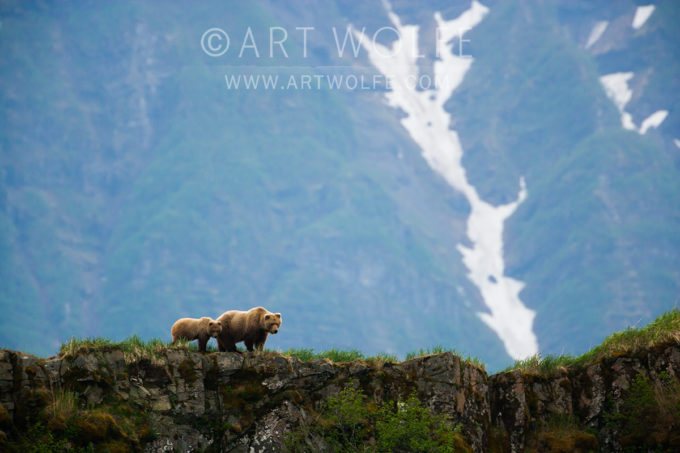
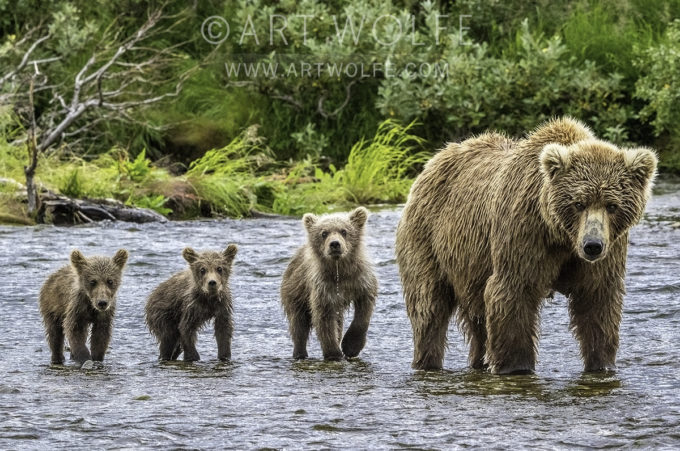
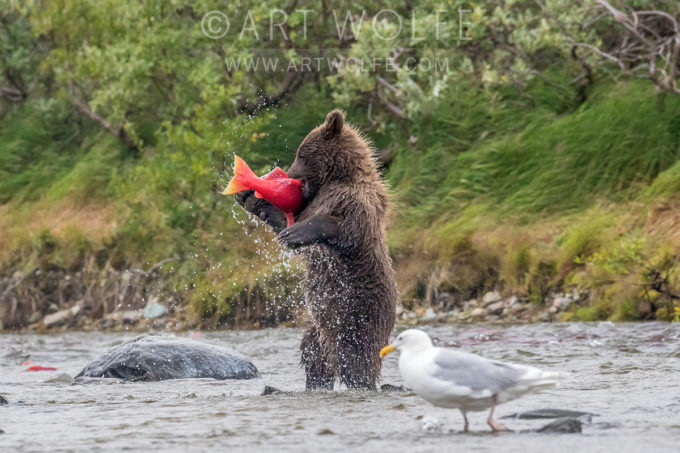
Time for a little wilderness and wildlife advocacy. Alaska’s Bristol Bay needs our help. It is home to the world’s largest, most productive salmon run and it is threatened by the advancement of the Pebble Mine. The Pebble Mine would be a massive open pit mine that would leach into the ecosystem of one the most productive wildlife regions on the planet. I have been photographing in the region, which includes Katmai National Park and the famous McNeil River Bear Sanctuary, since the early 1980s, and understand first hand what this massive extraction project would do to the wildlife, the fishery, as well as the thriving, sustainable wildlife viewing industry.
Click here for a brief interview I did on the subject.
Brown bears associated with the Project area are a resource that has high ecological, economic, and social value. Southwest Alaska residents and visitors were estimated to spend nearly $145,000,000 (2019 dollars) annually to view wildlife and generated more than an additional $133,000,000 in associated annual economic activity. Much of the wildlife viewing activity in southwest Alaska is centered on observing brown bears. For more information, this study drills down on the economics involved in brown bear viewing ins South-central Alaska.
Watch:
I strongly urge you to take 20 minutes and watch Koktuli Wild, a video by Brendan Wells which perfectly illustrates the fragile beauty of the wilderness that feeds the potent Bristol Bay watershed. It is uplifting, beautiful, informative, and most importantly galvanizing. Even if you never see it with your own eyes, just knowing this this wilderness exists is affecting.
UPDATE: 6/29/2019 – The U.S. House of Representatives passed amendment 90, being called the “Huffman Amendment,” to the Energy and Water Appropriations Act. However, this is only the begging and Alaskans have called upon Senator Murkowski to to stand with Alaskans in opposing the Pebble mine.
UPDATE: 7/31/2020 – Following an Army Corps of Engineers Environmental Impact Study, which organizations like the NRDC have labelled as inadequate and flawed, the house has once again voted to suspend any funds for issuing a permit to the mining operation – the battle continues!
It’s Technique Tuesday, and since the last little tip I shared was a very technical tutorial on creating panoramas in Photoshop and Lightroom, I figured we would go back to the basics with a more universal message that I think will help new photographers and those who may be struggling themselves with tunnel vision alike. With a recently added Abstract Astoria workshop happening soon, and my Photography As Art seminar happening in Seattle this fall, these are some basics I will find myself repeating!
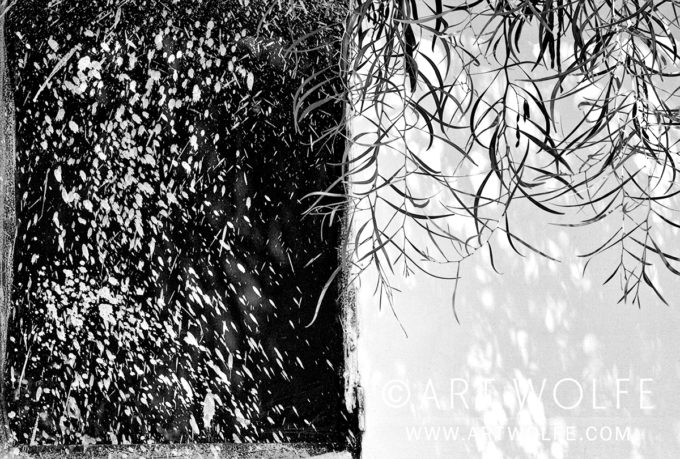
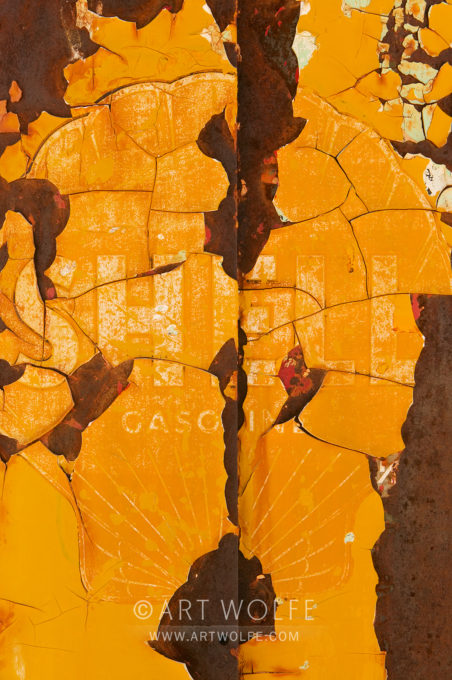
What are you seeing as you photograph? How do you perceive the world and what’s important to you? This is something that goes much deeper than thinking about getting the latest camera with the most megapixels. Good shots come from cultivating the eye. Scrutinize every subject without prejudice. A good photo can be found in rusting debris lying in an alley of a big city or out in a pristine environment. Finding images everywhere is how you practice, how you improve your work. It’s about the subject only in how you frame it, and in the message you send with the photo.
Do you shoot any possible subject, whether a rusting can in a gutter, a grand ceremony in a foreign land, or birds on a beach? Or do you define yourself as a “bird photographer” or a “landscape photographer”? Try not to limit your subjects or how you define yourself as a photographer. Photographing without prejudice opens up the world! You can’t even walk into a grocery store without finding a viable subject. And along the way, you gain practice that cultivates your eye.
Practice Matters
You might think that composition comes naturally for professionals like us. Naturally, perhaps, after many years of doing it! There is no question that if you are to succeed as a photographer, you have to take a lot of pictures. This is sometimes frustrating for people who have invested a lot of money in the latest gear and want instant results since you have to take a lot of both good and bad photographs to get better.
There is an old joke about a visitor to New York City trying to get to a concert at Carnegie Hall. After getting a little lost, he saw a man walking down the street with a large cello case. He stopped the musician and asked, “How do you get to Carnegie Hall?”
The musician looked sternly at the visitor and said, “Practice, practice, practice.”
A concert pianist rarely gets up on stage and gives a bad performance, but only because he or she has had years of practice. That isn’t to say that you can’t get good pictures at whatever stage you are in, but it does point out how important it is to get out and take lots of pictures. Practice does matter.
The Subject, or the Photograph?
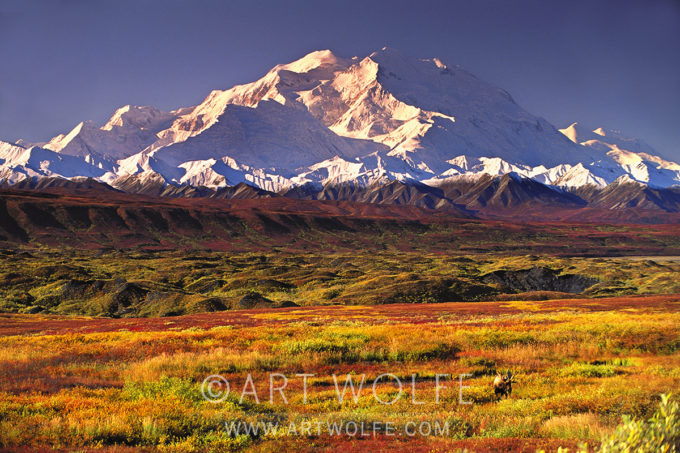
One thing that can hold photographers back from finding great images is that they focus too hard on finding the “perfect” subject. Whenever possible, try to avoid “trophy hunting” for subjects. That means going out and trying to find the same subjects that photographers like Art Wolfe shot, or going to major locations and photographing only the big, iconic subjects. Think about that. You can buy postcards of those big, iconic subjects that were shot under ideal conditions. When you start looking for subjects simply as trophies to be captured, you stop looking for the photograph.
If you simply look for subject matter, you’ll often be disappointed because the camera is not looking for subject matter. The camera doesn’t care what your subject is! The camera is simply looking at light and shadow and how to translate that into pixels. It is your job as a photographer to work with your camera to find interesting photographs, not simply capture a subject.
Looking at the art world outside of photography can be instructive. Painters have to figure out what the whole image is going to be, not simply the subject. They have to interpret a scene in a certain way on their canvas, rather than simply pointing a camera at a subject and pressing a button. Seeing through that “lens” can help you navigate the challenge of finding original compositions in the world you walk through every day.
In this book there are very few photographs of the big, iconic subjects that so many others shoot. Art looks for and finds subject matter that is going to translate into interesting photographs that appeal to him. He responds to the world around him as a place filled with photographic possibilities because he is not simply looking for an interesting subject. He is always looking for interesting photographs.
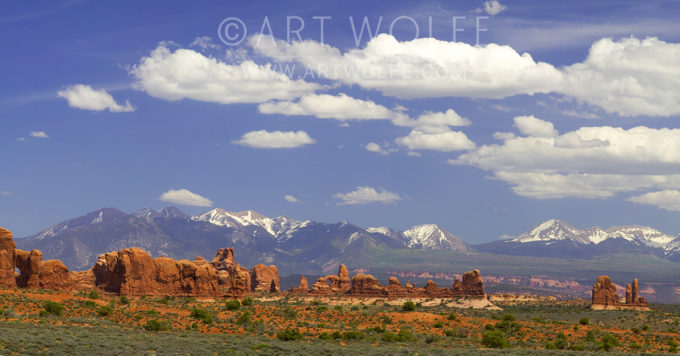
A topic that came up recently was just how easy it is nowadays to quickly create seamless panoramic images from stitched photos using Adobe Photoshop and Lightroom. It’s a simple process in either program, so if it’s something you haven’t tried or are just looking for a refresher on how to merge photos – this post is for you!
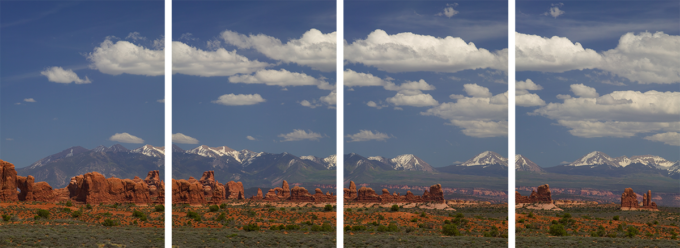
The first thing you want to do of course is choose the images you’d like to create a panoramic from. The photos should overlap just a bit, as the colors of the pixels are how the software will determine where to stitch the images together. Make sure you photograph your panoramas in portrait format to get the most amount of pixel real-estate for the highest resolution final image!
Once you’ve made your selection of images, you’ll then need to choose between using Photoshop or Lightroom to merge them together. The base Adobe Creative Cloud subscription includes both, so it’s really a matter of your familiarity with one or the other.
Both processes are simple enough. I’d say if you’re looking for quick and easy results the Lightroom method is a good starting point, but if you want a little more control the Photoshop method offers a little more. Better yet, give both a shot to see what you prefer!
In Lightroom:
1.) Import the images you wish to merge together
2.) From the top menu, choose the “Photo” drop-down and find the “Photo Merge > Panorama” Option
3.) In the Panorama Merge Dialogue box, ensure “Spherical” is selected for the
projection. You can also choose “Auto Crop” to automatically crop away the
transparent edges. Finally, ensure “Auto Settings” is checked.
4.) Click “Merge” and your panorama will be created!
In Photoshop:
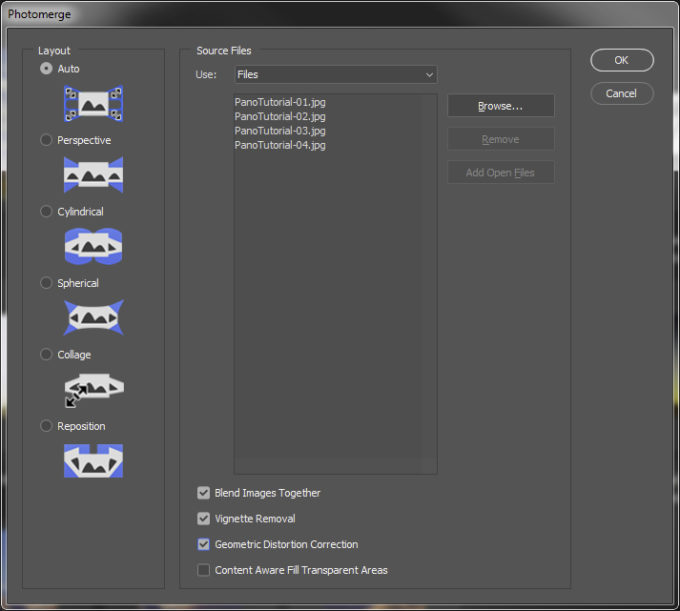
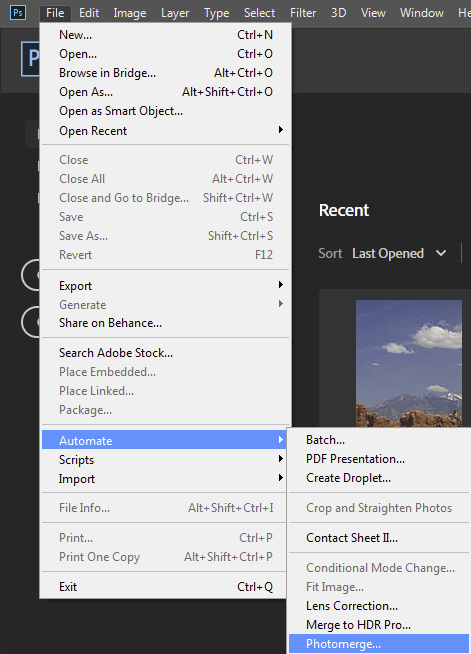
1.) From the “File” menu, choose “Automate” and then “Photomerge“. 2.) In the Photomerge dialogue box, ensure “Auto” is checked under “Layout“.
In the “Source Files” box, be sure “Use:” is set to “Files” and hit the
“Browse. . .” button.
Choose the files you wish to stitch together. In this case we will use four
PanoTutorial.jpg images in the Pano Tutorial Images folder.
Be sure that “Blend Images Together”, “Vignette Removal”, and “Geometric
Distortion Correction” are all checked.
You can also choose to check “Content Aware Fill Transparent Areas”, but this
will add to processing time and attempt to fill in edges with content sampled from
the image, which may require more advanced Photoshop experience to ensure
there aren’t repeated elements in your image.
3.) Click “Ok” and the Process will begin. Depending on the size of the images being
merged, it could take several minutes to process the images.
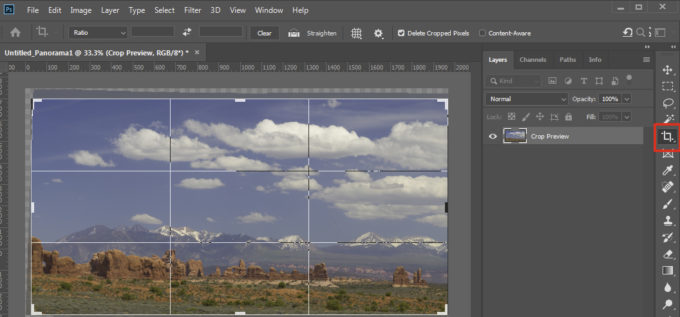
4.) Once the image has processed, from the top menu, choose the “Layer” drop down and
choose “Flatten Image“.
5.) Using the crop tool (highlighted in red below) crop the image to get rid of transparent
areas, and also use the rotate ability of the tool to ensure your horizon is straight.
Those are the basics – There are obviously a lot of other options in those dialogue boxes. . . I suggest experimenting to see what different settings do to come up with a process that works for you!
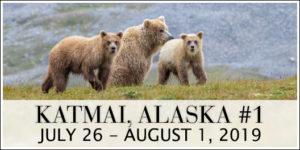
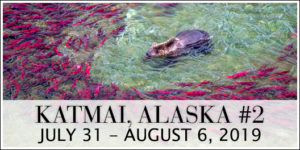
It’s May, and the sun is out here in the Pacific Northwest. Have you thought of what you want to do in July and August? Consider joining me in Alaska’s Katmai National Park to photograph bears. Scary? No. Exhilarating? Indeed! These are the last Katmai trips I am offering until 2021 so if you have been sitting on the fence, it’s time to jump off and sign on. None of us are getting any younger!
Just two spots are left on my Romania tour with native son Gavriel Jecan, and two spots just opened up on the Antarctica Fly/Cruise in February. Sign up today to ensure your spot in these trips before they fill up!
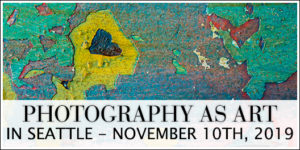
Happy #WorkshopWednesday! I’ll be presenting my acclaimed full-day seminar Photography As Arthere in my home city of Seattle this November, and time is running out to enjoy an early bird special discount. Sign up before May 1st and save!
This seminar is designed to completely change the way you view photography, and my intent is to inspire you to bring unique artistic visions to life using your camera as both brush and canvas. With an emphasis on the abstract, imaginary landscapes, and capturing metaphors the lessons learned here can be applied anywhere and with whatever equipment you have available – no globe-trotting or a plethora of fancy gear required.
Recently I collaborated with B&H Photo Video to share a few quick tips on shooting wildlife photos for World Wildlife Day.
Click here to check out the video, and don’t forget to visit my gear page which lists a lot of the equipment I use both in the field and to manage and edit my photos!
In just over a week, I’ll be in Boise, Idaho bringing my popular Photography As Artseminar to the City of Trees!
This seminar is designed to completely change the way you view photography, and my intent is to inspire you to bring unique artistic visions to life using your camera as both brush and canvas. With an emphasis on the abstract, imaginary landscapes, and capturing metaphors the lessons learned here can be applied anywhere and with whatever equipment you have available – no globe-trotting or a plethora of fancy gear required.
I recently took a trip up to Northern Canada to photograph a variety of owls, and came away happy – if not chilled to the bone. It’s cold up above the 51st parallel, no matter the time of day. That didn’t seem to impact the hunting owls of the region, who’s keen senses can detect rodents beneath the snowfall dozens of meters away. They essentially do a graceful face plant into the snow, rummage around, and come away with a snack.
The light sky and the bright white snowy landscape make shooting a challenge. To control the light and capture a quality image, one first has to understand light in terms of it’s relationship to photography. This excerpt from “Chapter 6: Reading the Light” from The New Art of Photographing Nature explains it more succinctly than I might in a blog ramble:
Without light we would have no color. And without light, there would be no photography. In fact, the word photography derives from Greek roots meaning “writing with light.”
Primitive man did not have the benefit of science to explain natural phenomena such as the rainbow. Nor did we, until Sir Isaac Newton’s use of the prism separated white light into its component colors. Light is a form of electromagnetic energy, which, in the whole spectrum of frequencies, is only visible as colors in a very narrow band. Other frequencies, such as infrared, ultraviolet, gamma, and X-ray radiation, are invisible to our eyes.
Yet, despite our basic understanding of light, it is something we are apt to take for granted, like the rising and setting of the sun. But in photography, we can never take light for granted, and must learn to perceive it many nuances. The quality of the light creates a variety of colors and moods. Light also models form, and the direction of light is crucial to how we perceive shape and depth in the landscape.
When talking about light, it is important to distinguish between quality and quantity. Quality of light can, for the outdoor photographer, mean the time of day, the angle of the light striking your subject or whether it creates high-contrast or low-contrast conditions. It can also be measured as color temperature (in degrees Kelvin) with daylight on a sunny day being around 5500 degrees Kelvin. While color film required filtration to correct for changes in color temperature, digital cameras have a built-in white balance function that can adjust the camera to virtually any lighting condition, indoors or out.
Quantity of light refers simply to the amount of light reaching the camera’s sensor and recording an image. It is by controlling this light, through changes in aperture and shutter speed, that we arrive at a proper exposure.


 Once you’ve made your selection of images, you’ll then need to choose between using Photoshop or Lightroom to merge them together. The base Adobe Creative Cloud subscription includes both, so it’s really a matter of your familiarity with one or the other.
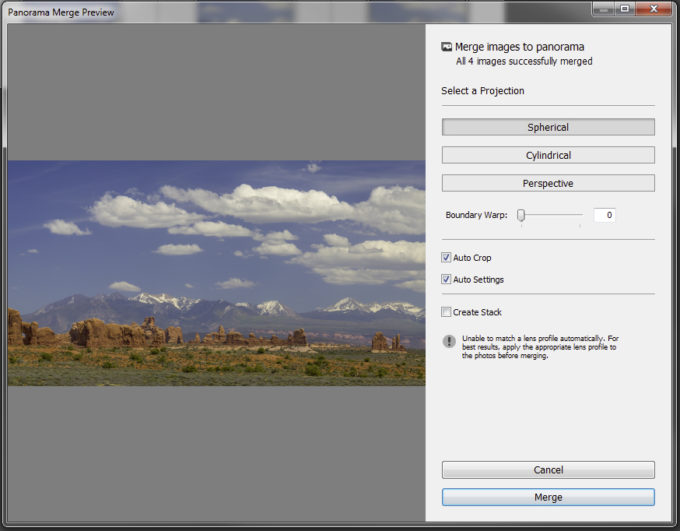
 2.) In the Photomerge dialogue box, ensure “Auto” is checked under “Layout“.