It’s that time again! Each year Pantone choose a “color of the year” that can help drive creative endeavors and design. Check out my image gallery celebrating this year’s color, “Classic Blue”. Here is some additional information on Pantone’s Color of the Year:
For over 20 years, Pantone’s Color of the Year has influenced product development and purchasing decisions in multiple industries, including fashion, home furnishings, and industrial design, as well as product packaging and graphic design.
A timeless and enduring blue hue, PANTONE 19-4052 Classic Blue is elegant in its simplicity. Suggestive of the sky at dusk, the reassuring qualities of the thought-provoking PANTONE 19-4052 Classic Blue highlight our desire for a dependable and stable foundation on which to build as we cross the threshold into a new era.
Imprinted in our psyches as a restful color, PANTONE 19-4052 Classic Blue brings a sense of peace and tranquility to the human spirit, offering refuge. Aiding concentration and bringing laser like clarity, PANTONE 19-4052 Classic Blue re-centers our thoughts. A reflective blue tone, Classic Blue fosters resilience.
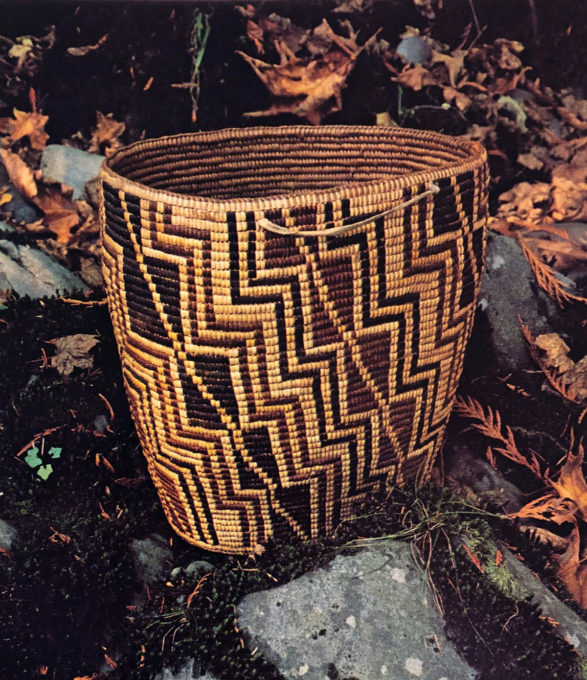
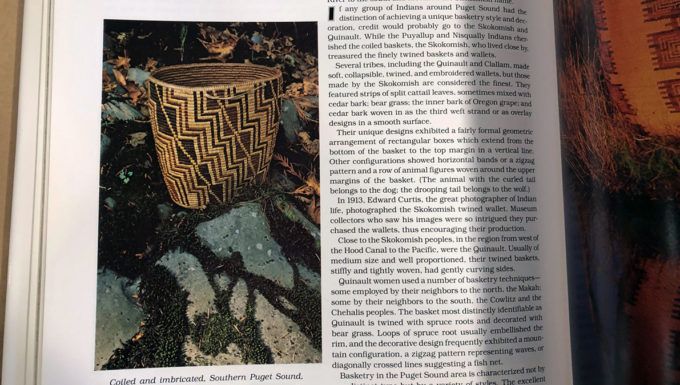
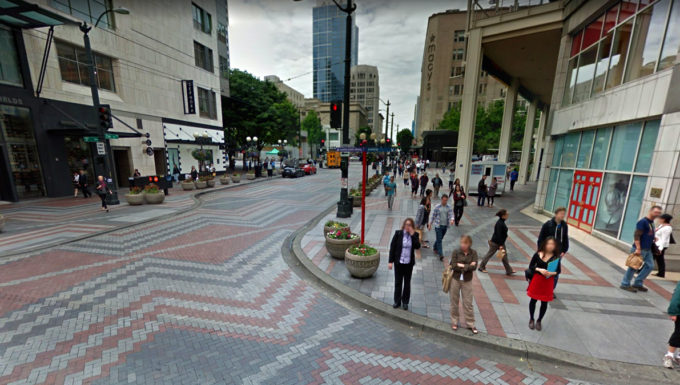
Happy Technique Tuesday! A little less of a technical lesson today as I’d like to talk about the many ways simple shapes and forms can become the basis for decades of design inspiration. This photo is from the book Indian Baskets of the Pacific Northwest and Alaska and captures a Cowlitz-style basket made from bear grass and dyed cedar bark. Coiled baskets were generally used in cooking are adorned in diagonal zig-zags and checkers.
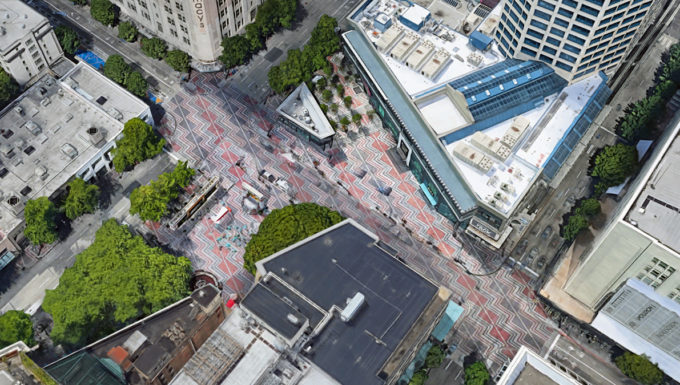
The detail and quality of these baskets was cherished and ownership of them was prestigious enough that many baskets of this caliber were kept unused as pieces handed down generationally or traded. This particular pattern was used as inspiration when Westlake Center in downtown Seattle underwent a re-design in 1989. The pattern covers Westlake park and expands a block in any direction and was intended to bind the central down-town park into a ‘living room’ for the city.
From beautifully hand-crafted basket to (exquisitely captured, if I do say so myself!) photograph to major metropolitan design element, the original artist had no idea their work would become so very timeless. Next time you’re down town, give it a look – and the next time you’re looking to do your own decorating, it’s worth considering that inspiration may come from unlikely places!
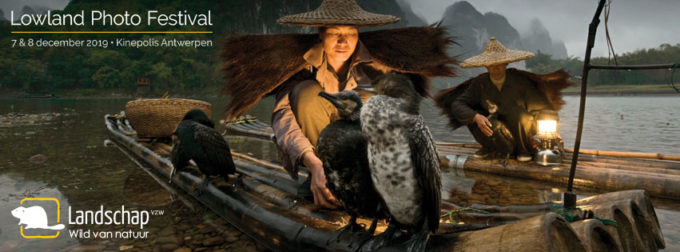
Coming up in December, I will be giving the keynote at the Lowland Photo Festival in Antwerp, Belgium. I’ve been putting together quite the presentation, and I can’t wait to share it!
During the weekend of December 7th, 2019, thousands of nature photographers will once again settle in Kinepolis Antwerp to enjoy diverse lectures by famous nature photographers from around the world. Nature photography exhibitions with hundreds of works will be on display, along with a photography fair packed with demos and workshops.
Mis hét natuurfotografiefestival van de Lage Landen niet! Het Lowland Photo Festival is dit jaar al aan zijn zesde editie toe en tekent steevast voor dé hoogdagen voor elke natuurfotograaf.
Duizenden fotografen strijken neer in Kinepolis Antwerpen om er te genieten van de
* PRACHTIGE EXPOSITIES NATUURFOTOGRAFIE (GRATIS)
* GROOTSE FOTOGRAFIEBEURS & DEMO’S (3 EURO)
* SPECTACULAIRE LEZINGEN (VANAF 42 EURO/ DAG)
Behalve het kruim van de natuurfotografen uit Vlaanderen en Nederland maakt ook een rist internationale toppers hun opwachting tijdens het Lowland Photo Festival. Eén van de absolute headliners dit jaar is ongetwijfeld de wereldberoemde fotograaf ART WOLFE (USA)!
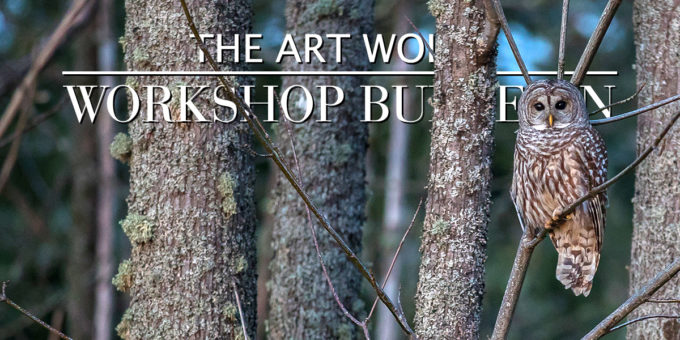
Good news if you’re in the Pacific Northwest and could use a little photographic inspiration to recharge those chilly fall batteries – the next two weekends will see me back home for a few events, and I hope to catch you there!
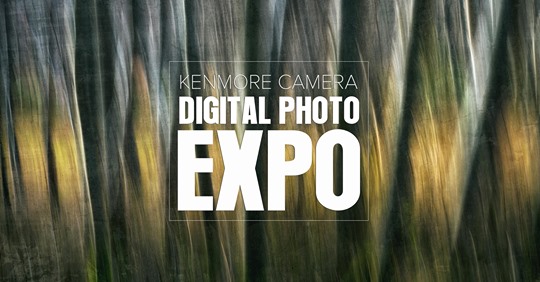
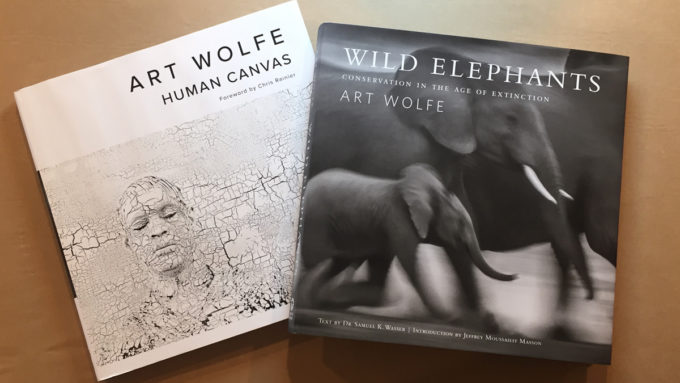
As you may know if you follow me, Wild Elephants was published this week. Thank you to everyone who pre-ordered. I’ll be signing those books this weekend so we can send them out! The new trade edition of Human Canvas will also be officially published next week, but we have received those as well. I’ll be attending the Kenmore Camera Digital Photo Expo this Saturday from 10:30 AM til 12:30 PM – come and pick up your signed copy of either or both books! This is always an invaluable event with plenty of resources on-hand to talk about the latest photo tech – don’t miss it!
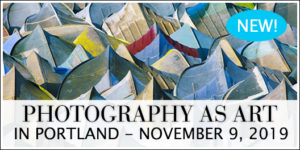
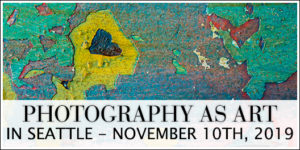
For those of you in the Seattle and Portland areas, there are still limited spaces remaining for both Photography As Art seminars happening in those cities – sign up to reserve your spot today!
If you’d rather gamble than secure a guaranteed spot, today is the last day to enter your name in our give-away, so check it out and enter your name before midnight for your chance to win a ticket!
Over the next two weeks I’ll be giving away a couple of free spots to my two upcoming Photography As Art seminars in the Pacific Northwest! Use the link below to enter, or visit the give-away page. Random winners will be drawn on Monday, November 4th!
I’ve only just begun a couple months of heavy travel, but in between I’ll be back in Seattle just long enough to catch my breath. This happens to coincide with the annual Kenmore Camera Digital Photo Expo, which is always a fantastic event full of passionate presenters and the latest and greatest equipment from the digital photography world available for hands-on evaluation!
Please note – I’ll only be available at the expo myself on Saturday, November 2nd from 10:30 AM – 12:30 PM and I’ll have my new books Wild Elephants and Human Canvas on hand to sell and sign, along with a selection of my other popular books.
You should definitely check out both days of the expo if you can. There will be a number of speakers on hand from a variety of backgrounds and companies. There is sure to be something for everyone, and so much information to be absorbed.
If you’re in the market for new equipment, or simply a photography enthusiast looking to gather all the knowledge you possibly can from experts in the field and those with the technical know-how to answer your equipment related questions – take advantage of this opportunity!
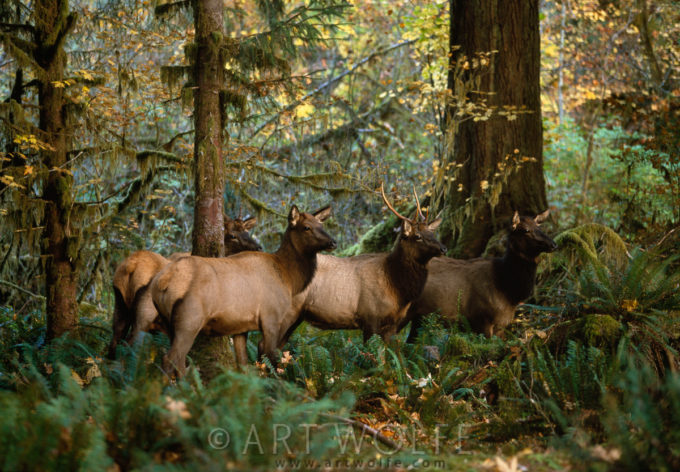
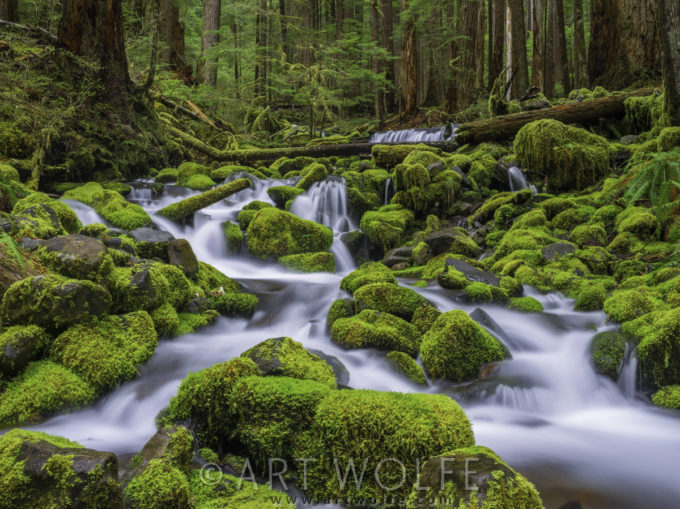
Just two spaces remain in my Lake Quinault Photography Retreat coming up very soon! Fall in Washington state is gorgeous, and what better way to celebrate the season than to be part of an intimate group of photographers exploring the lush Olympic forest? This is a location that I can never seem to get enough of as far as photographic opportunities go. I always leave feeling like there is so much more to explore, and this exclusive small group setting is my opportunity to share what I see with you in hopes I can pass on four decades of knowledge to you.
1) Check the Olympic National Park off your bucket list. Do you have a National Parks passport? Maybe it’s time to get one and start visiting the sites of “America’s Best Idea”!
2) Check a workshop with Art Wolfe off your bucket list. A UNESCO world heritage site combined with a world renowned photographer, who also happens to be a great teacher and inspiration? Check!
3) The trees. The temperate rainforest has a living standing biomass which may be the highest anywhere in the world. And it is stunningly gorgeous.
4.) The Luxurious and historic Lake Quinault Lodge is a fantastic home base. We welcome your partners to join us for meals and critiques at the end of our workshop activities.
5) Assistants. I am accompanied by terrific assistants to assure that your photographic experience is as rich as your surroundings. The Quinault retreat is manned by my workshop coordinator Libby whom is also familiar with the area and will be on hand to help assist the participants.
6) Friendship! I don’t know how many friendships have formed as a result of these workshops in particular, but my workshops seem to bring like-minded people together many of whom end up traveling with one and other again and again.
7.) Beautiful images make beautiful prints! Make room on your walls for some new images from a lush and vibrant location.
8) Water. Water defines Olympic National Park. There’s a reason why the trees are massive and the moss lush; why the rivers are highways of life; why the glaciers are there to sculpt the massive peaks.
9) Wildlife. We may get lucky and see the huge Roosevelt elk that make the Olympics home.
10) Adventuresome learning. I work hard to make sure everyone comes away from these multiday workshops feeling better about and more enriched by their photography skills.
Again, only two spaces remain – Sign up now and I’ll see YOU in a few weeks!
AW – Often students in my classes will bring work that shows an interesting subject, but without enough information to tell a complete story. I find that one effective tool for storytelling is using a wide-angle lens close to my subject, so that some of the background is included, creating a valuable sense of place.
I find elephant seal weaners, fattened up and then abandoned by their mothers, to be wonderfully cooperative photographic subjects. With this weaner, I laid flat on the ground in front of it to photograph it on its level.
The hot-spring-addicted macaques in the Japanese Alps are another fun subject. When their own hot springs were invaded by the furry monkeys, the human residents built a monkeys-only spring. This youngster hung around the side of the pool, making a perfect subject for a wide-angle shot, which allows me to add important background and context.
MH – Looking at us with its liquid black eyes, the seal pup seems to be hoping we are his mother coming to feed him. Weaned at three weeks, he seems a bit lost, even indignant, that the tap has suddenly been turned off. With the spectacular landscape of South Georgia in the background, this image creates a sense of loneliness, seeing this solitary pup by himself in this grand wilderness.
In the second image, the Japanese macaques are so human-like that it’s a little freaky. The monkey in the image seems curious, even mischievous, while his peers ignore his proximity to the camera and wallow in the thermal heat. I love seeing an animal in its environment, especially one as unique as this. It enlarges our understanding of how they live and sometimes gives us clues as to what motivates their behavior. Here, the slight distortion of the wide-angle lens enhances the drama of the scene.
Strong Leading Lines
Another important approach to using a wide-angle lens is to work with leading lines. Leading lines have long been important parts of painting and other two-dimensional forms of art. A leading line is simply something that creates a line from foreground to background and leads or directs the eye through the image. It can be anything that is visually distinct, that a viewer is going to notice, and helps define the composition.
You can find all sorts of leading lines in the environment: tracks in the sand, edges of roads, cracks in rocks, architectural structures, and so on. These can be used to direct the viewer’s eye through a composition and toward the main subject. They are an excellent way to help the viewer understand your picture as well as add a graphic element to the design of your image.
Wide-angle lenses help emphasize leading lines. This comes back to the concept of perspective. By getting in close to nearby parts of leading lines, you spread them apart, yet they still go to the same vanishing point in the distance. That creates a very strong change from foreground to background along those lines, something that will dramatically show off the elements of your photograph.
To understand this, think about a railroad track. If you stand on a hill and photograph railroad tracks in the distance so they start at the bottom of your picture and go to the horizon near the top, you will see them heading off to a vanishing point at the horizon. The railroad tracks will be a certain width at the bottom of your composition. If you then put on a wide-angle lens and get right down on the tracks, the width of the tracks will fill the width of your image. The tracks are still going to go off into the distance to a vanishing point, but now they go from the full width of your frame, creating an extreme change from foreground to background.
Don’t be afraid to get close to leading lines in order to emphasize how strong they are. So often photographers back off from subjects like this and lose some of the impact because they don’t have the same foreground-to-background perspective.
After spending two weeks in Alaska photographing beautiful images of brown bears, salmon, and wolves, I am now home in Seattle and looking at my schedule for the upcoming months. The Pacific Northwest figures prominently in these plans and Fall is a lovely time to visit.
Lake Quinault is one of my absolute favorite locations to visit in the fall, and only one space remains to join me there in September! You can hear the sound of the elk bugling, the golden colors of ancient big leaf maples surround you, and you may have a chance to spot eagles, otters, and bobcats feeding on spawning salmon in the local rivers!
I will be teaching two Photography As Art seminars in Portland (early bird special!) and Seattle this November. I constantly update my presentation, so if you have seen this seminar before, there is a good chance it has changed since the time you last attended.
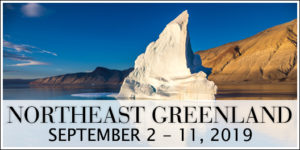
As a wildcard, one space has opened up on the September Greenland expedition that I am leading with Kevin Raber and Steven Gosling. This is sure to be an unforgettable experience for everyone!
On the heels of my recent trip to Ecuador where freezing the action of the tiny and quick humming birds there was my primary goal, here is an excerpt on using fast shutter speeds from Chapter 7: Creative Options from The New Art of Photographing Nature. Enjoy!
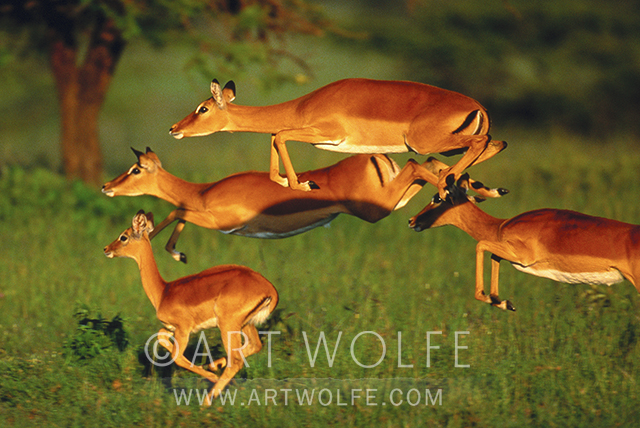
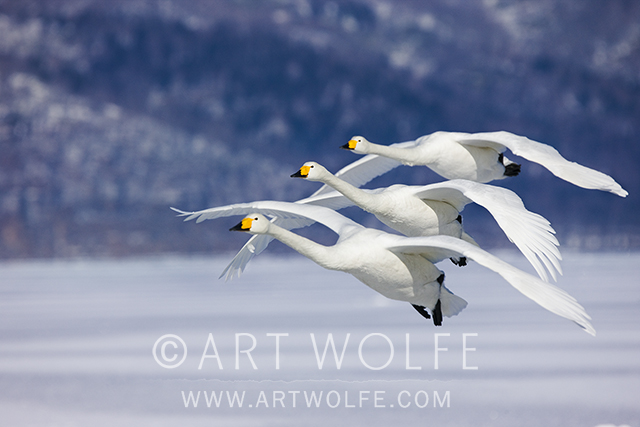
AW: In this final set of images—of a Gentoo penguin porpoising in Antarctica, of leaping impalas in Kenya, and of whooper swans coming in for a landing on a frozen lake–I have chosen the fastest shutter possible to stop the action, capturing a frozen moment in time rather than a more impressionistic view. In the age of digital, the ability to select higher ISOs and faster shutter speeds allows me to capture a lot more moving subjects in sharp focus in this way, although my preference is still for blurred motion.
Impala, Masai Mara National Reserve, Kenya EF600mm lens, f/8 @ 1/500 sec, Fujichrome Velvia 50
MH: The penguin shot is a wonderful example of allowing us to enjoy something unusual, in this case, a penguin “in flight.” This is a split-second event and takes remarkable timing to capture with a camera. The result allows us to appreciate the penguin’s torpedo-like shape, and understand a little better what makes them such speedy swimmers.
All of these images are examples of the camera being able to record something that is either too fast or too slow for the human eye to capture accurately. Fast shutter speeds enable us to savor moments of peak action at a later time and at our own pace. One of the greatest advantages of digital has been the ability to immediately see your results, allowing you to experiment and then make corrections on the spot. This can be especially valuable, for example, when testing different shutter speeds to gauge their effect.
Whooper Swans, Hokkaido, Japan EF400mm f/4 lens, f/6.3 @ 1/1250 sec, ISO 400


 I’ve only just begun a couple months of heavy travel, but in between I’ll be back in Seattle just long enough to catch my breath. This happens to coincide with the annual
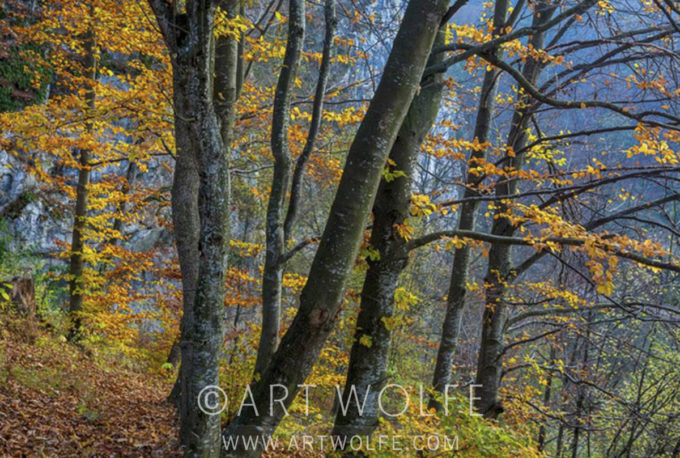


 After spending two weeks in Alaska photographing beautiful images of brown bears, salmon, and wolves, I am now home in Seattle and looking at my schedule for the upcoming months. The Pacific Northwest figures prominently in these plans and Fall is a lovely time to visit.