Since we are all likely spending a little MORE time on our computers and less time out and about shooting, I thought it might be good to compare notes on what everyone is using these days to edit, organize, and promote their photos.
Serious photographers seem to come in some combination of three varieties – those who love the medium and the experience it can bring through travel and interaction with the world around us, those who love using the camera as a tool to create artistic statements, and those who really -really- love tech. I am definitely more a combination of the first two types – but to really maximize your potential, you need to embrace all three to some extent.
I’m fortunate to have a staff to help me with the minutiae of all of these tools, and together we’ve come up with a list of some of the software applications and web services we use. If you have any suggestions for myself and fellow photographers, leave a comment!
Ten Tech Tools of the Trade (In No Particular Order):
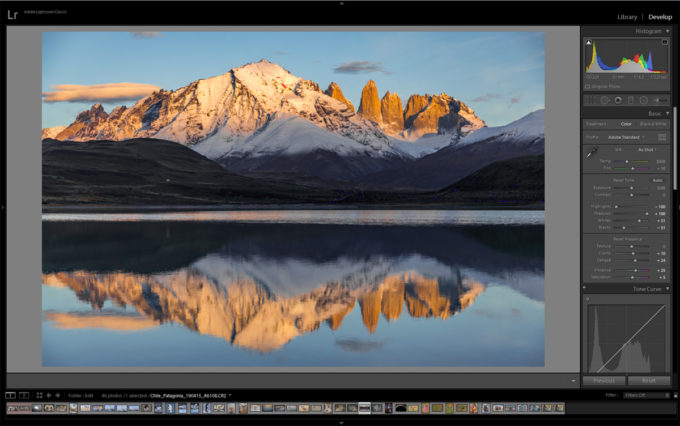
AW: Lets get the most obvious tool out of the way first as I’m sure most people are familiar with Adobe’s tools. I spend most of my time in Lightroom, where I use it as both an organizational tool, and to add some post processing to my photos. Most of the tools you’ll find here keep photography at the forefront, simulating many traditional practices in a much more simplified and speedy manner.
AW Staff Note: Art rarely uses Photoshop, however when I’m preparing his photos in final edit for a book project or print, it pays to have more control over the fine details. There are lots of tips out there for things like enhancing sharpness, reducing noise, and much more.
AW: This is a tool I’ve just recently started using. In the past, most de-noise tools operated roughly the same, or at least to my eye seemed to have similar results. This app from Topaz uses a new process to remove nose, and so far it works great.
AW Staff Note: It does take some time to process however, so make sure you have the time to spend getting everything just right, and pack your patience! Not that Art is ever impatient. . .
AW Staff Note: These are tools we use to edit audio and video. It’s not a huge part of what we do, but as they can come packaged with the other adobe tools we use it doesn’t hurt to have them. Premier is used primarily for cutting and editing video clips; AfterEffects is kinda like photoshop for video, and Audition is for editing sound clips to remove things like echo, mic popping, etc. . . they are complicated programs but just simple enough that most things you might need to do, you can find a tutorial online to get you through it.
AW Staff Note: Yep. Art doesn’t use this one himself either, but when we are working with video files, they are often for the web and therefore require slightly less fidelity than if we were say, creating an HD TV show with all the Audio/Video bells and whistles. But you also want to start with the best possible quality. That means huge video files. Handbreak is a great (and free) tool for taking huge video files and turning them into smaller video files that still look and sound great, with a lot of tuning available to get the result you want.
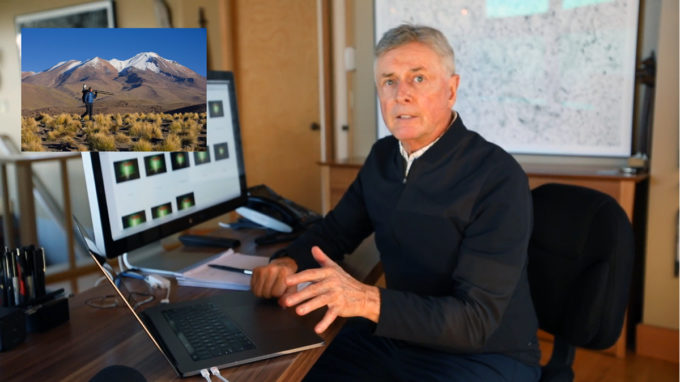
AW: Ah! Now we are speaking my language again. Currently I’m living in Keynote working on Pathways to Creativity, a new series of seminars that will be divided into chapters and made available for download, aiming for this fall! These programs are simple enough. I create all of my presentations in Keynote, whether it’s for an epic stage or a slide show at home. Lightroom does have a built-in slide-show feature as well, but Keynote gives me more control.
AW Staff Note: Powerpoint and Keynote are similar so if you’re on a windows-based computer, PP might be your option. They mostly play nice together, but aren’t without some small issues if you’re going back and forth.
AW: I don’t personally use Photoshelter often, but I have their plug-in installed in Lightroom. When I export my photos it can be pre-set to upload automatically to Photoshelter assuming I have an internet connection, so staff back home can see my latest photos.
AW Staff: Photoshelter is a great way to store, organize, and share your photos online. We use it to drive our stock site and host innumerable images. We’ve had very few if any service interruptions or down time in my experience with it. There are a lot of options for sharing your work, and also protecting it with watermarking and small file downloads.
AW: This one goes without saying – if you’re taking photos, share them! And follow me – maybe you’ll get a follow back – in fact, if you leave your handle in the comments below, I’ll be sure to do so.
AW Staff: One thing you’ll notice about Art’s Instagram page is that we try to avoid the square crop when possible and aim to preserve Art’s preferred aspect ratio for his images. We accomplish this in a simple manner – a square background slightly off white (RGB all set to 251), and then size the image to fit within the square.
AW Staff: YouTube gets more traction, but I find Vimeo to be more user friendly. The best solution is to use both if you’re using these tools for promotion. Don’t forget about the Handbrake tip – you don’t want to spend hours uploading a huge video that is going to soak up your storage space!
AW: Having a place to dump or receive files on the road or while travelling is incredibly useful. Both DropBox and Google Drive are good options and easy to use. Photoshelter is limited to just photographs, so having another way to store and transfer other file types online is necessary.
AW Staff: Another shout out to wetransfer.com as well, a free service (with some paid options) where you can send files to people to download via emailed link.
AW Staff: Last but not least with everyone working from home these days, we use GoToMyPC.com to connect to the office. We’ve never had any issues using it, and after the initial setup it’s very easy to use. There’s also a file-sharing option to make transferring files between computers easy and painless.
AW: Well, that rounds out today’s list, though there are plenty of other tech tools out there. Comment below if you have any additions or suggestions for things we should be taking a look at while we have the time to do so.
Hello again from Seattle! Some of you may be wondering what I’m up to while we do our best to protect ourselves and one and other from the current pandemic. I’m better in front of a camera than I am a keyboard – so I’ll let it do the talking!
Watched it? Great! Feel free to leave comments below as to what you’re doing to keep your photography skills honed and your mind active; I’m sure we could all use various perspectives on how to use our time productively. I’ll be posting ideas to the blog on a regular basis as well, so stay tuned and most importantly, stay safe!
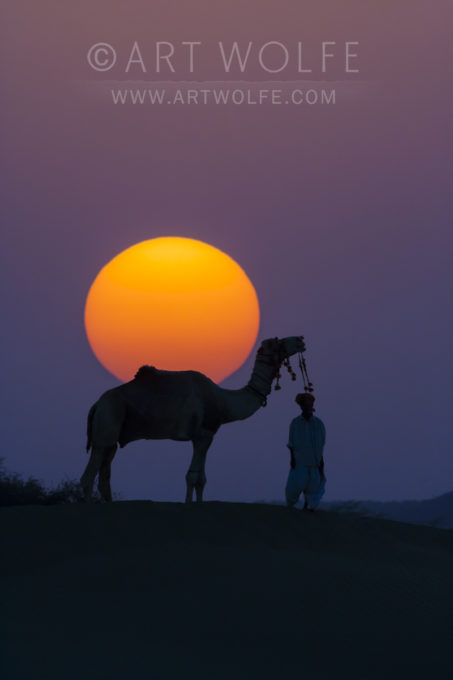
Happy World Wildlife Day! It’s also technique Tuesday, and today’s tip was inspired by a question from Lowell E., Who inquired via my contact page – how exactly DO photographers make things, like the sun for example, seem so much larger in a photograph than it does in real life?
Great Question Lowell!
The simple answer – use a telephoto lens! Now, it should be noted the sun itself is not getting larger, rather it’s an optical trick where your subject is appearing larger as your lens dials in on it. Photographing a subject a quarter of a mile away, for example, is relatively a short distance compared to the sun at 93 million miles away.
For more information, here’s an excerpt from The New Art of Photographing Nature:
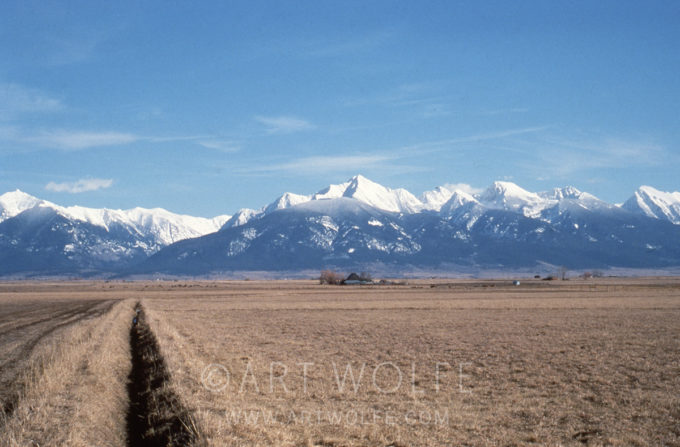
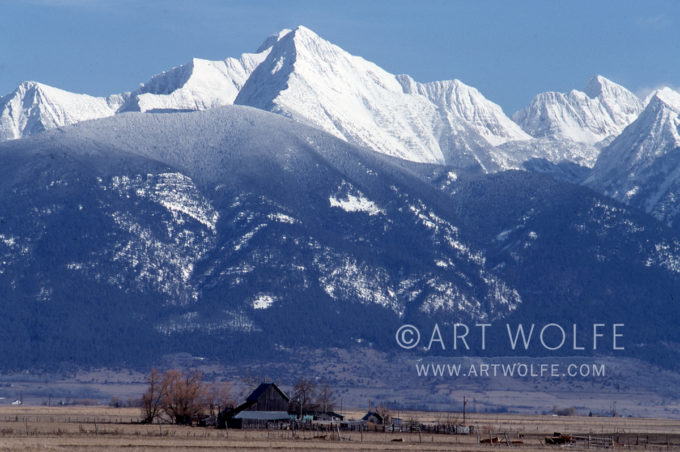
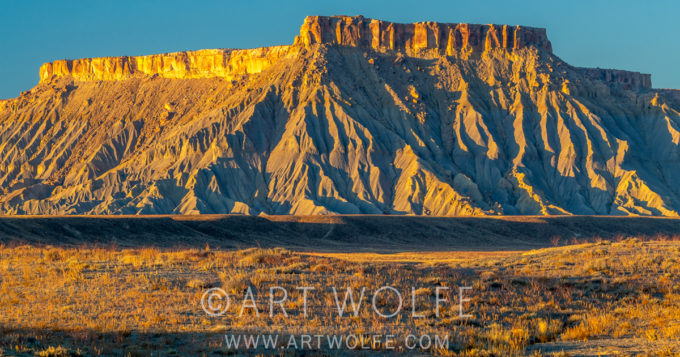
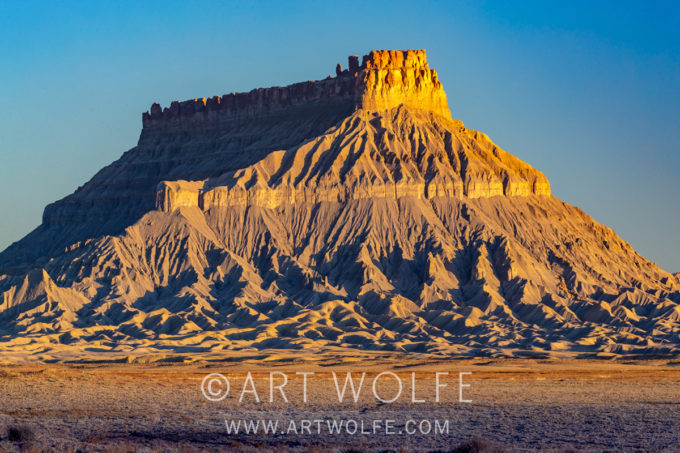
AW: As I was driving down the Flathead Valley in the Montana Rockies, I noticed this homestead set against the distant mountains. The first shot was taken with a 50mm and most closely resembles what I saw from the car as I drove by. I recognized the possibilities, but this clearly was not it. It incorporated too much sky, too much foreground, and the dark furrow of earth leads your eye away from what was most important to me in the composition.
In the second shot, I zoomed in with a 300mm lens, creating a telescopic effect, and brought the mountains closer in relation to the farm. I knew this was what I wanted–the farm with the looming backdrop of mountains. I placed the farm in the bottom and cropped so only mountains were above it, creating a sense of dramatic vertical rise. For the last shot I used a 400mm with a 1.4 teleconverter resulting in 560mm focal length, bringing me even closer. By making the image a vertical I was able to emphasize the rise of the mountains, and using a polarizer allowed me to create a little more drama. For my money, this is the strongest image in the series.
MH: Here again is a good example of what the camera can do that the eye cannot. The only way we could approximate this image would be to hike a long way to get very close to the farm. But even then you would not have the same perspective, with the farm and the mountains so strongly juxtaposed. This sense of drama is created by the compression of distance only achieved by using a powerful telephoto lens.
Think you have a great question that might prompt it’s own Technique Tuesday post? Submit a question via the contact page!
Here are some other great resources relating to the subject:
I recently joined award-winning photographer, creator of his own books, and fellow world-traveler Rick Sammon on his podcast recently with an interview that begins with some general wildlife photography advice, and goes on to talk about upcoming book projects.
Today is “Monarch Butterfly Day” according to whatever mystical powers-that-be control the hashtags! I’ve had the pleasure of photographing Monarchs over the years at many of Mexico’s renowned preserves that harbor millions of butterflies as they migrate.
It’s with a heavy heart, then, that I make this post – one that should be about the beauty of this creature and the symbolism and joy it brings world-wide. However, tragic events that have befallen a pair of conservation heroes in Mexico should be taking center stage right now until answers are found.
As you may have heard, activists and outspoken critics of the illegal logging activities in preserved areas of Mexico, Homero Gómez González and Raúl Hernández Romero were recently found deceased, both under mysterious and possibly malicious circumstances.
González was an agricultural engineer and the manager of the El Rosario Monarch Butterfly Preserve. Growing up in a logging family, he was a skeptic of conservation efforts and their possible impact on contributing to poverty in the region. His background and education gave strength to his voice when, in the early 2000’s, he became an advocate for curbing the deforestation he was seeing first hand.
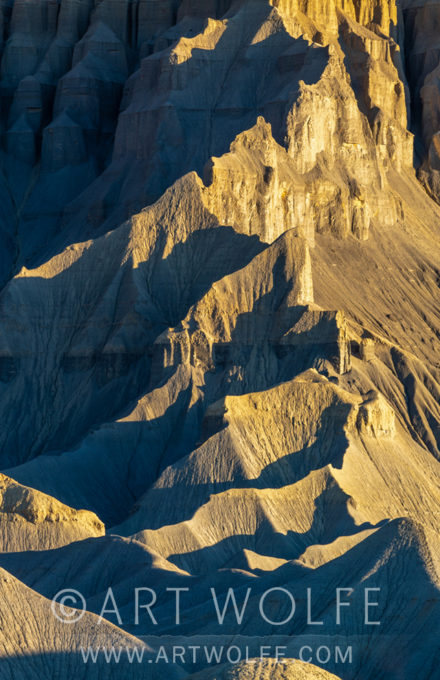
I spent some time in Utah this past November, and was struck by the colors of the directional light and shadow on the rugged buttes looming over the landscape.
Artists of the Renaissance period would work on a medium-toned colored paper and used light and dark paints, inks, and other materials to build depth within the image, adding form and dimension along the way. The term “chiaroscuro” has come to define images in which there is a strong contrast between light and dark areas that help inform the shape and form of a subject.
Renaissance artists often painted by candlelight, which provided it’s own harsh directional lighting. With photography we are painting in our own way with natural light we’ve been gifted, or our own artificial setups.Obviously it helps to have strong directional light when the sun is low on the horizon, but still high enough to illuminate your subject.
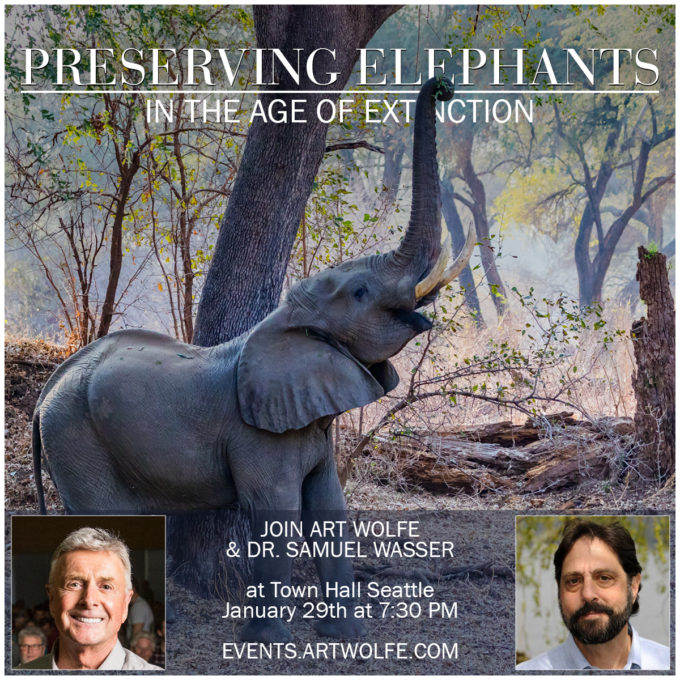
Next Wednesday, January 29th I’ll be joined by Dr. Samuel Wasser at Town Hall Seattle to give a special presentation to discuss the many threats to Elephants world wide, as well as the hopefulness surrounding the many measures being explored and executed to curb the decline of their population.
I had the honor of working with Dr. Wasser on my recent book Wild Elephants. As the director of the Center for Conservation Biology, Sam is recognized world-wide on an expert on elephant populations, and a pioneer in the area of non-invasive monitoring methods.
Through photos, conversation, and research notes we will describe the disturbing trends facing elephants – but also the work being done to ensure their continued survival.
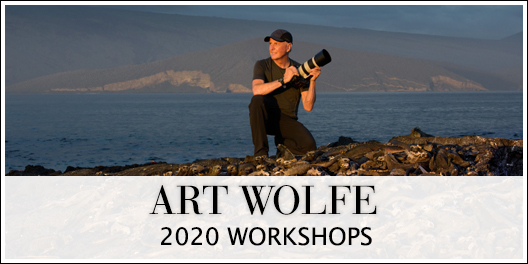
I had a chance to spend some time while traveling looking ahead at the coming year and noticed that many of my workshops are already sold out or are on the verge of doing so. Wow! I’m humbled by the response, and I can’t wait to travel again with friends new and returning.
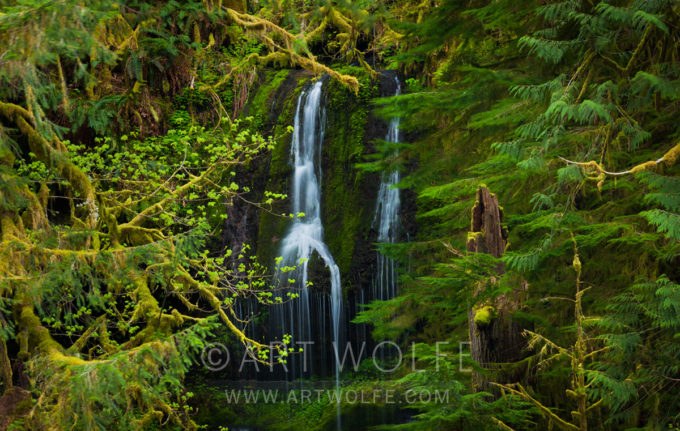
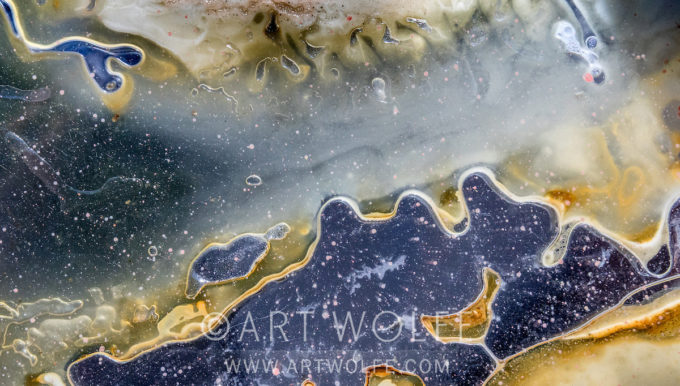
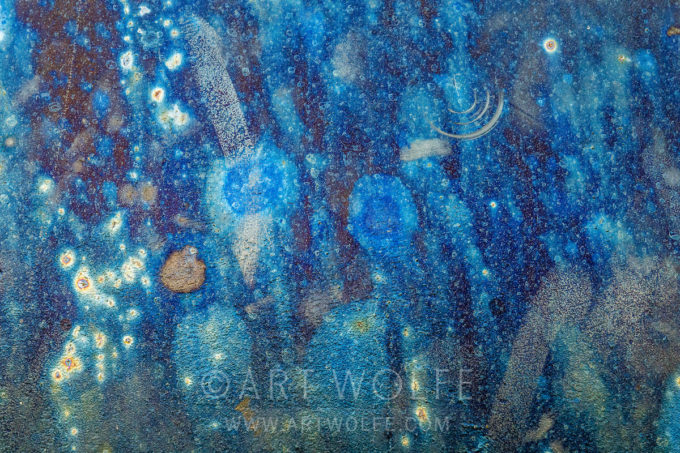
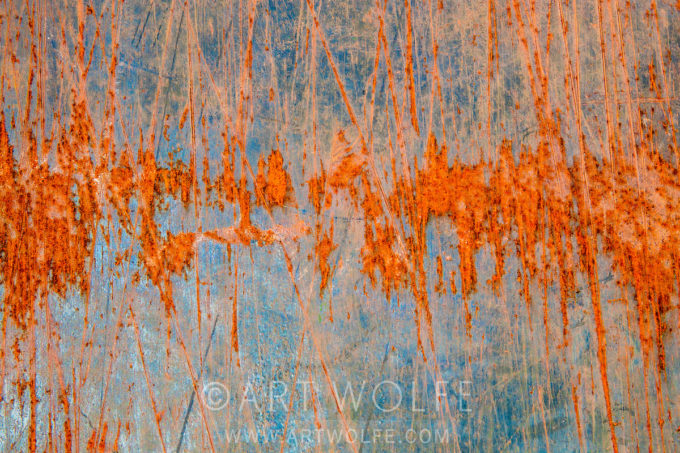
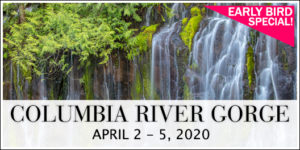
For those of you who are still looking to get signed up for a workshop, an early bird discount is available for a recently added Abstract Columbia River Gorge trip taking place this April. Not only will we be exploring one of the most stunning landscape locations in the Pacific Northwest, I will also be spending some time focusing on abstract images from locations in the area. You’ll come away with gorgeous shots of the area for context and be creatively inspired to look past the expected!
If you’re still on the fence to sign up, here are 10 reasons to sing up for the Abstract Columbia River Gorge Workshop:
1.) As stated, this is simply all the gorgeous things about the Pacific northwest – evergreen forests, trickling streams and crashing waterfalls, but with an abstract lesson thrown into the mix. It’s my goal to send you home having had a unique experience you won’t get anywhere else.
2.) Continuing with this idea, it is my goal to ensure your travel photos are unique. No one should leave the workshop having captured the same old token postcard shots as every other participant, or anyone else who has toured the area. Give your travel photos a voice!
3.) Spring is the time to be in the area – the waterfalls are flowing and the surroundings are green and teeming with the activity of nature.
4.) Variety – from moss-carpeted forests to dusty dry grasslands in just around an hour of travel.
5.) On the idea of abstracts, I have some lesser known locations up my sleeve to explore them. Formerly, the forestry boom was once a thriving machine in the area. Discarded and forgotten remnants of the time make for some interesting hidden surprises!
6.) We will explore both the Washington and Oregon sides of the Columbia River Gorge, rather than simply focusing on the most popular waterfalls and scenic locales.
7.) The area is popular with out-of-towners whom are not just on vacation, but many of whom are there to indulge their hobbies on a wakeboard or numerous other interests. What this means for us is a location accustomed to enticing and satisfying visitors. We’ve scouted ahead to find the best food, delivered with the best service in the area.
8.) Expertise! I’ve spent a lot of time here. Enough said!
9.) No workshop is complete without a critique session to share photos, and get invaluable feedback on your photography. I’m not timid about providing honest feedback because I respect the time and resources set aside to attend a workshop. Seeing something ‘click’ for first-time attendee, or seeing the growth in a repeat client is probably the second most satisfying outcome of my take-away from a workshop, with the most important being. . .
10.) Fun. We like to have it! Settling down for a great meal with new and old friends alike after a day in the field is the perfect way to cap the day. Lifelong friendships have been formed at Art Wolfe workshops, not only between myself and attendees, but between attendees as well, many of which began as strangers but have since become routine travel companions.
Looking backward has never been a pastime of mine; I am always looking forward—to new travels, projects, and meeting new people! I did indulge in putting together a presentation of my travels in 2019. I give this every year at my year-end parties & I am happy to share it with you.
Below you’ll find a list of workshops that still have space left to fill. As you can see from the number of sold-out events on the the calendar, these will fill quickly – reserve your spot! If you’d like to arrange a private tour, give my office a call – lets see if our schedules mesh.
Of special note for January, Dr. Sam Wasser and I will be giving a presentation & doing a book signing for WILD ELEPHANTS at Town Hall in Seattle. If you can’t make it, Town Hall will also be live-streaming the event on Facebook January 29th at 7:30pm.
One of the draws to visiting a country like Romania is the old-world rural setting, and I came upon a couple fantastic and eventually willing subjects to illustrate just that.
When I first found the cat and the Muskovy duck in a barnyard in Romania, I decided to play up their relationship by basically herding them closer together. Initially they were about 5 feet apart which meant their association was less memorable. By slowly circling I was able to get them to be less than a foot apart which becomes visually more significant.
The cat understandably was unfazed by my presence. The duck was less confident with my intentions. Finally, with perseverance and patience, I got what I wanted – and brought two friends closer together!