After spending two weeks in Alaska photographing beautiful images of brown bears, salmon, and wolves, I am now home in Seattle and looking at my schedule for the upcoming months. The Pacific Northwest figures prominently in these plans and Fall is a lovely time to visit.
Lake Quinault is one of my absolute favorite locations to visit in the fall, and only one space remains to join me there in September! You can hear the sound of the elk bugling, the golden colors of ancient big leaf maples surround you, and you may have a chance to spot eagles, otters, and bobcats feeding on spawning salmon in the local rivers!
I will be teaching two Photography As Art seminars in Portland (early bird special!) and Seattle this November. I constantly update my presentation, so if you have seen this seminar before, there is a good chance it has changed since the time you last attended.
As a wildcard, one space has opened up on the September Greenland expedition that I am leading with Kevin Raber and Steven Gosling. This is sure to be an unforgettable experience for everyone!
Having missed the “Eclipse across America” I scheduled a trip to Chile to catch the recent total eclipse down there. I have shot eclipse moments in the past but this time armed with Canon’s new lightweight 600, a 2x and 50mp 5D… I was not only able to get the shot I came for – but cropping in you can even see solar flares along the edge of the sun!
On the heels of my recent trip to Ecuador where freezing the action of the tiny and quick humming birds there was my primary goal, here is an excerpt on using fast shutter speeds from Chapter 7: Creative Options from The New Art of Photographing Nature. Enjoy!
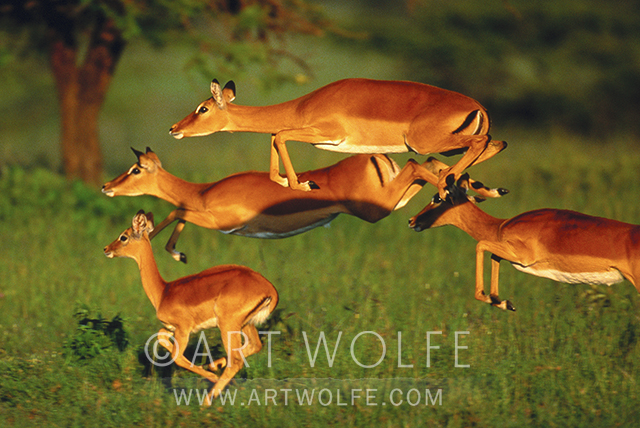
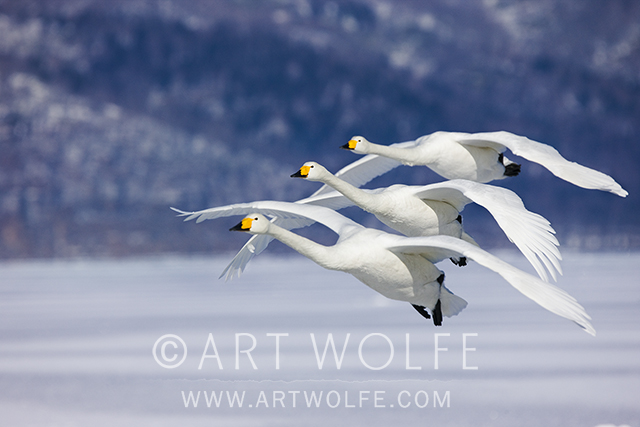
AW: In this final set of images—of a Gentoo penguin porpoising in Antarctica, of leaping impalas in Kenya, and of whooper swans coming in for a landing on a frozen lake–I have chosen the fastest shutter possible to stop the action, capturing a frozen moment in time rather than a more impressionistic view. In the age of digital, the ability to select higher ISOs and faster shutter speeds allows me to capture a lot more moving subjects in sharp focus in this way, although my preference is still for blurred motion.
Impala, Masai Mara National Reserve, Kenya EF600mm lens, f/8 @ 1/500 sec, Fujichrome Velvia 50
MH: The penguin shot is a wonderful example of allowing us to enjoy something unusual, in this case, a penguin “in flight.” This is a split-second event and takes remarkable timing to capture with a camera. The result allows us to appreciate the penguin’s torpedo-like shape, and understand a little better what makes them such speedy swimmers.
All of these images are examples of the camera being able to record something that is either too fast or too slow for the human eye to capture accurately. Fast shutter speeds enable us to savor moments of peak action at a later time and at our own pace. One of the greatest advantages of digital has been the ability to immediately see your results, allowing you to experiment and then make corrections on the spot. This can be especially valuable, for example, when testing different shutter speeds to gauge their effect.
Whooper Swans, Hokkaido, Japan EF400mm f/4 lens, f/6.3 @ 1/1250 sec, ISO 400
I spent some time down in South America recently, a trip that was initially conceived to photograph the solar eclipse in Chile but also turned into a fantastic opportunity to photograph birds and other wildlife in Ecuador with a focus on capturing tiny, agile hummingbirds.
There are numerous sources online you can go to to find technical information on shooting slight and/or speedy subjects such as these, so I won’t bore you with technical specs except to say that my photos were captured with a Canon 5D Mark IV, a 100-400 lens, and a shutter speed of 1/160th of a second. Instead, I’d like to focus on my approach to capturing these and other animals that can be hard to get a handle on.
There were two things I didn’t want to end up doing in this situation – chasing elusive birds around with my lens all day long, or firing off a bunch of shots in hopes of coming away with something good after spending hours and hours editing and cropping photos.
Instead, I took the approach of spending plenty of time observing these creatures long before I attempted to take any shots. I recognized patterns in their behavior and how they interacted with their surroundings and each other. This allowed me to anticipate their movements and come away with more focused and intentional shots rather than just releasing the shutter and hoping for the best. Instead of chasing, I let them enter the frame and do the work for me. In the end, I came away with shots I’m happy with, and didn’t have to sort through too many duds to get there.
I just finished up photographing the eclipse and hummingbirds in South America. This has been a very fun and fruitful trip – stay tuned for the photos to be posted to the blog as well as my Facebook and Instagram pages!
Speaking of new photos, I have put together a collection of my favorite images from all of the amazing trips I have been on so far this year. If you are interested in seeing some of them here is a link to my new 2nd quarter photos.
Venerable Cornell University can’t be wrong about this: a recent study shows that traveling makes us happier than acquiring material goods. I can second that—travel with me and I’ll show you the joys of being a travel junkie! If you’ve already signed up, good on you. You have a thrilling adventure awaiting you!
During a recent trip to photograph in Astoria, OR I ran into several fans of my work who convinced me I should offer the Photography As Art Seminar in Portland. To that end, I’ve added this seminar to my November schedule. We are offering Early-bird specials on the new Portland seminar and all of my 2020 US workshops through the end of August.
I also wanted to mention a new website that my good friend Kevin Raber just launched – Photopxl. This site will be a valuable resource for photographers of all skill levels as a place to go to build your photo community, learn new tricks of the trade, and read helpful reviews.
Thank you everyone who took the time to be activists about the ill-conceived Pebble Mine project that would deeply affect Bristol Bay. It’s so important that we speak up about our wild lands and the wildlife, as well as renewable industries that depend on them.
I look forward to meeting new friends and seeing old friends on my travels this year! My goal is nothing less than to change the way you see.
After spending much of the first quarter of 2019 in the Eastern Hemisphere, my time in the few months since then has been spent in the West. From Patagonia to Utah, from the California and Oregon coasts to Alaska and now back to South America, it’s been a busy one.
On one hand, it’s hard to believe we are already halfway through 2019 – on the other, looking back I suppose I shouldn’t be surprised with as much as I’ve traveled. There’s been a lot of maneuvering to get everything just right, with attempts to conduct my excursions at ideal times for the goals I had in mind for both myself and workshop participants. I’m fortunate to have a great staff to lean on when it comes to thoughtfully pin-pointing and scheduling the best times to visit all of the locations we add to the calendar.
While we are on the subject, it’s important to note that just about any image you see posted on my site, the stock site, or anywhere else for that matter can be created as a print. If it hasn’t been printed before, each photo will be expertly edited and fine-tuned to look it’s absolute best when printed by staff members with decades of editing experience. It will then be examined by my staff to ensure its quality. Just contact us and let us know what image you’re interested in.
Currently, I’m in Chile viewing the total solar eclipse visible from South America, and it makes me hark back to when I traveled to South Australia back in December 2002 to photograph a total eclipse there. At the time, I was photographing landscapes for my book Edge of the Earth, Corner of the Sky and I thought this would be an amazing opportunity. I’d seen many technically excellent photographs of total eclipses over the years, but quite honestly they all looked pretty much alike. My objective became capturing the eclipse in relation to the Earth.
The solar eclipse that occurred on December 4, 2002, was noteworthy when viewed in South Australia for a couple of reasons. First, the eclipse was unusually brief at 25 seconds. Also, it occurred less than 40 minutes before sunset, so the likelihood of an obscured view was greatly increased because clouds generally stack up along the horizon at that time of day. To maximize my chance of success, I decided to find the precise position from which to film the eclipse by experimenting exactly 24 hours before the eclipse. I also decided to try two cameras for two very different perspectives, so I used both a wide-angle and a 70–200mm lens, enabling me to take full advantage of the eclipse’s late hour by incorporating the landscape.
Most eclipses occur earlier in the day when the sun is much higher in the sky. For this book, I wanted to establish the connection of the eclipse with the Earth. I wanted the viewer to witness the eclipse as if they were standing there next to me under the gum trees. Since I could not determine exposure until totality began, I decided to use matrix metering on an automatic aperture priority setting. When totality began, I would simply engage the shutter using locking cable releases, hoping that the entire roll of film would run continuously through the camera. This would have happened had I not made one final decision: to auto-bracket my exposures. I discovered, too late, that the camera would not continuously advance while on the auto-bracket setting. After just three exposures, both cameras stopped advancing. By the time I figured out what was happening, totality ended. Fortunately, I did get proper exposures for both compositions. After the critical moment of the full eclipse, I continued to photograph as the eclipse continued, switching to other lenses and film.
To create these images I used two Canon cameras, an EOS-1N and an EOS-1N/RS, EF70-200mm and EF 16-35mm lenses, Fujichrome Provia 400 film, and a Gitzo tripods. For the images of the setting eclipse on the horizon, I used an EF500mm IS lens and Fujichrome Velvia film.
The summer is a spectacular time to visit Glacier Bay – the weather is usually good and the plentiful wildlife here is active, and the location has so much to offer anywhere from portraits of animals to the vast and majestic glacier-bound landscape. It’s also a busy time for tourism, so if you plan to visit in this most photo-op rich time of year, make sure you set your plans early!
This trip offered plenty of variety as usual, and I was excited to use my somewhat recently acquired canon 600mm lens here, which has served me well thus far. humpback whales, Steller sea lions, and bald eagles were among the usual suspects.
Enjoy the photos! Check out the NPS page to plan your visit, and keep an eye on my events page for future trips here with me!
We’ve had two last-minute cancellations on the formerly sold out Katmai Workshop that I am leading in late July and early August. If you have ever wanted to see powerful brown bears fishing for beautiful red spawning salmon right in front of you, this is the place to go! With me and our expert Katmai guide by your side, you will come away with not only amazing photographs, but fun stories to tell for years to come.
There are plenty of reasons that every Summer in late July and early August I return to Katmai Alaska to lead multiple workshops. From a new perspective on a location that’s become very familiar to me, to capturing the kinds of shots of the local bears one simply cannot get anywhere else, it always has something new to offer.
Now is your chance to claim the remaining two spots – due to my travel schedule, I’ll have to miss visiting this time next year, so it’ll be a while before I return!
If you’re still on the fence, here are 10 more reasons to join me in Katmai, Alaska this Summer!
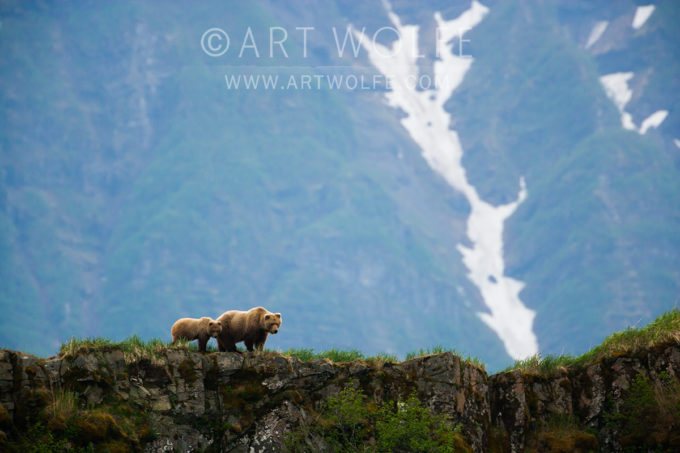
1.) Coastal Brown Bears are beautiful and powerful, and to be in the presence of an animal of this magnitude it is humbling.
2.) Capturing amazing images of these creatures is even more magical. There is no substitute for experience in the field, and I’ll be bringing decades of it to our group as well as our interactions on an individual basis.
3.) We have two dedicated pilots, four planes, and a speed boat at our disposal. Not only is this convenient, but it means we have the utmost flexibility to change our plans depending on weather conditions. If the group cannot fly, we can always take the group up to Lake Clark to see the bears fishing for clams, or to see Dick Proenneke’s cabin!
4.) The remote Katmai Coast is the largest intact stretch of uninhabited coastline left in North America, and provides a rich and contextual backdrop for the bears.
5.) The lodge has a top-notch cook, so the group can enjoy delicious meals while reminiscing about the day’s adventures on the tour.
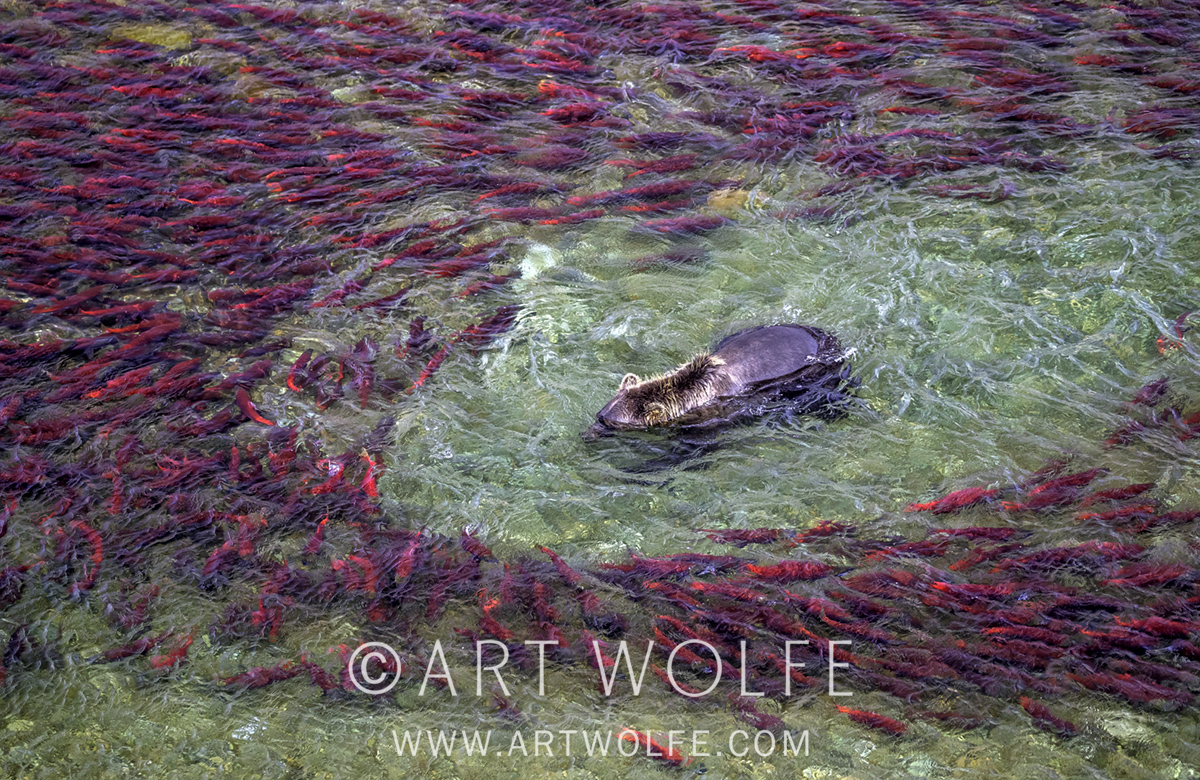
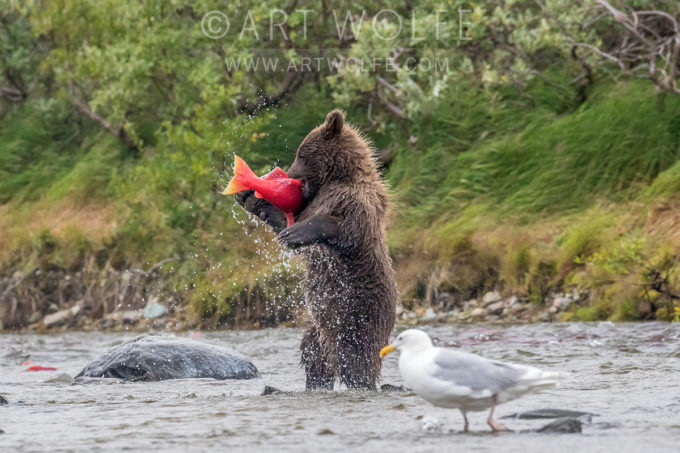
6.) Late July and early August is the peak of the salmon run, and is why we reserve these times with our local experts and accommodations well in advance. The rivers are running with beautiful red salmon, which is an excellent secondary element for fantastic photographs.
7.) I’ve been such a frequent visitor of this location that I can recognize individual bears by sight and in many cases can predict their behavior and identify their strengths, giving us a distinct leg up in capturing them at their best. If an individual is known to be an expert fisher, rest assured I can point them out to ensure we capture the best possible action on the river!
8.) We work with the local lodge owner whom scouts the area before our group arrives to ensure we have a good idea of where the bears are going to be. This cuts down the amount of hiking the group needs to do so we can get right into photographing.
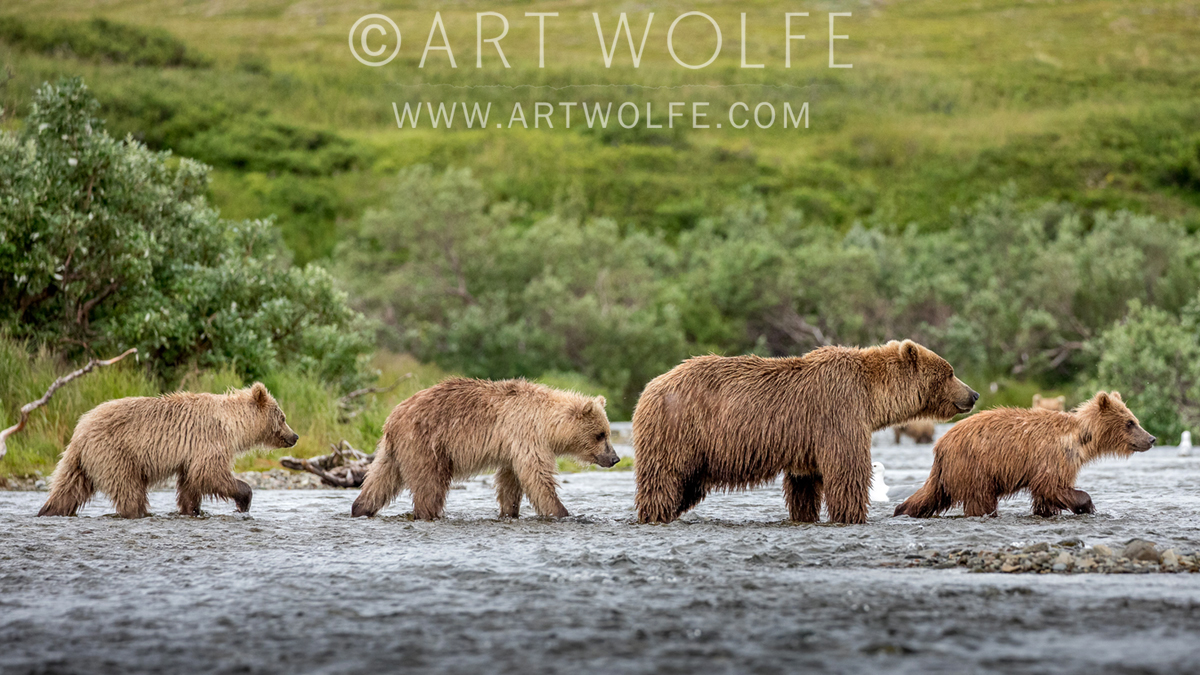
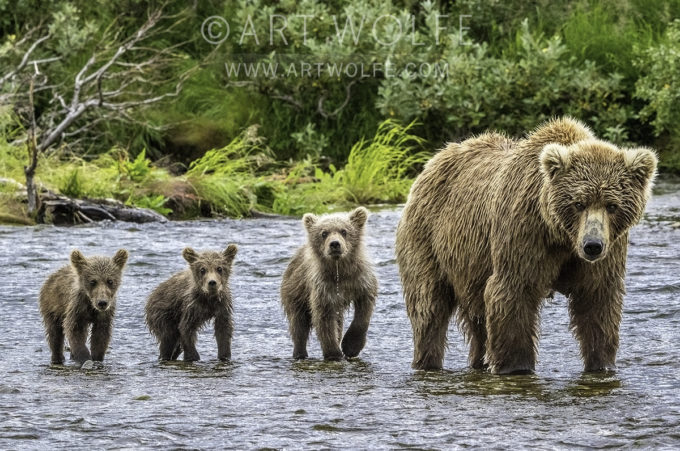
9.) We always find several mothers with young cubs and they are generally not intimidated by humans, so our groups can sit and photograph the cubs as they run and play for hours if we like.
10.) If it hasn’t become clear already, this is a region I know like the back of my hand, and we’ve spent several years working with the same local folks to ensure as much consistency as possible. So few variables and unknowns means I’ll have more time to spend directly working with participants to ensure they all come away with stunning photos!
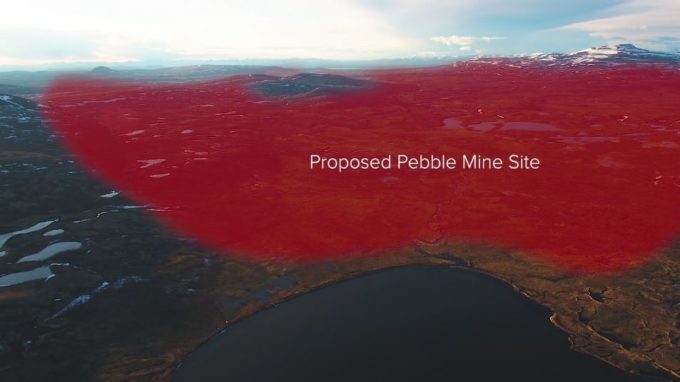
Time for a little wilderness and wildlife advocacy. Alaska’s Bristol Bay needs our help. It is home to the world’s largest, most productive salmon run and it is threatened by the advancement of the Pebble Mine. The Pebble Mine would be a massive open pit mine that would leach into the ecosystem of one the most productive wildlife regions on the planet. I have been photographing in the region, which includes Katmai National Park and the famous McNeil River Bear Sanctuary, since the early 1980s, and understand first hand what this massive extraction project would do to the wildlife, the fishery, as well as the thriving, sustainable wildlife viewing industry.
Click here for a brief interview I did on the subject.
Brown bears associated with the Project area are a resource that has high ecological, economic, and social value. Southwest Alaska residents and visitors were estimated to spend nearly $145,000,000 (2019 dollars) annually to view wildlife and generated more than an additional $133,000,000 in associated annual economic activity. Much of the wildlife viewing activity in southwest Alaska is centered on observing brown bears. For more information, this study drills down on the economics involved in brown bear viewing ins South-central Alaska.
Watch:
I strongly urge you to take 20 minutes and watch Koktuli Wild, a video by Brendan Wells which perfectly illustrates the fragile beauty of the wilderness that feeds the potent Bristol Bay watershed. It is uplifting, beautiful, informative, and most importantly galvanizing. Even if you never see it with your own eyes, just knowing this this wilderness exists is affecting.
UPDATE: 6/29/2019 – The U.S. House of Representatives passed amendment 90, being called the “Huffman Amendment,” to the Energy and Water Appropriations Act. However, this is only the begging and Alaskans have called upon Senator Murkowski to to stand with Alaskans in opposing the Pebble mine.
UPDATE: 7/31/2020 – Following an Army Corps of Engineers Environmental Impact Study, which organizations like the NRDC have labelled as inadequate and flawed, the house has once again voted to suspend any funds for issuing a permit to the mining operation – the battle continues!
 After spending two weeks in Alaska photographing beautiful images of brown bears, salmon, and wolves, I am now home in Seattle and looking at my schedule for the upcoming months. The Pacific Northwest figures prominently in these plans and Fall is a lovely time to visit.