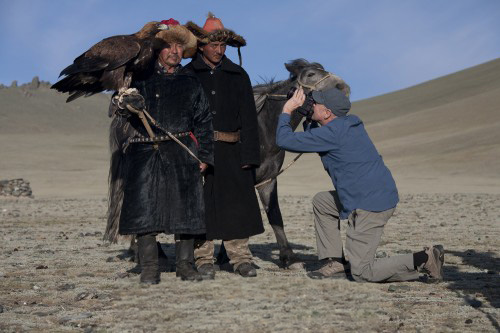
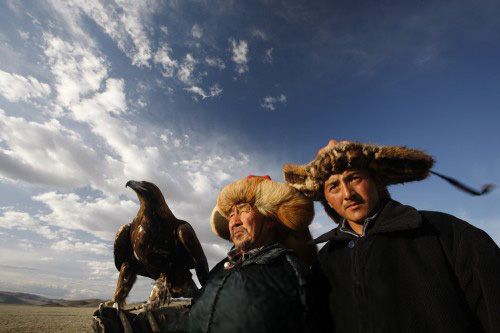
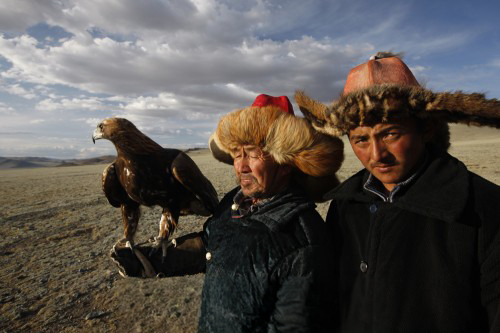
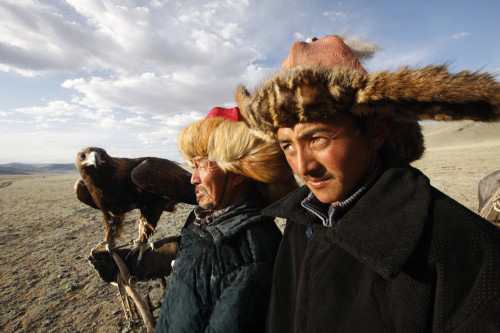
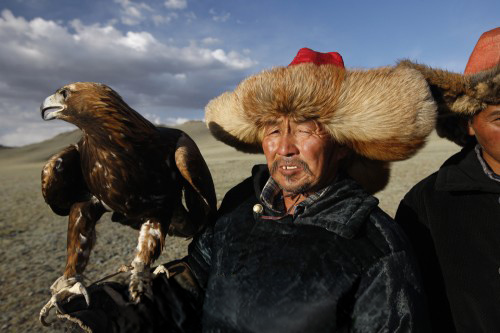
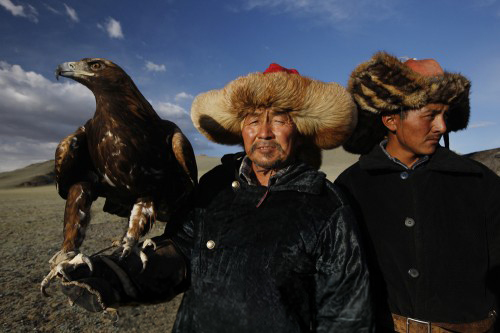
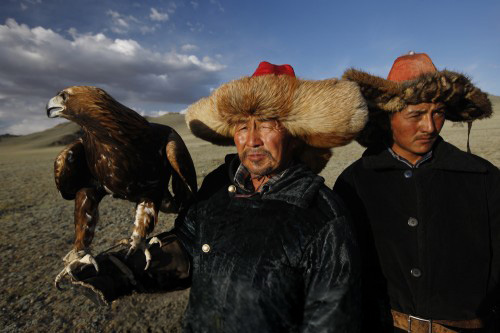
The Eagle Hunters of western Mongolia are a proud and hearty people that have an immense sense of culture. They also practice a particular form of falconry in which they hunt with eagles. My goals for photographing them within the context of their environment were three-fold: convey the expansive landscape of the region, feature the power of the eagle, and highlight the traditional dress that is ever fading in the historical cultures of the world today.
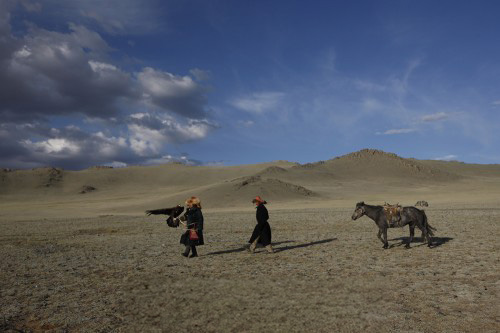
1.) This first photo establishes where are, and our starting point. A pair of eagle hunters traverse the open landscape bordering western Mongolia and Kazakhstan with their avian assistant with horse in tow. While it does show the landscape, there is little drama and the other goals are not present.
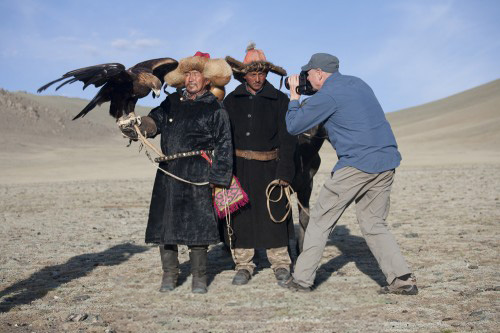
2.) Here you can see I move in close to my subjects; I’m using a 16-35 wide angle lens which allows me to keep the three subjects in prominence while also capturing a dramatic background. The lighting looks a bit flat in this shot, but up close I am able to find better results. We keep the horse out of the shot – we don’t want competition for our focus – the men and their eagle.
3.) In my third image, which is at a right angle to the direction of the sun, I have attached a polarizer to my wide angle. You can see how much more dramatic the light appears. This image also highlights the problems of working with dramatic light – very harsh shadows were cast every time the eagle moved its wings.
4.) The wing of the eagle is now down, but the man that’s controlling the eagle is casting a shadow on his assistant. As my goal is to bring this culture into the light and share it, it’s not an ideal result to have half of my subjects in shadow.
5.) I decided to get lower and shoot upwards to bring in some of the openness of the sky in hopes of creating more of a story than in the previous shots. Always keep experimenting within your photographic goals!
6.) The result is that I don’t have nearly the problems of the previous images with the shadows. This is a very satisfying image to me and meets the goals I set for myself in terms of capturing the men, animal, and landscape. This is where some may stop, thinking they’ve captured the shot they are looking for. In an effort to see what else is achievable, I begin working the scene a bit more.
7.) I’m standing at eye level again with the hunters, but the problem with this shot is that the man closet to me is staring straight at me. I like to maintain anonymity when I am taking pictures, and would prefer that the subject is not staring straight into my camera.
8.) I ask him to look straight ahead, but now with movement of doing so, it’s the eagle mugging for the camera. This isn’t necessarily a bad composition, but I would prefer the eagle in a different position.
9.) I move a little bit further around and discover I love the way the light is falling across the main eagle hunter and his beautiful fox fur hat. However, as you can see, I have moved in too close to get all three subjects in the frame.
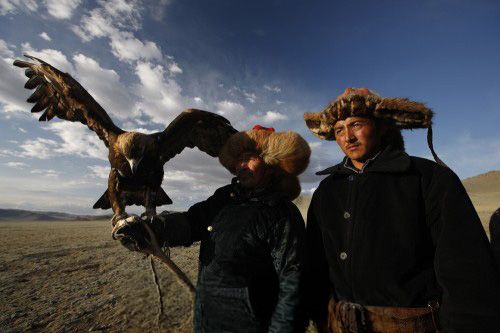
10.) I decide to back off a little bit, and now I am getting what I am looking for. I love the fact that the man in the middle is kind of looking my way without staring straight into the camera, the assistant is looking off to his left, and the eagle is conversely looking off in the opposite direction. There is a nice balance to this image, with no shadows on their faces. In addition, the eagle has nice light on his eye. This to me is a winner.
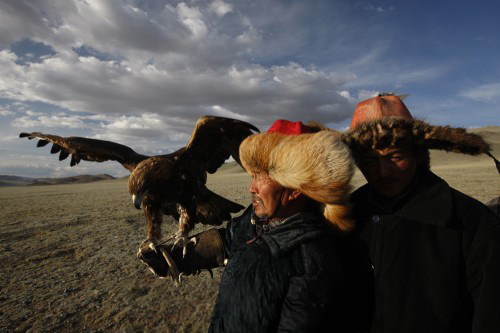
11.) I also like this last photo because it has a nice sense to it; the eagle is looking further opposite now, and is even more absorbed in what is going on in the landscape, rather than in what the photographer is busy trying to achieve. Both of these final two images are very strong photos for me, and I am very happy with the results.
A good balance of composition, dramatic light, openness of the land, traditional wardrobes – it all comes together in a very nice way in these last two images!
If Mongolia has long called to you, I invite you to join me in July 2027 for an unforgettable photographic journey through this extraordinary country. Together we’ll explore the sweeping landscapes and rich traditions that make Mongolia so compelling, from photographing Kazakh eagle hunters on horseback in the mountains of the west to experiencing the excitement of the Naadam Games, photographing wild horses on the steppe, and visiting with local shamans. This intimate trip is designed to give you exceptional photographic opportunities while allowing us to put these field techniques into practice in a truly remarkable setting.
“A common mistake many photographers make is finding a subject they really like, but then failing to spend time refining the image. Often, there is a shot within a shot within a shot–but rarely does the observer see the photographer’s intent. What I have learned over the years is that if the subject is worthy of shooting, make it clear and unequivocal: this is the subject!
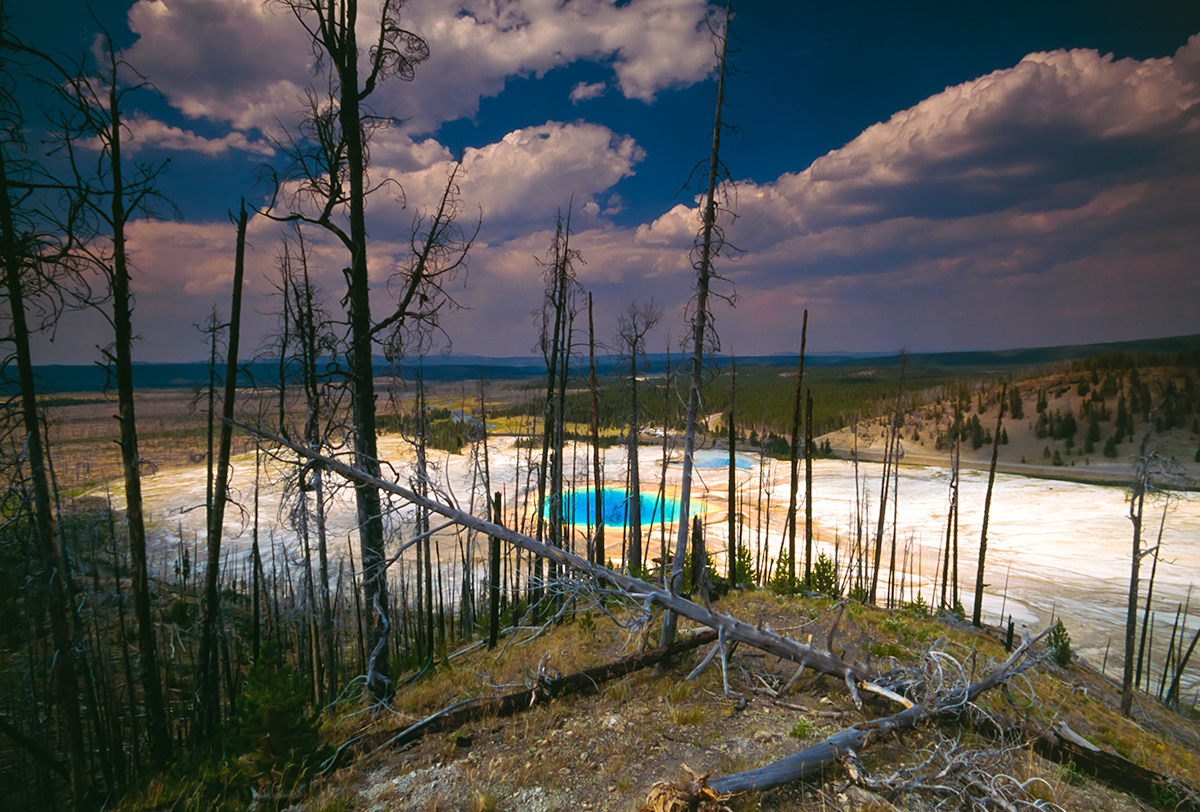
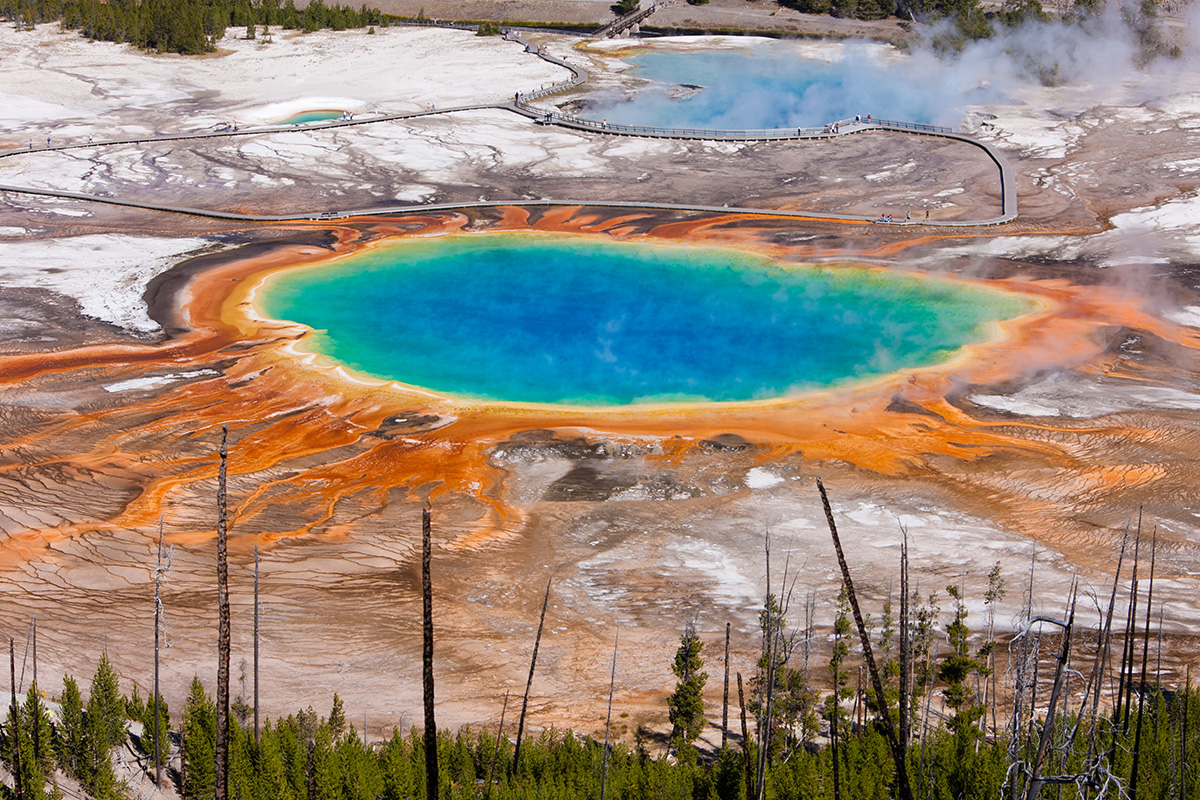
Here is a prime example. In this series of three photos, the first (above) was taken with a wide-angle and includes open sky, middle horizon, and the landscape of Yellowstone National Park, but it lacks a clear sense of what the subject is.
In the second shot I let go of the bright cumulus clouds, and started to zoom in. There is still a bit of clutter, including several cars, but I am on my way. This image may be fine as an editorial illustration in a guidebook, but it doesn’t convey what I was trying to get out of the landscape.
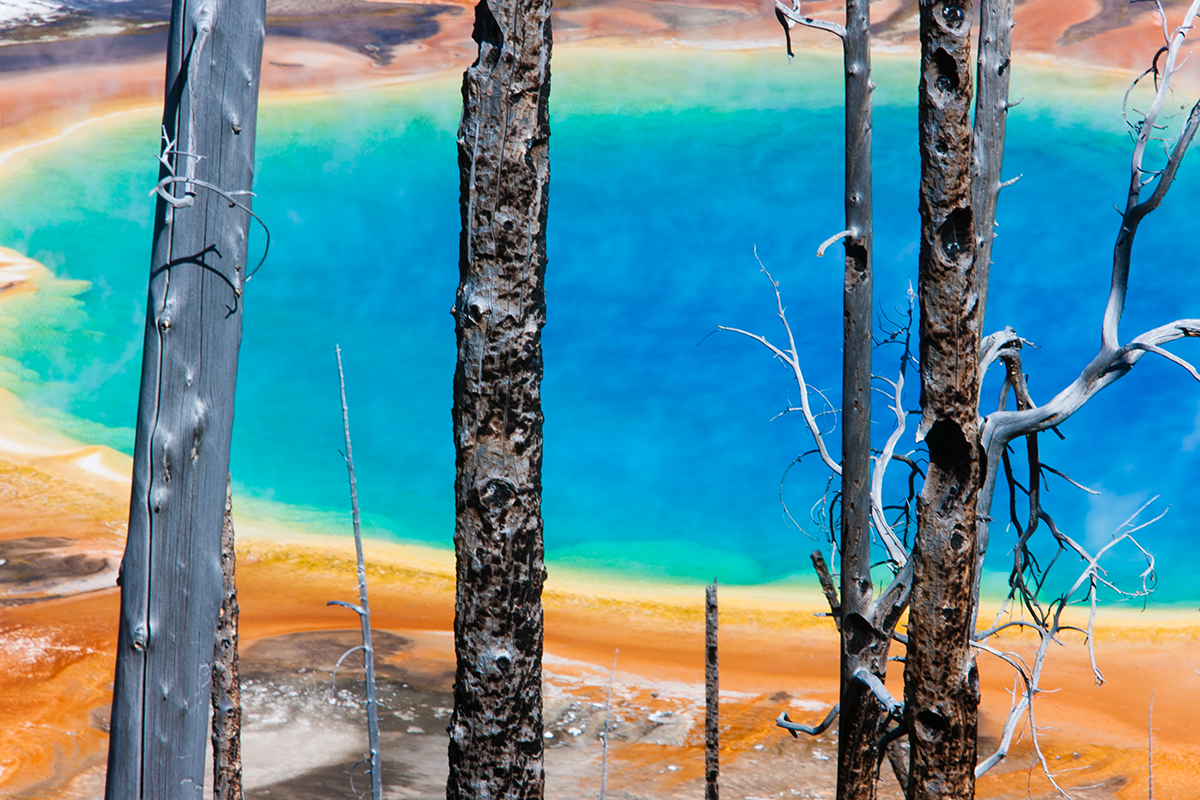
The last shot, however, creates a strong abstraction, combining the brilliant colors of the Grand Prismatic Spring with the weathered pines that died in the great fires of 1988.”
This is a classic landscape dilemma most photographers face, and a perfect example of making order out of chaos. If you don’t have the luxury of moving to a new vantage point from which to photograph, then you have to think of an alternate way to make the image say what you want.
In the second image, Art decided to shift to a vantage point that gave him a clearer view of the pool, the color of which dominates the otherwise monochromatic surroundings. In the final image, he has removed all distractions and emphasized the colorful spring, while still keeping a hint of the charred landscape, distilled to its most important elements. The result is a strong graphic combination of the pool in all its vibrancy, in the context of a landscape in eternal flux.
One of the most powerful tools a photographer has isn’t just the camera—it’s the choice of lens. Focal length not only determines how much of the scene you capture, but it also shapes how subjects relate to each other in scale and space. By deliberately choosing different lenses, you can either magnify a subject or minimize it, creating vastly different stories within the same world.
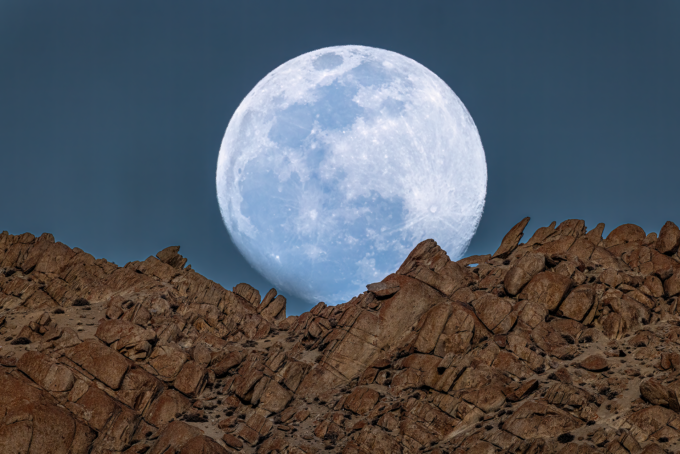
In Ladakh, India, while tracking the elusive snow leopard, I turned my attention to other subjects while waiting out the evasive cats. Using a 1200mm lens with a 1.4x extender, the moon filled my frame—crisp, detailed, and dominant.
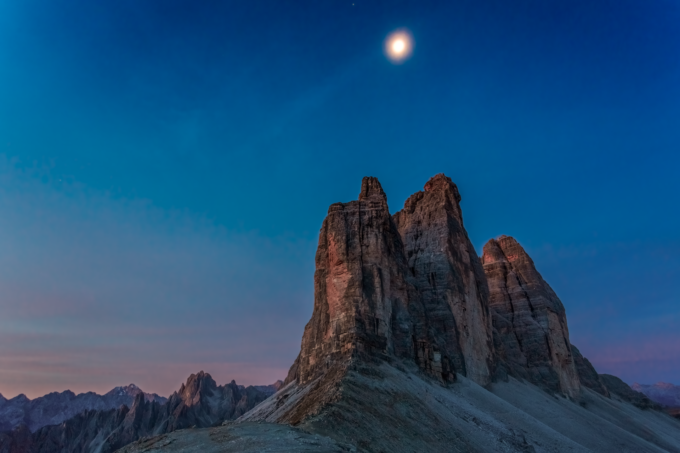
Compare this to my image of the moon over Tre Cime di Lavaredo, Italy, shot with a 17-40mm wide-angle lens. Here, the moon shrinks to a tiny accent while the towering spires command attention. Same moon, two worlds apart—thanks to lens choice.
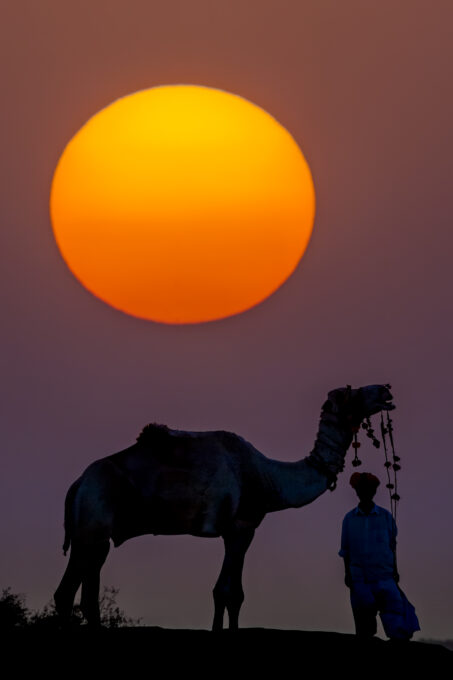
The same principle applies when photographing the sun. At the Pushkar Camel Fair in Rajasthan, I used a 500mm lens to place the sun in near-equal prominence to the silhouetted subject, creating a striking balance.
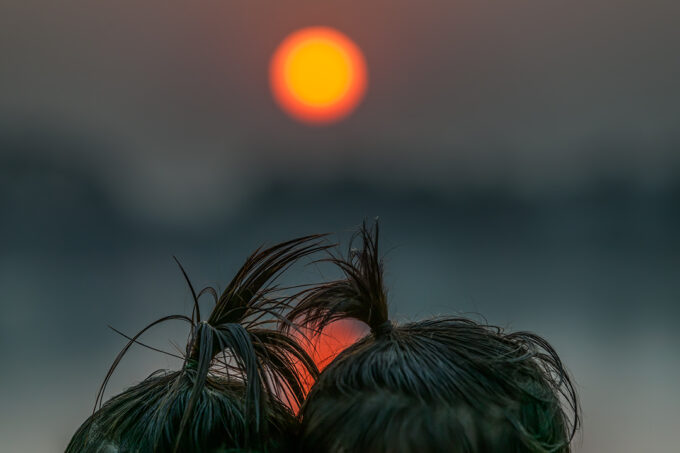
In Goa, India, I photographed two girls’ ponytails with the sun in the background, using a 70-200mm lens at 165mm. The sun becomes a smaller, softer presence—still important, but secondary.
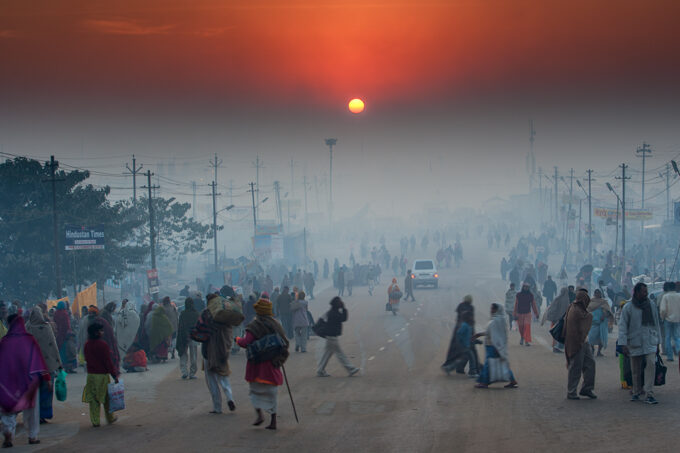
At the Kumbh Mela in Uttar Pradesh, a 70mm lens rendered the sun as a tiny orb in a vast, dusty expanse, emphasizing the human pilgrimage over the celestial backdrop.
Longer lenses not only magnify distant objects—they compress space, making background elements appear closer to the foreground. Wide angles, on the other hand, exaggerate depth, pushing background elements farther away. Mastering this interplay between focal length, subject size, and background compression will give you the ability to control the viewer’s perception and craft stronger, more intentional images.
“What I see vs. what I take” is a trend online among photographers to show how they find interesting subjects in otherwise uninteresting busy shots that lack a focus. It just so happens that this very idea is the concept behind the opening discussion of the Pathways to Creativity series I released a few years ago when I was at home during the pandemic.
Working with light is the very definition of what a photographer does, and to that end it’s important to keep the various approaches and angles of light in mind to ensure you’re emphasizing what’s important to you or an essential aspect of the subject you’re capturing.
Here are a few examples of the types of lighting I consider while shooting a subject.
Front Lighting:
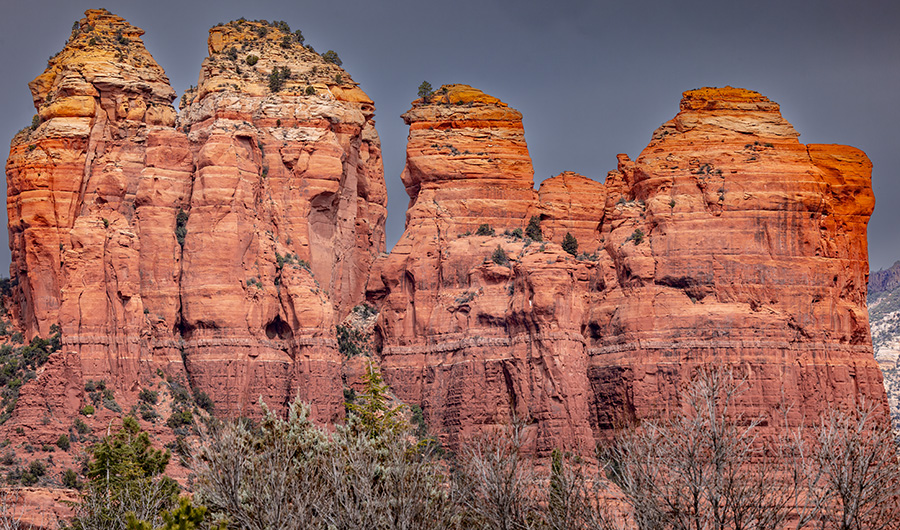
Front lighting is a common but difficult angle to work with. With the light coming from behind the photographer and illuminating everything from the front, shadows can be weak or non-existent as they fall behind the subject. It can also wash out colors as light is reflected directly back at the camera. This overall lack of contrast can create images that look flat, but when used correctly it can also create shots that emphasize colors, textures and patterns in more unified ways than other forms of lighting.
Side Lighting:
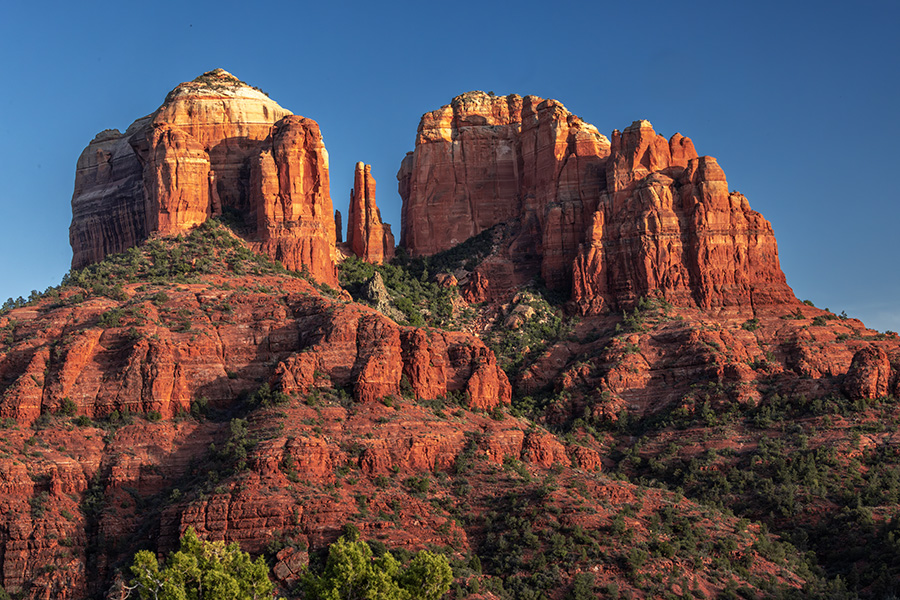
Conversely, side lighting provides an obvious falloff from highlight to shadow, resulting in dramatic contrast. This image, from the same location as the previous in Sedona, Arizona shows how two similar shots can look drastically different in two different lighting scenarios, in this case determined by the time of day. Side lighting can help emphasize the volume and overall shape of a subject. It will also emphasize texture quite a bit more than front lighting.
Silhouette (backlighting):
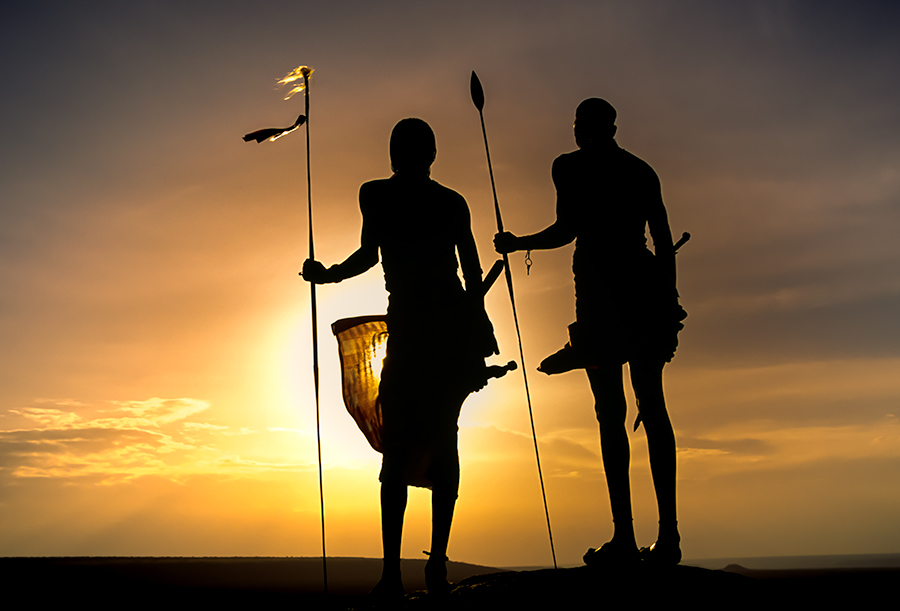
Backlighting can be used to great effect to show the shape of a subject without defining it’s volume when used to create a silhouette. It simplifies the scene, removing unimportant details. This shot of Samburu warriors in Kenya might still be an interesting subject in full light, but as a silhouette the forms of the men and their tools become one.
Rim Lighting (backlighting):
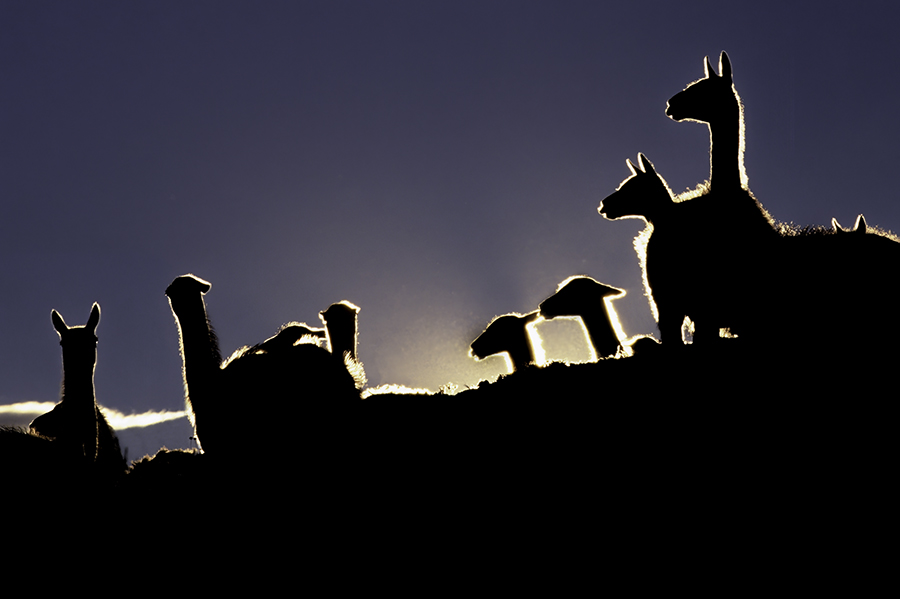
Another form of backlighting very similar to silhouette is rim lighting. This is when the light bleeds around the edges of your subject, creating a halo of light around a darker or silhouetted form. This is achieved by having a light either directly behind your subject, or behind and at a slight angle. This creates a dramatic effect that not only informs the shape of the subject, but begins to hint at volume and texture as the light bleeds over the edge of your subject. The rim lighting on these guanaco in South America hint slightly at their furry texture and brown color.
Reflected Light:
Reflected light is most often used in portraiture to provide soft, even illumination to the subject that helps to diffuse textures. In nature, it most often occurs when sunlight reflects off one surface and illuminates another, such as the walls of a canyon, or light bouncing from a lake to illuminate the forest at it’s edge.
Spotlighting:
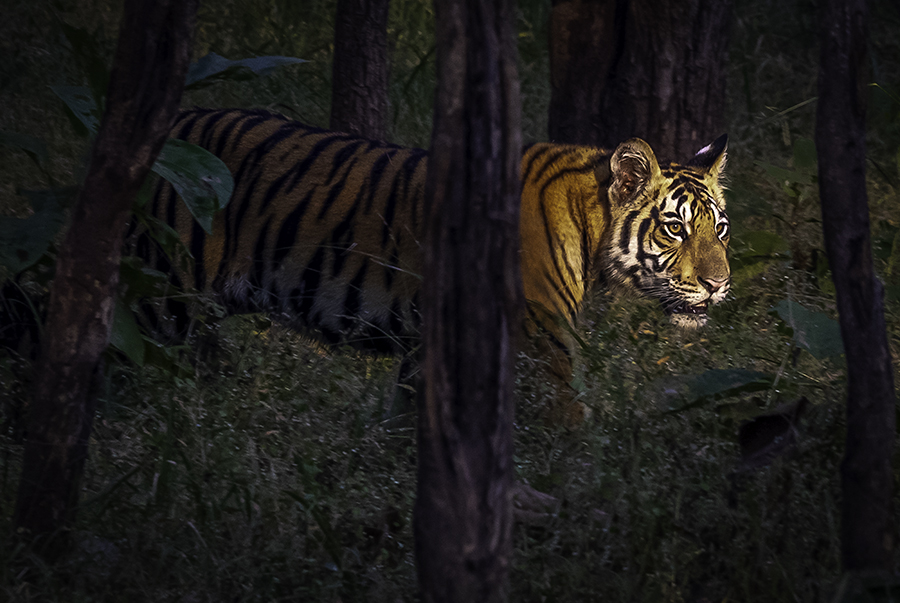
Spotlighting is often associated with artificial lighting setups, but when it’s found in nature it can be dramatic and provide a unique look at a subject. I have many shots of tigers in full, even light. This shot stands out as the subject steps into an illuminated pocket of an Indian forest.
Overcast:
Overcast lighting, also known as diffused lighting is one of the more frequently used and successful lighting types. It provides even illumination from light to dark, without creating harsh shadows or blown-out highlights. It does the most to show all aspects of your subject, allowing for detail in light and dark areas that shows texture while still including enough information to identify shape and volume.
Your assignment, should you choose to accept it: Go out and capture a subject or similar subject in two different angles of light, noting the elements that stand out and conversely fall back out of interest in each – feel free to share in the comments below!