#TechniqueTuesday – Easy Panoramic Creation In Photoshop & Lightroom!
A topic that came up recently was just how easy it is nowadays to quickly create seamless panoramic images from stitched photos using Adobe Photoshop and Lightroom. It’s a simple process in either program, so if it’s something you haven’t tried or are just looking for a refresher on how to merge photos – this post is for you!
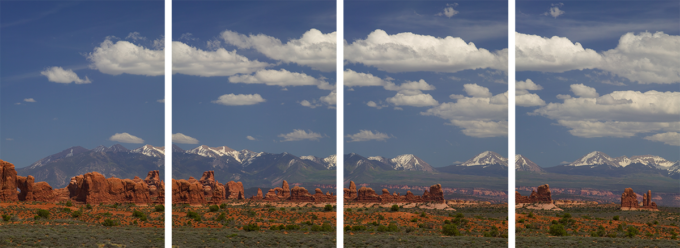
The first thing you want to do of course is choose the images you’d like to create a panoramic from. The photos should overlap just a bit, as the colors of the pixels are how the software will determine where to stitch the images together. Make sure you photograph your panoramas in portrait format to get the most amount of pixel real-estate for the highest resolution final image!
 Once you’ve made your selection of images, you’ll then need to choose between using Photoshop or Lightroom to merge them together. The base Adobe Creative Cloud subscription includes both, so it’s really a matter of your familiarity with one or the other.
Both processes are simple enough. I’d say if you’re looking for quick and easy results the Lightroom method is a good starting point, but if you want a little more control the Photoshop method offers a little more. Better yet, give both a shot to see what you prefer!
In Lightroom:
1.) Import the images you wish to merge together
2.) From the top menu, choose the “Photo” drop-down and find the “Photo Merge > Panorama” Option
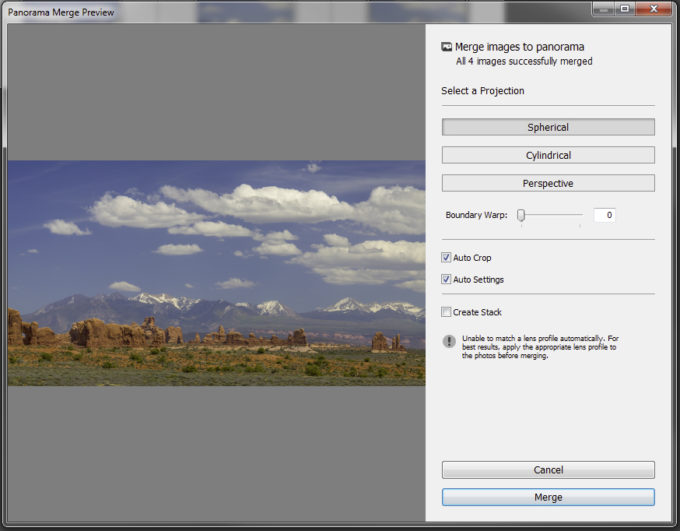
3.) In the Panorama Merge Dialogue box, ensure “Spherical” is selected for the
projection. You can also choose “Auto Crop” to automatically crop away the
transparent edges. Finally, ensure “Auto Settings” is checked.
4.) Click “Merge” and your panorama will be created!
In Photoshop:
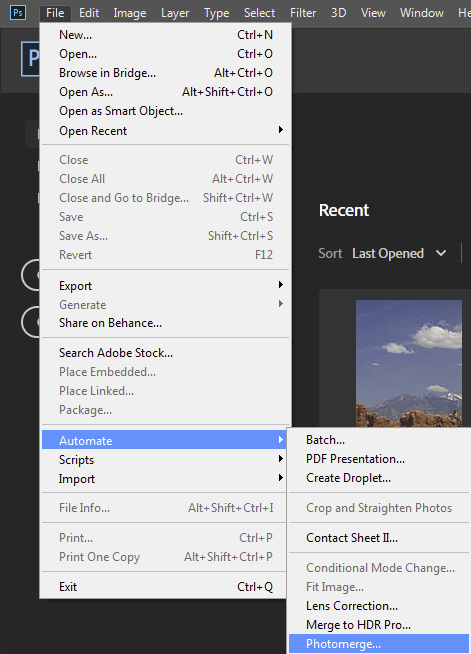
1.) From the “File” menu, choose “Automate” and then “Photomerge“.
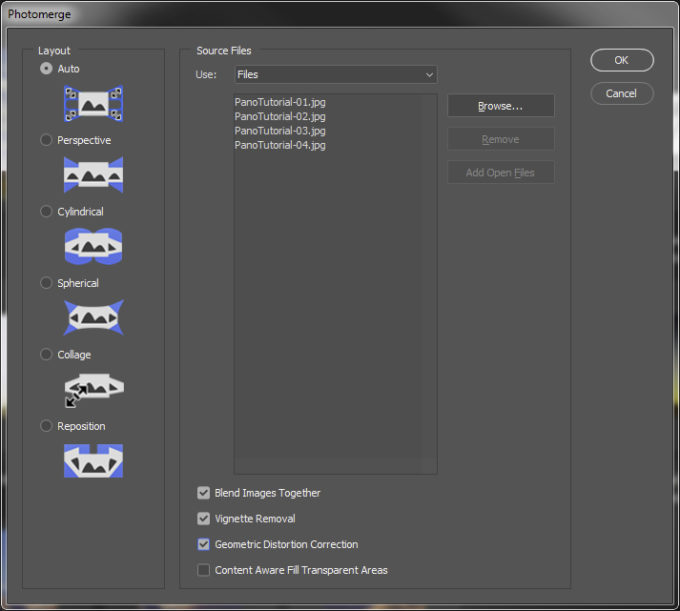
 2.) In the Photomerge dialogue box, ensure “Auto” is checked under “Layout“.
In the “Source Files” box, be sure “Use:” is set to “Files” and hit the
“Browse. . .” button.
Choose the files you wish to stitch together. In this case we will use four
PanoTutorial.jpg images in the Pano Tutorial Images folder.
Be sure that “Blend Images Together”, “Vignette Removal”, and “Geometric
Distortion Correction” are all checked.
You can also choose to check “Content Aware Fill Transparent Areas”, but this
will add to processing time and attempt to fill in edges with content sampled from
the image, which may require more advanced Photoshop experience to ensure
there aren’t repeated elements in your image.
3.) Click “Ok” and the Process will begin. Depending on the size of the images being
merged, it could take several minutes to process the images.
4.) Once the image has processed, from the top menu, choose the “Layer” drop down and
choose “Flatten Image“.
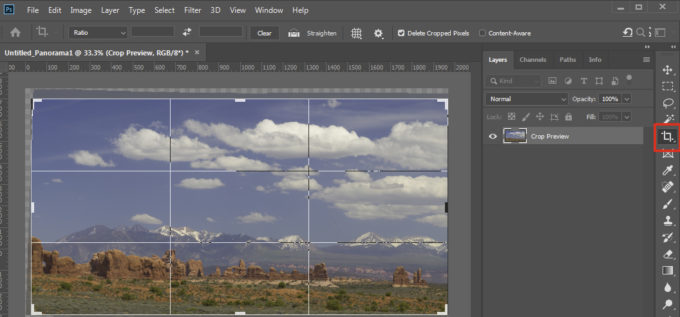
5.) Using the crop tool (highlighted in red below) crop the image to get rid of transparent
areas, and also use the rotate ability of the tool to ensure your horizon is straight.
Those are the basics – There are obviously a lot of other options in those dialogue boxes. . . I suggest experimenting to see what different settings do to come up with a process that works for you!