Throwback Thursday – Exposure Control
EXPOSURE CONTROL
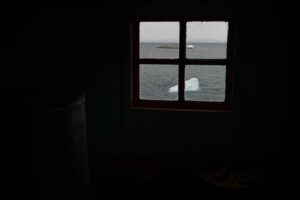
A big challenge for photographers is that the camera simply cannot capture the range of brightness in the world that we can see. When we look at a subject with our own eyes, we can see all sorts of detail, from the brightest areas to the darkest areas. Unfortunately, the camera cannot. And when there is strong contrast between bright and dark areas, the camera will emphasize, even overemphasize, that contrast.
This can be especially problematic with bright skies and dark landscapes. It can be impossible to get a single exposure directly from your camera that captures both a good sky and good ground at the same time. Another problem can occur when you are photographing a subject in the shade against a bright, sunny background; the exposure range can be so extreme that, once again, there is no correct exposure to get a good image.
The first thing to do is accept that sometimes you just have to say no to a particular picture, recognizing that it may be impossible to get a good image given the lighting conditions since no exposure will be correct. If you can recognize this, you will start looking around for images that you can say yes to. That’s an important decision to be able to make.
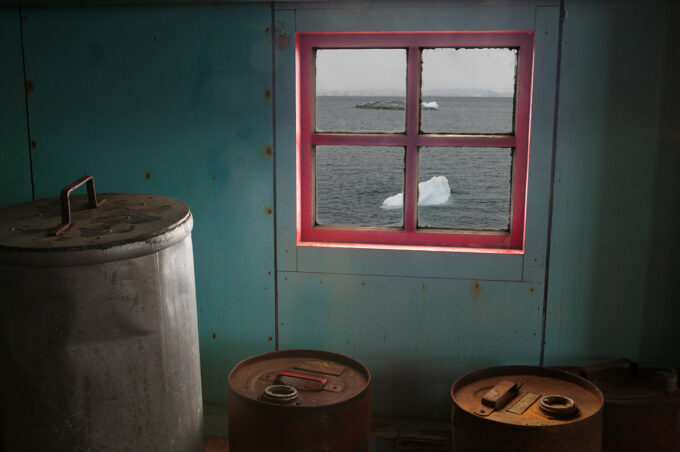
To get a better photograph, in certain situations, there are things you can do to control the way light comes into your camera. A traditional way for landscape photographers to deal with a bright sky is to use a graduated neutral density filter.
This filter is half clear and half gray with a blend, or gradient, through the middle. By placing the dark part of the filter over the bright part of the scene, such as the sky, and the clear part of the filter over the darker part of the scene, such as the ground, you can balance the light coming through your lens so the camera can get a good exposure.
The challenge with a graduated neutral density filter is that it creates a line through the image. If you have a mountain or tree going into the sky, it will be darkened as well as the sky, for example. Unfortunately, this is starting to be a very dated look for photography. A graduated neutral density filter can still be helpful in knocking down bright light or brightly lit areas in the picture to balance them with the rest of the image, but you just have to use it carefully so the effect is not obvious.
Another way to work with multiple image exposures is to shoot an exposure for the bright areas, then an exposure for the dark areas. These two images are then combined in the computer by using the best of each. Shooting two images like this is actually quite easy to do.
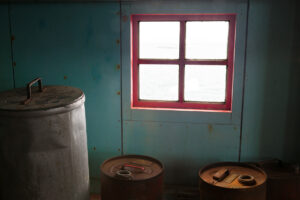
Start by locking your camera onto a tripod. Shoot one exposure that makes your sky look good, then shoot a second exposure that makes your ground look good. Bring the two images into Lightroom, where you can adjust the sky picture to make the sky look its best, and the ground picture to make the ground look its best.
Then you send the two pictures over to Photoshop as layers. Put the two pictures on top of each other as layers and make sure they are lined up. Then simply remove the bad part of the top picture, revealing the good area of the bottom picture in that section of the image. You can do this in two ways. The down and dirty way is to simply use the Eraser tool by setting it to a large size and 0 hardness (a very soft brush). You then erase the bad part of the picture.
The second way to do this is to use a layer mask. Add a layer mask to the top picture/layer and use a large, soft-edged (0 hardness) brush to paint black onto that layer mask and block the bad part of the top picture.
For more tips and tricks, or a great gift for a photography enthusiast, my popular how-to books The Art of the Photograph and The New Art of Photographing Nature can be purchased in my online store, and are also available as a bundle.
If you’d like to see the masking process in action as a future lesson for the blog, leave a comment below. Although there are a lot of helpful tools these days to help you auto-mask and adjust exposures, nothing beats knowing how to manually edit your photos without relying on automated tools that might not always give you the best results. A fundamental understanding of masking is an incredible tool for any photographer to have available to them.

Photographers have been dealing with this issue for decades by using HDR techniques. Surprised this technique wasn’t mentioned.
Having just switched from Canon DSLR to OM 1 I now have the ability to see my exposure in the viewfinder. This has been a revaluation for my bird research as I can now overexpose to see colors on backlight birds. The camera also has built in ND filters. Great article.
I would love to see the masking process in a future blog